Showing posts with label DIY. Show all posts

Wednesday, September 18, 2013

Dining Room Facelift {#DIY Home Décor}

This post is going to have a ton of pictures, so I totally apologize in advance if I cause you to go over your data plan for you mobile users.

My dining room has kind of stayed as is, plus or minus seasonal décor, ever since I did this reveal post last year. Well, the hubster and I have been lusting after a new dining table, so we rearranged the space a bit to see what it’d feel like in a different configuration. Ok, and I sort of lied…I’ve been lusting after a new dining table while my husband is 100% OK with the set we have.

It is the bane of my existence. But more about that in a post later this week.

We flip flopped the layout and now it looks like this when you walk in:

DiningRoomMakeover01

Now the dining table is what greets you when you walk in (before it was the sofa), and I’ll admit I despised the layout the first few days…Now I LOVE IT! It flows nicely, the room feels more spacious—which is a challenge since the room is about 10 feet wide and 30 feet long. Yeah, seriously narrow and long.

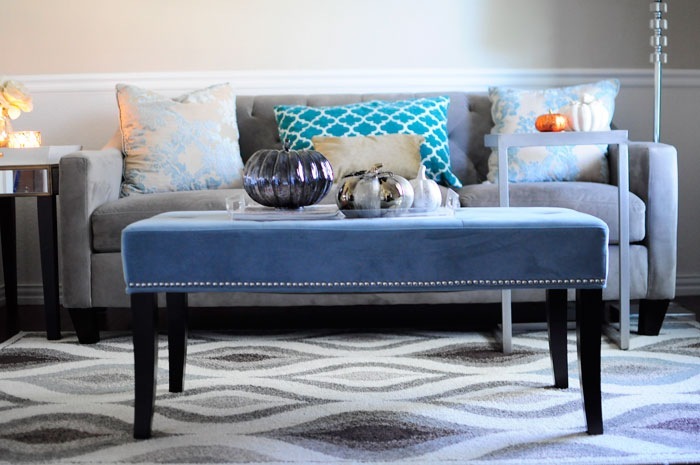
The chandelier is centered beautifully over the table, and mercury and jewel tone accents add drama to the space.

DiningRoomMakeover08

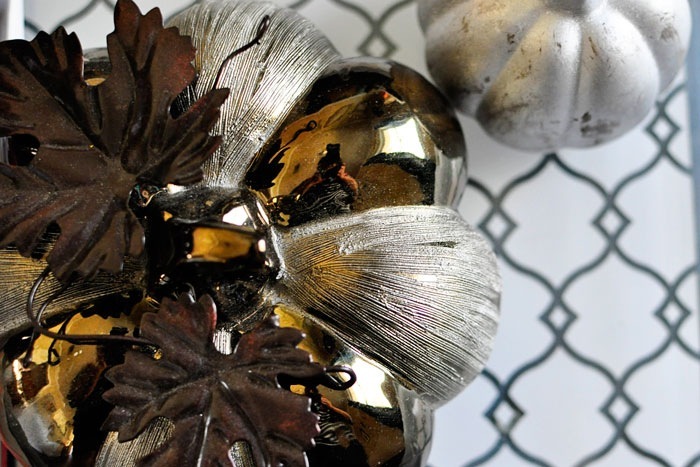
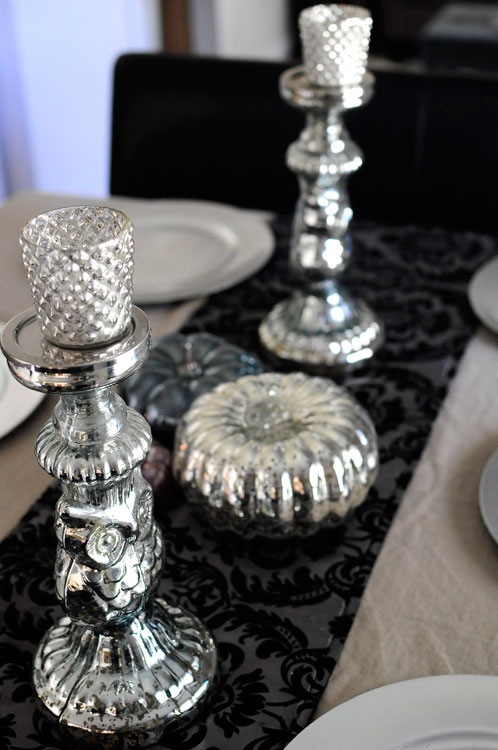
The candlesticks and mercury glass pumpkin are from one of my top 5 favorite stores: ZGallerie. The blue and magenta pumpkins are from Hobby Lobby, and the flocked damask runner is a wedding leftover from Kohl’s holiday collection back in 2008. Silver chargers are 98-cents each at Walmart.
DiningRoomMakeover14

Past the dining table, is a comfy, luxe seating area perfect for cocktails with the gals. Plus, there’s a doorway that leads straight to the kitchen, so that it’s easy to get refills on drinks or check on the puffed pastry in the oven.

DiningRoomMakeover15

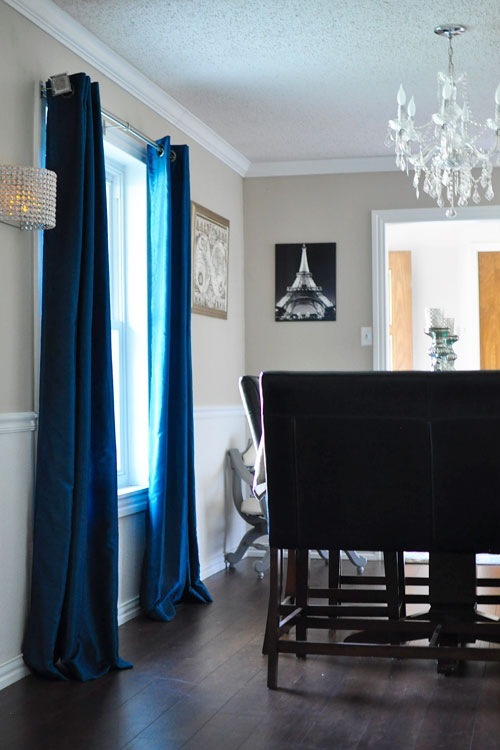
And if you haven’t noticed, I finally splurged on some curtains with COLOR. My other ones were 5 different shades of beige, and these are STUNNING. They are a gorgeous peacock blue color, but when the light hits them, they can morph into having more green or blue. I am in love! The price is oh so right—these gorgeous SIlkana Teal Curtains are only $52 for a pair, and they are worth every penny. They do not totally block out the light, but they do filter it so it just softly embraces a room. Highly recommend!

DiningRoomMakeover23

And now onto more pictures and less of me talking…

DiningRoomMakeover02

DiningRoomMakeover07

DiningRoomMakeover27

DiningRoomMakeover25

DiningRoomMakeover13


DiningRoomMakeover04

DiningRoomMakeover03

Pee Wee always comes into my blog photo shoots to give his approval.

DiningRoomMakeover10

Or to lounge.

DiningRoomMakeover12

That mirrored table off to the left developed a HUGE crack out of nowhere. Ugh. So now a nice serving tray from World Market covers that sucker up.

DiningRoomMakeover11

DiningRoomMakeover19

DiningRoomMakeover20

I’m still obsessed with my ghost chair. I’m writing this very sentence right now while sitting in my ghost chair from Overstock. It’s so comfy. I think my circa 2008 Dell PC is an eyesore. Maybe Santa will bring me a new all in one PC this year…or maybe a Mac? Hhmm.

DiningRoomMakeover18

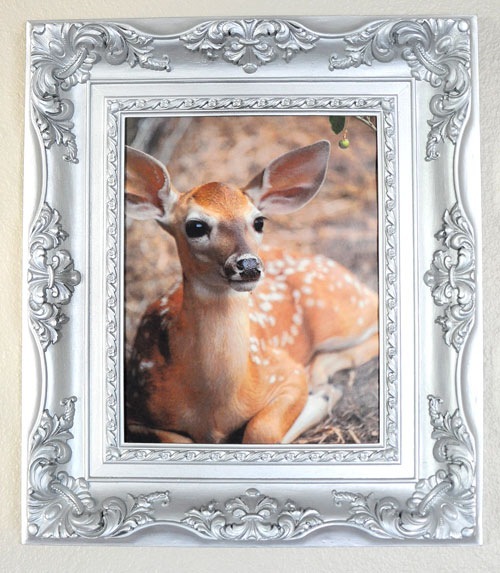
This frame is one of those fugly gold frames you can find at garage sales. While the gold may be old/ugly, a coat of spray paint can work wonders! Plus, look at those gorgeous, ornate elements on the frame.
DiningRoomMakeover17

DiningRoomMakeover09

DiningRoomMakeover06

These flocked damask pillows were a great score at JCP a few years back. I got 4 of them for $6 each.

DiningRoomMakeover21

The mirrors are from Kirkland’s and were about $10 each. They always have sales and coupons (plus you can use coupons from your phone), so I always go to Kirkland’s for affordable home décor such as mirrors, vase filler, and pumpkins for fall.

DiningRoomMakeover24

DiningRoomMakeover05

There you have it! Again, the primary “makeover” aspect of this simply involved moving around furniture, and bringing in accents from other rooms, but in the interest of full disclosure, I did splurge on the following:

  • New Silkana Teal Window Panels (4 panels, $100 total)
  • New trellis patterned pillow ($15 at Ross)
  • New magenta pumpkin ($4 at Hobby Lobby)
  • New black lamp shade ($10 at Ross)
  • New bright white bulbs ($12 at Walmart)

Total: About $150 for a whole new look!

I have this obsession for pumpkins, so I love being able to scatter them throughout my home. The dining room won’t get to enjoy the fall décor too much since I have been selected for a super awesome opportunity that I’ll tell you about later this week. IT IS EXCITING!! I am so over the moon about it and can’t wait to gush all the details to you lovely people.

There are a few things I want to change about the space, in addition to getting rid of the dining table. I’d love a luxe throw with a fun geometric or damask print, a bar cart, wine fridge, recessed lights, a tufted storage ottoman, more wall décor, mirrored/acrylic serving tray, metallic pillows, and a less “beige” wall color. Oh and a gorgeous arm chair! I’ll be working on those during the next phase of my dining room facelift. :)

What do you think of my “new” dining room? Like? Love? Want to come over and have drinks with me?

If you have any questions about anything in my dining/office/living room area, please feel free to leave a comment and I’ll reply to you in the comments as soon as I can.

But here are some questions I am anticipating and will just answer now:

Monday, July 15, 2013

Family Heirlooms {True Value #Giveaway}

Everyone has a family heirloom, right? For some people it may be grandma’s old rocking chair or grandpa’s favorite foot stool. These are priceless, timeless pieces that seem to always fit into our heart and homes.

IMG_5649

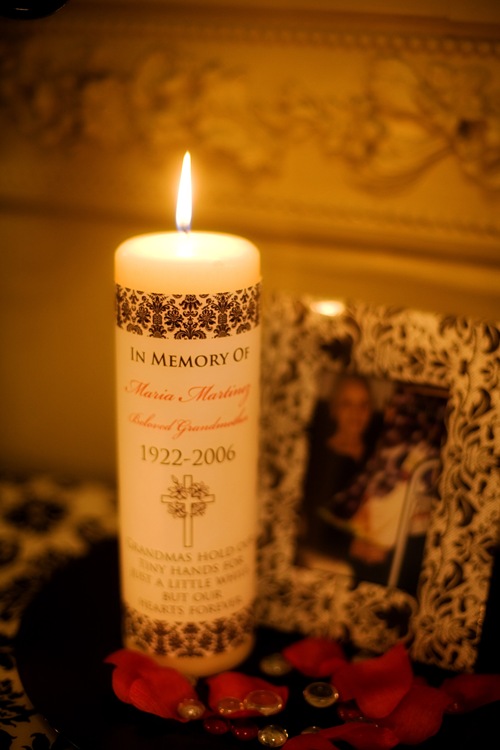
Above: A memorial candle I had in honor of my granny at my wedding. That candle is now an heirloom in our family; it’s in my mom’s possession.

The priceless heirloom that I have in my possession is my grandma’s collection of costume jewelry. My granny was born in the 1920’s, so her collection is very vintage and chic. I remember when I was younger I loved to sit with her and try on all of the jewels. I felt like a princess of sorts with all that bling. And honestly, I just don’t see that kind of jewelry anymore, unfortunately.

Mon2Party

Above: Me looking like a princess…as usual!

My mom gave me the collection after my grandma passed away in 2006, and I have it tucked away safe and sound. However, I thought I should display some of it, so I am officially inspired to do a DIY project. I know traditional heirlooms tend to be antique furniture pieces or family quilts, etc. but really I think any item that is treasured deserves the designation as an heirloom. DIY projects can help bring these heirlooms to life. In my case, my grandma’s vintage jewelry has inspired me to create a piece of art that I’ll enjoy for many years to come.

DSC02135

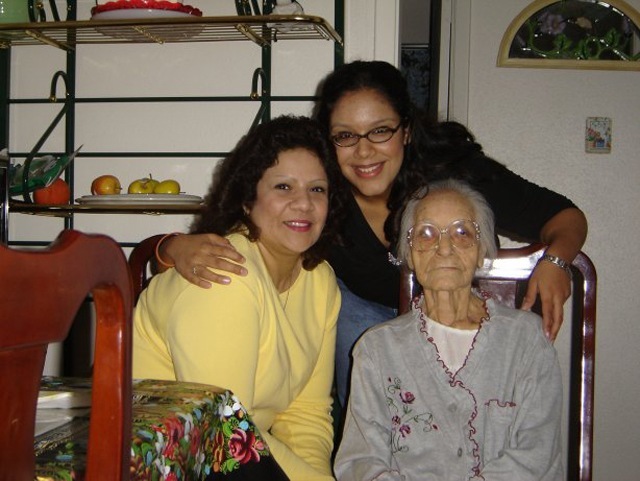
Above: My mom, my granny and me. :)

You can see the  priceless value of a dining table/heirloom in the YouTube video below by True Value. Warning—it’s a tear jerker, but I really want you to watch this video. It’s good! I got all misty eyed during the video, but it’s a good reminder of the power of DIY and the True Value of life—those we love. Family heirlooms can keep memories alive, and I think that’s what most of us want to do to honor those we love. I look forward to sharing with you my finished DIY project honoring my granny and her love of fabulously gorgeous baubles.

Video by True Value

So in honor of keeping memories and heirlooms alive, both in our hearts and homes, True Value is sponsoring a $50 gift card giveaway on my blog to help with your project. You can enter below on Rafflecopter, and there are several ways you can enter. Good luck! True Value is also hosting a Pin to Win Sweepstakes--You can find more information about that over here. Two exciting contests for you to be able to enter. Contest is open from now until July 22, 2013 at 12 am CST.

a Rafflecopter giveaway

Disclaimer: I am also being provided with a $50 gift card in exchange for a post/giveaway promoting the True Value brand and their Pinterest contest.

Monday, November 12, 2012

I Wanna See Your Peacock {Home DIY}

Have you heard the Katy Perry song, "Peacock”?

She’s so not talking about peacocks, y’all. Ohmygosh it’s scandalous.

And would have made a great song in Magic Mike

Yup.

But I’m not here to chat about Channing Tatum’s amazing bod in that movie nor about Katy Perry songs.

On Pinterest, the peacock colored wall trend is huge. Everyone who is anyone has a wall in their home with that color, and it looks fab and chic. Yet much like most trends these days, if I try them on myself, I look like a sausage stuffed into skinny jeggings.

No business. Just no business.

So, I gathered up my inspirational photos and narrowed down my peacock-teal paint colors to Plumage from the now defunct Martha Stewart line and Deep Sea Dive by Sherwin Williams.

I wanted the result to look as bright, yet bold and deep as they do in the photos below.

Via Teal & Lime

Via Young House Love

I got Plumage color matched at Sherwin Williams + I had a sample of Deep Sea Dive in the garage. The result on my master bedroom accent wall was atrocious.

See?

Plumage. Onto Deep Sea Dive by Sherwin Williams.

Meh.

I finally just caved and realized that dark, deep, bold colors were NOT going to work in my master bedroom space.  And that’s because one whole wall is a set of sliding glass doors with plenty o’ natural light beaming in.

Sigh. I guess I’ll just have to bring in the color with bold accessories and a variety of textures.

So, what did I do with that accent wall? Well, what the other half of people on Pinterest are doing…stripes.

Forgive the awful quality of all these photos…they’re Instagrams. They look so wonderful on my phone though. Hmph.

That brings me to my next conundrum… accent colors.

I want our master bedroom to be chic, boutique hotel like (that quirky, unique, curated vibe) yet restful and easy to maintain. I don’t want 80 billion pillows that will get thrown on the floor every night.

After much, much thinking, I am 99% sure I want the overall color palette to be a combo of these 2 pics:

Via Sarah Gordon Home

Via Ashlee Raubach Photography (Those lamps are TO DIE FOR!)

The main colors in both photos are: teal, white, hot pink, silver, and gold. I’d also throw in some black for a dash of drama. Our tall tufted headboard will be the star of the show along with a BIG damask rug I snagged from Overstock last week. I’ve got the 2 leads in the master bedroom show, and now I need a whole supporting cast. It is so hard to find those perfect accessories to really bring a room together. While that is the most stressful part of it, it is also the most fun. My husband and I have no shame in scouting every single Home Goods, Marshalls, Ross or TJ Maxx in a city.

WE HAVE NO SHAME.

I’ve been on the prowl for an affordable version of the chrome lamp above, and I found a nearly identical lamp at One Kings Lane for $149. Each.

Gulp. Or you can pay even more for this nearly identical version.

Dimond D1426W Waverly Table Lamp, Chrome Plated Glass With White Shade

Or this one is kind of cool, too:

Only $65 from Amazon.

But I also did find a STEAL of a deal on a pair of damask pillows, $36 for both, with free shipping.

These nightstands I made over earlier this year will get made over again, or I may just splurge on mirrored nightstands.

Nightstand22

Or I could turn them into peacock colored nightstands with a high gloss/lacquer finish? I can never achieve quite the look I am going for sometimes. Must keep trying.

What do you think? I have taupe walls with stripes, dark cherry handscraped floors, and a bright white popcorn free ceiling (more on that soon)…

What now?

Tuesday, October 23, 2012

DIY Kitchen Makeover {Reader Revamp}

This is a bit of something new on these pages. Ya see, sometimes I get emails from people and they’ve taken so much time and effort to write to me. It means so much. Especially when it’s something along the lines of, “Please help me not have an ugly kitchen!”

How can I say no?

Today we have Stephanie’s kitchen, and she emailed me about a month ago asking for some advice. So, I’m going to give her some ideas in this post, but I’m also hoping YOU will help her out. Sometimes a team of people can come up with way better ideas than one person.

Let’s help Stephanie! Here’s her email to me:

Dear Monica,

I LOVE your website and blog! Your tutorials are awesome. You have excellent taste! I have such a hard time imaging what the finished product with look like when I’m staring at ugly.

I’ve read your tutorial about staining your cabinets in your bathroom so many times. I’m really tempted to do this in my kitchen. I hate my kitchen, but I can’t afford to remodel it at this time. I was wondering if I could get your expert opinion on it. I’m sure you get bugged by people like me all the time, but I thought it might be worth a shot, because if you did reply, it would be awesome!

My appliances are black and the countertop is a very strange purple/grey color. I may just do a resurface kit for the countertops I found at Lowes or something. But can’t decide if the Java color of stain would look too dark on the cabinets next to the black fridge and oven or if I should do the Cherry color instead by General Finishes. I think I would add a tile backsplash and take off the two cupboards that have the ugly glass in them and just leave open shelves. Do you have any suggestions on color of the stain, tile, or paint?

I hope you are having a great day! Thank you for all of your tutorials that you put out there for us to read!

Thank you!!!

~Stephanie

And here are the photos she sent along:

Kitchen1

WindowAboveSink

So here’s my super cheap plan.

I would definitely stain the cabinets the espresso color (if you’re new here, I have the tutorial right over here). I think although the appliances are black, it’ll work.

Now personally, I love glass cabinets, so rather than take them off I’d add in some battery operated LED lights. I have these under my cabinets in my office, and I adore them. I’ve had them over a year, and the batteries still haven’t gone out. Adding in some light immediately classes up the glass and adds some nice interest. Rather than hop on a chair to turn them on, I just poke them with a ruler or pen.

Next, I’d swap out the hardware. It looks like you might have a standard 3” hole-to-hole opening, so it should make finding new hardware super duper easy. I’d recommend something modern in a satin nickel finish:

Amerock TEN26201-G10 Essential'z Collection Pull Arch Center to Center, Satin Nickel,3-Inch, 10-Pack

From Amazon, $24 for 10.

Or if you’re more traditional, maybe something more along these lines:

Amerock BP53030-G10 Mulholland 3-Inch Center Pull, Satin Nickel

From Amazon, $2.51 each.

In that open wall area near the window, I might add some glass shelving (or these nice stainless steel ones would work) for herbs/cute kitchen canisters/decor. Ooh, ooh…how about these floating Umbra shelves for cookbooks?

And maybe a fun menu chalkboard that would cover up the phone jack (get one of those canvas type ones that will just fit right over it). What might also look good is a simple roman shade on the window.

Unlike Stephanie, I don’t find her countertops particularly hideous, so I would probably leave them alone. I’ve seen a few people try those countertop makeover kits…and it looks like crap. Just my 2-cents, but if I were you, rather than spend $100 to paint them, I’d save up for some new solid surface countertops in 2013 if you hate them that much.

A few other things:

-I would move the coffee maker over to where the basket of stuff is. You could always get a mail/wall organizer to put on that wall to keep it off the countertops. This leaves the area to the left and right of your stove free for prep space.

-If you put shelving on the open wall to the left of the sink, you can move those plants onto it and keep that area free for pretty soap bottles. Also, a roman shade, even if left mostly open, could make the kitchen a ton more cheery and sophisticated. Oh and chic!

-Finally, if you do decide to stain your cabinets, I would recommend painting the walls just a faint, faint gray. Perhaps something like Silverpoint by Sherwin Williams. It’ll instantly cool, calm and elevate your kitchen from drab oak to tall, dark and handsome espresso.

Total cost for my plan:

-$100ish for staining supplies

-$60ish for new pulls

-$30 for paint (walls)

-$10 for lights

-$150 for misc. accessories (shelves, décor, etc.)

-$50 for supplies (paint rollers, tarps, etc.)

Total: $350-$400

Total Time Commitment: 3 weekends, max

What would you tell Stephanie to do to her kitchen? I think her space is lovely and with just a few small tweaks could be a STUNNING kitchen. Help Stephanie out in the comments section with your advice or encouragement.

Have a reader revamp you’d love my help with? Email me with the subject line “Reader Revamp Series” and briefly tell me how much I rock, how much your space sucks and a rough budget target plus about 3-5 photos. :)

Monday, October 1, 2012

Metallic Gourds Fall Wreath {DIY Tutorial}

Fall is here!

Well, officially it is. Unofficially, it is still sweat your arse off kinda hot down here in South Texas.

Nonetheless, I decided to make a pretty wreath for my dining room area. It was relatively inexpensive and it’s pretty easy to make. Like usual, I had to incorporate my love of metallics into my wreath.

MetallicGourdWreath

You’ll need some common craft supplies to whip up this wreath. I’m usually strictly a pumpkin kinda gal, but this year the gourds caught my attention. Ok, to be perfectly honest, I had no choice because that’s what came in the little bags from Dollar Tree: 1 pumpkin + gourds.

MetallicGourdWreath3

I bought 4 packages, but for this wreath you’ll only need 1 pack.

Supplies:

-1 pack of gourds from Dollar Tree

-1 Grapevine Wreath ($4 at Walmart currently)

-About 2 yards of mesh ribbon (I got mine at Hobby Lobby for 40% off, $4)

-Some pearly twig thingies (~$1 each at Hobby Lobby)

-Decorative fall leaves (~$1 for a pack of 12 at Hobby Lobby)

-Paint (primer + craft paint colors of your choice)

-Hot glue

-Scissors

-1 yard of burlap or ribbon to hang the wreath

-Glue Dots

-Floral Wire

-Paint brushes/foam brushes

-Knife

Total Cost: About $10-$15 depending on what you have on hand

MetallicGourdWreath2

First I took my wreath, and I wrapped the deco mesh all around it. I wanted to give the wreath some pizazz while still retaining the rustic look of the grapevine wreath.

MetallicGourdWreath4

MetallicGourdWreath5

Then I used some of my trusty 97-cents a can flat white spray paint to prime my Dollar Tree gourds. Note, I primed all of mine because I am using the leftovers as vase filler for my fall mantle. :)

MetallicGourdWreath6

Once your gourds are dry, go ahead and paint them with 2 coats of your favorite craft paint. For my wreath, I used Martha Stewart Craft Paint in Rust, Gold and Sterling. For all my craft projects, I used to use foam brushes, but they didn’t really wash well for repeated use, so I am happy I invested in a set of Martha Stewart paint brushes. I’ve used them on walls, furniture, crafts, jewelry, etc. and they wash so easily with warm soapy water. They still look brand new. Love them, well worth the modest price. I’ve never had an issue with anything from the Martha Stewart crafts line from Plaid.

While my paint was drying, I placed my pearly twigs onto the wreath. I secured the small stems down with some basic 97-cent floral wire from Walmart since the pearls didn’t exactly lay flat. Then I curved the stems to the shape of the wreath.

MetallicGourdWreath7

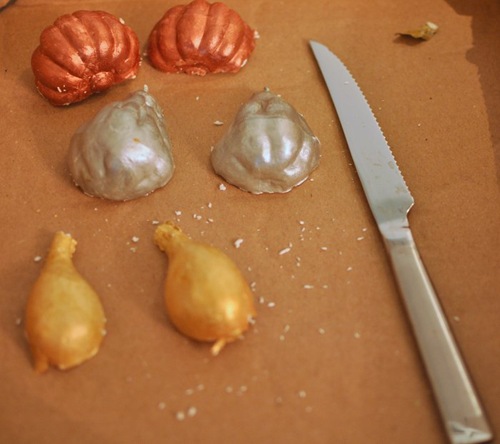
I checked if my gourds were totally dry, and I sliced them in half with a knife. Literally, a knife from my kitchen. The gourds are foam, so it didn’t take much effort at all.

MetallicGourdWreath8

I hot glued them onto the wreath and filled in any gaps with my glitter leaves from Hobby Lobby.

MetallicGourdWreath9

Using some spare burlap I had on hand, I cut a section of about 5” x 30” to create a way to hang the wreath in my dining room. Three thumbtacks hold the wreath up (and are covered by the burlap). To make the little fold in the burlap, I rolled the end up and in and secured with my super heavy duty Glue Dots. I adore Glue Dots. I embellished with a pair of leaves and was done!

MetallicGourdWreath10

MetallicGourdWreath11

MetallicGourdWreath12

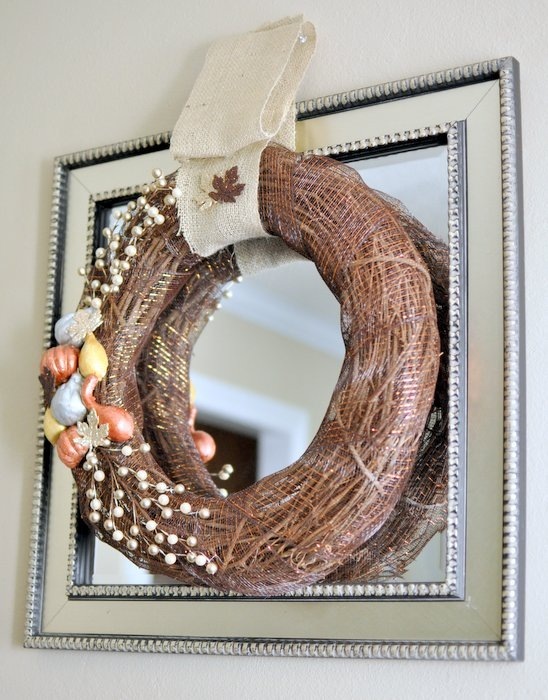
My favorite part of this wreath is the contrast in the metallic colors and the mesh ribbon and pearls. Feast for the eyes.

MetallicGourdWreath13

And also, the burlap gives it a hint of country chic amidst all the high impact metallics and pearls.

MetallicGourdWreath14

It was just too darn pretty to hang on my front door. Now I get to gaze at my creation as I blog. Squee. I guess I should mention that I didn’t officially affix the mesh ribbon to the wreath. I wrapped it around, but I didn’t hot glue it onto the grapevine, so at the end of the season, I could feasibly unwrap the wreath and re-use. I do that a lot with wreaths because I hate to end up with 6 wreaths at the end of the holidays. Now I have a prop box of stuff for wreaths. I did hot glue the gourds, but I use a low-temp glue gun, so it usually means I can peel it off if I want to. Just a tip that can save you money on décor + help out if you don’t have a ton of storage for wreaths—figure out a way to make the accents stick while you have it on display, but not in a permanent way.

Again, Glue Dots y’all. Seriously.

I love my fall wreath! Last year I didn’t make one and opted for a Halloween wreath, but this year I am opposite. I want to just decorate for fall and enjoy it all the way until Black Friday when it all gets put away in favor of Christmas décor. I do love Halloween though. How do you all decorate for both fall and Halloween?