Showing posts with label how to. Show all posts

Tuesday, September 24, 2013

Rustic Cast Iron Breakfast Pizza {Recipe}

Rustic Cast Iron Breakfast Pizza Recipe: One dish meals from monicawantsit.com

Breakfast is my most favorite meal of the day, especially on weekends. As with all my cooking, I hate making anything that takes a long time and/or requires 5 different pots or pans.

No thank you.

Rustic Cast Iron Breakfast Pizza Recipe: One dish meals from monicawantsit.com

This dish is the anti-thesis to all of that. It’s all made in one cast iron skillet…and a small saucepan if you opt for gravy. It’s simple, delicious, filling and QUICK. You can have this from kitchen to table in under half an hour. I made this for Sunday breakfast, and then we ate the leftovers for Sunday lunch. This dish is perfect for brunch or breakfast, or heck, why not dinner? You likely have most of the ingredients on hand.

I use a cast iron skillet for this recipe because I am obsessed with the great crust and flavors that develop when cooking with cast iron. If you don’t have one, and don’t want to buy one, a 9x13 Pyrex dish will work, too.

Rustic Cast Iron Breakfast
MonicaWantsIt.com
Servings: 4-6

Ingredients:

  • 1 can of jumbo buttermilk biscuits (8 count)
  • 4 large eggs
  • 1/3 cup of milk
  • Salt/Pepper
  • 6 strips of cooked bacon
  • 1 tsbp butter

Gravy Ingredients:

  • 2 tbsp butter
  • 2 tbsp flour
  • 1 1/4 cup of milk
  • 1/2 cup shredded gruyere cheese
  • Salt/Pepper to taste
Pizza Directions:

Preheat oven to 425 degrees. Cook up 6 strips of bacon and drain excess fat onto paper towel. In a bowl, whisk together salt, pepper, milk and eggs until well mixed. Crumble the 6 strips of bacon into bite sized pieces and toss into egg mixture.

Open can of biscuits and form a crust on bottom of greased cast iron pan. Pour egg/bacon mixture over the biscuits and bake for about 15-17 minutes.

Cut into 4-6 servings using a pizza cutter and enjoy!

Gravy Directions:

Melt butter in small saucepan, add in flour to make a roux, then mix in milk. Bring up to a boil, whisking constantly. Reduce heat, add in cheese until melted, and add in salt and pepper to taste. I like my country gravy with a lot of pepper—I probably used 2 tbsp worth. The gruyere cheese adds a smoky flavor, but feel free to omit it or add in your fave cheese.

Rustic Cast Iron Breakfast Pizza Recipe: One dish meal from monicawantsit.com

The gravy adds a salty, decadent touch. Plus, who doesn’t like biscuits and gravy…WITH BACON?!

Rustic Cast Iron Breakfast Pizza Recipe: One dish meal from monicawantsit.com

It’s kind of funny how this totally does look like a pizza! The biscuits puff up and form a crust that is reminiscent of a pan pizza crust. Nom nom nom.

Rustic Cast Iron Breakfast Pizza Recipe: One dish meal from monicawantsit.com

You can really get creative with this recipe and use turkey bacon, or use pepperoni, or add in veggies like spinach and tomatoes. The possibilities are endless. This recipe is sure to please even the pickiest eaters, and I think it’d be fun for kiddos to eat.

What are your favorite Sunday morning foods?

Wednesday, September 18, 2013

Dining Room Facelift {#DIY Home Décor}

This post is going to have a ton of pictures, so I totally apologize in advance if I cause you to go over your data plan for you mobile users.

My dining room has kind of stayed as is, plus or minus seasonal décor, ever since I did this reveal post last year. Well, the hubster and I have been lusting after a new dining table, so we rearranged the space a bit to see what it’d feel like in a different configuration. Ok, and I sort of lied…I’ve been lusting after a new dining table while my husband is 100% OK with the set we have.

It is the bane of my existence. But more about that in a post later this week.

We flip flopped the layout and now it looks like this when you walk in:

DiningRoomMakeover01

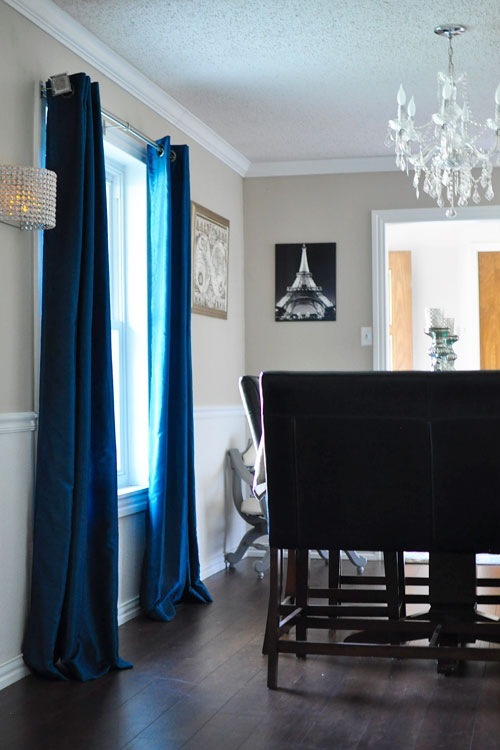
Now the dining table is what greets you when you walk in (before it was the sofa), and I’ll admit I despised the layout the first few days…Now I LOVE IT! It flows nicely, the room feels more spacious—which is a challenge since the room is about 10 feet wide and 30 feet long. Yeah, seriously narrow and long.

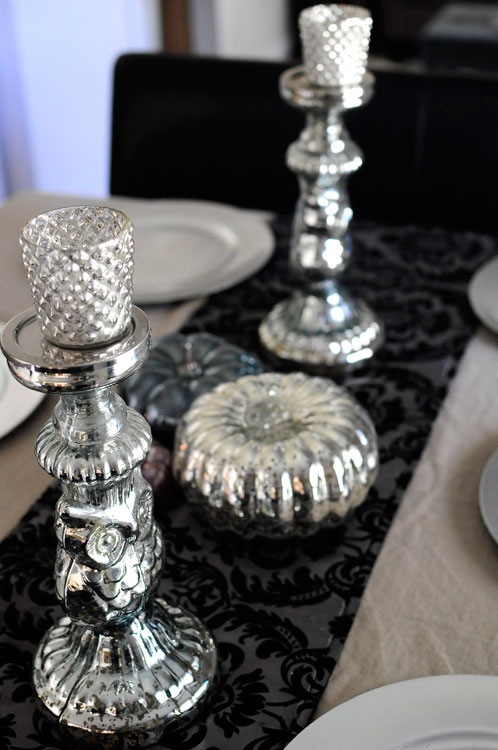
The chandelier is centered beautifully over the table, and mercury and jewel tone accents add drama to the space.

DiningRoomMakeover08

The candlesticks and mercury glass pumpkin are from one of my top 5 favorite stores: ZGallerie. The blue and magenta pumpkins are from Hobby Lobby, and the flocked damask runner is a wedding leftover from Kohl’s holiday collection back in 2008. Silver chargers are 98-cents each at Walmart.

DiningRoomMakeover14

Past the dining table, is a comfy, luxe seating area perfect for cocktails with the gals. Plus, there’s a doorway that leads straight to the kitchen, so that it’s easy to get refills on drinks or check on the puffed pastry in the oven.

DiningRoomMakeover15

And if you haven’t noticed, I finally splurged on some curtains with COLOR. My other ones were 5 different shades of beige, and these are STUNNING. They are a gorgeous peacock blue color, but when the light hits them, they can morph into having more green or blue. I am in love! The price is oh so right—these gorgeous SIlkana Teal Curtains are only $52 for a pair, and they are worth every penny. They do not totally block out the light, but they do filter it so it just softly embraces a room. Highly recommend!

DiningRoomMakeover23

And now onto more pictures and less of me talking…

DiningRoomMakeover02

DiningRoomMakeover07

DiningRoomMakeover27

DiningRoomMakeover25

DiningRoomMakeover13


DiningRoomMakeover04

DiningRoomMakeover03

Pee Wee always comes into my blog photo shoots to give his approval.

DiningRoomMakeover10

Or to lounge.

DiningRoomMakeover12

That mirrored table off to the left developed a HUGE crack out of nowhere. Ugh. So now a nice serving tray from World Market covers that sucker up.

DiningRoomMakeover11

DiningRoomMakeover19

DiningRoomMakeover20

I’m still obsessed with my ghost chair. I’m writing this very sentence right now while sitting in my ghost chair from Overstock. It’s so comfy. I think my circa 2008 Dell PC is an eyesore. Maybe Santa will bring me a new all in one PC this year…or maybe a Mac? Hhmm.

DiningRoomMakeover18

This frame is one of those fugly gold frames you can find at garage sales. While the gold may be old/ugly, a coat of spray paint can work wonders! Plus, look at those gorgeous, ornate elements on the frame.

DiningRoomMakeover17

DiningRoomMakeover09

DiningRoomMakeover06

These flocked damask pillows were a great score at JCP a few years back. I got 4 of them for $6 each.

DiningRoomMakeover21

The mirrors are from Kirkland’s and were about $10 each. They always have sales and coupons (plus you can use coupons from your phone), so I always go to Kirkland’s for affordable home décor such as mirrors, vase filler, and pumpkins for fall.

DiningRoomMakeover24

DiningRoomMakeover05

There you have it! Again, the primary “makeover” aspect of this simply involved moving around furniture, and bringing in accents from other rooms, but in the interest of full disclosure, I did splurge on the following:

  • New Silkana Teal Window Panels (4 panels, $100 total)
  • New trellis patterned pillow ($15 at Ross)
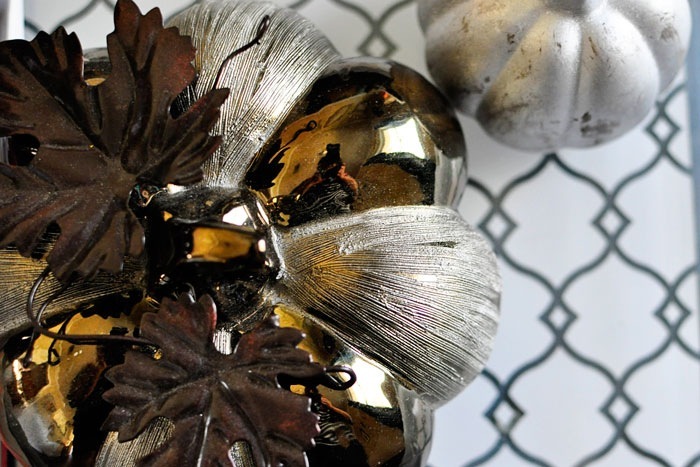
  • New magenta pumpkin ($4 at Hobby Lobby)
  • New black lamp shade ($10 at Ross)
  • New bright white bulbs ($12 at Walmart)

Total: About $150 for a whole new look!

I have this obsession for pumpkins, so I love being able to scatter them throughout my home. The dining room won’t get to enjoy the fall décor too much since I have been selected for a super awesome opportunity that I’ll tell you about later this week. IT IS EXCITING!! I am so over the moon about it and can’t wait to gush all the details to you lovely people.

There are a few things I want to change about the space, in addition to getting rid of the dining table. I’d love a luxe throw with a fun geometric or damask print, a bar cart, wine fridge, recessed lights, a tufted storage ottoman, more wall décor, mirrored/acrylic serving tray, metallic pillows, and a less “beige” wall color. Oh and a gorgeous arm chair! I’ll be working on those during the next phase of my dining room facelift. :)

What do you think of my “new” dining room? Like? Love? Want to come over and have drinks with me?

If you have any questions about anything in my dining/office/living room area, please feel free to leave a comment and I’ll reply to you in the comments as soon as I can.

But here are some questions I am anticipating and will just answer now:

Tuesday, September 17, 2013

Candy Corn M&M’s Pumpkin Bars & Apple Cider Recipes #HarvestFun

In anticipation for fall, I’ve worked on 2 tasty fall inspired recipes as part of a sponsored post for Collective Bias®. These recipes are easy, delicious, and quick to make.

Here’s the first one!

#HarvestFun Candy Corn M&M's Pumpkin Bars #shop

Fall is definitely my favorite time of year. I get beyond ecstatic when I see the fall preview start at Bath & Body Works—I am PUMPED for all things pumpkin from that point onward. And fall also reminds me of taking drives with my mom around San Antonio. She’d take me to get my most favorite French vanilla cappuccino from the local gas station, and we’d drive around killing time. We’d shop, see a $1 movie, or just explore the town. Now that I don’t live quite that close to her, these sorts of recipes help bring a bit of nostalgia into my kitchen and heart.

Candy Corn M&M’s have been one of my other fall obsessions since they came out in 2011. They have the familiar taste of candy corn with a dash of sophistication because of the white chocolate. They melt in your mouth, and they’re so sweet and satisfying.

#HarvestFun Candy Corn M&M's Pumpkin Bars #shop

When thinking of fall goodies, I knew I had to find a way to use some delicious candy corn M&M’s and pumpkin. It may seem like an odd combo when you first think about it, but trust me, they’re a match made in heaven.

These candy corn M&M’s pumpkin bars are so moist, and they have all the familiar flavors of a pumpkin pie with the added sweetness of the candy corn M&M’s. The result is a cake bar that is anything but dense. I cannot get enough of these cake bars. I am sort of happy I only make one 8x8 pan at a time or else I’d be gaining a ton of weight. I think this fall recipe is perfect for potlucks, football games, or simply as a way to spruce up weeknight dinners.

#HarvestFun Candy Corn M&M's Pumpkin Bars #shop

But enough of my jibber jabber, you probably want the darn recipe already, right? Well here it is!

Candy Corn M&M’s Pumpkin Bars
MonicaWantsIt.com
Servings: 9 • Size: 1 cake bar
Ingredients:

  • 1/2 cup all-purpose flour
  • 1/2 cup whole-wheat flour (or just use another 1/2 cup of regular flour)
  • 2 tsp cinnamon
  • 1 tsp pumpkin pie spice
  • 1 tsp baking powder
  • 1/2 tsp baking soda
  • 1/2 tsp salt
  • 2 large eggs
  • 2/3 cup dark brown sugar
  • 1 cup canned pumpkin puree
  • 1/4 cup 2% milk
  • 1/4 cup melted butter
  • 1 tsp vanilla extract
  • 1/2 cup of Candy Corn M&M’s


Directions:
-Preheat oven to 350 degrees and spray an 8x8 pan with non-stick spray.

-Combine all dry ingredients in a bowl. In a separate bowl, whisk together eggs, brown sugar, and pumpkin until well mixed. Add in the milk, butter, and vanilla extract. Pour wet ingredients into dry ingredients, toss in the M&M’s and mix together.

-Pour it all into the greased 8x8 pan. Bake in the oven for about 15-20 minutes, or until toothpick inserted in the center comes out clean. Let cool for 30 minutes, cut into 9 cake bars, and enjoy!

#HarvestFun Candy Corn M&M's Pumpkin Bars #shop

#HarvestFun Candy Corn M&M's Pumpkin Bars #shop

The Candy Corn M&M’s are marbled throughout the bars, and they just melt when you take a bite. It’s the perfect amount of sweetness.

#HarvestFun Candy Corn M&M's Pumpkin Bars Recipe #shop

Each bite tastes better than the last. Ohmygosh.

#HarvestFun Candy Corn M&M's Pumpkin Bars Recipe #shop

And of course, you need a fall-esque drink to go along with these babies. How about some pumpkin spiced apple cider topped with homemade whipped cream? Yes. Definitely yes.

#HarvestFun Mott's Pumpkin Spiced Apple Cider Recipe #shop

I LOVE apple cider, especially when topped with whipped cream and a drizzle of caramel. It is warm, tasty, comforting, and whipping this cider up will make your entire house smell absolutely divine. It’s so easy, too, thanks to Mott’s 100% Apple Juice. Tart, yet sweet, and just perfect for fall baking and ciders. And topped with my homemade whipped cream? Well, let’s say you’ll never  need to spend money on fancy coffeehouse ciders again.

You’re welcome.

#HarvestFun Mott's Pumpkin Spiced Apple Cider Recipe #shop

Pumpkin Spiced Apple Cider w/Homemade Whipped Cream
MonicaWantsIt.com
Servings: 8 • Size: 8 oz./1 cup
Ingredients:

  • 64 oz. Mott’s 100% Apple Juice
  • 4 sticks of cinnamon
  • 4 tsp pumpkin pie spice

Homemade Whipped Cream (Optional)

  • 2 cups of heavy whipping cream
  • 4 tbsp powdered sugar (or Splenda for baking)
  • 2 tsp pumpkin pie spice
  • 1 tsp cinnamon


Directions for the Cider:
-In a heavy saucepan, pour in the Mott’s 100% Apple Juice, cinnamon sticks, and pumpkin pie spice. Bring it up to a boil using a whisk to constantly mix the cider. Once it comes up to a boil, remove from heat and allow to cool for a few minutes before serving. You could also put into a crockpot to keep warm, if needed.

Directions for the Whipped Cream:
-In a glass bowl, pour in your heavy whipping cream, powdered sugar, and spices and mix with a hand mixer until soft peaks start to form. Taste, and add more sugar/spices if needed or desired.

#HarvestFun Mott's Pumpkin Spiced Apple Cider Recipe #shop

I know that this cider has a lot of pumpkin pie spice in it, but that’s what makes it so good. Some sips you swear you taste pumpkin pie, and then the next sip you taste apple pie. Delish! Topped with the homemade whipped cream it’s just out of this world delicious. If you really want to make it gourmet, add in a drizzle of caramel. This recipe is also easily halved or quartered if you want to make it on demand.

#HarvestFun Mott's Pumpkin Spiced Apple Cider Recipe #shop

Mmm. I’m enjoying these a lot lately while blogging or watching football.

#HarvestFun Mott's Pumpkin Spiced Apple Cider Recipe #shop

I hope the Candy Corn M&M’s Pumpkin Bars and the Mott’s Pumpkin Spiced Apple Cider recipes will help get you in the fall spirit! I encourage you to create lots of wonderful memories this fall now that the weather is cooling off a bit. Take time to de-stress, enjoy life, and be with those you love.

What are your favorite fall/seasonal treats? I’d love to know!

And if you’d like to get more ideas and inspiration from M&M’s or Mott’s, make sure to follow them on social media (I do!):

For more great ideas visit the Fall Baking and Entertaining Pinterest Board.

Monday, November 19, 2012

Thanksgiving Dishes with Country Crock {Recipe}


I adore Thanksgiving because it gives me an excuse to try new recipes. My favorite recipes to try out at Thanksgiving time usually revolve around 2 of my favorite dishes: potatoes and desserts.

For these recipes that I’m going to share with you today I was asked to swap butter and use a Unilever spread instead. I chose Country Crock, and I was super pleased with the results. You’ll also be happy to know that the recipes were tested on a 13-year old boy and a 30 year old guy and they both LOVED recipes.

Because they’re that good!

First up is a super easy potato side dish that is sure to please! The end result looks fancy, but I swear it doesn’t require a ton of effort.

Cheesy Hasselback Potatoes: Serves 4

Adapted from FoodNetwork.com

Ingredients:

  1. 4, 4-5 oz. potatoes (weight is before they’re peeled)
  2. 3 oz. of cheese (1.5 ounces per cheese type, grated) I used gruyere and white Vermont cheddar
  3. 1/2 cup of Country Crock Spread (melted)
  4. Salt/Pepper to Taste
  5. Bowl of water with dash of lemon juice

Steps:

1. Pre-heat your oven to 425-degrees. Rinse and peel potatoes, then soak in water with lemon juice. This keeps them from browning.

2. Once all your potatoes are peeled, thinly slice each potato about 3/4 of the way through in 1/4 inch slices like this:

I am so not a chef and my knife skills are not fab by any means, so just do your best!

3. Get your 1/2 cup of Country Crock Spread and melt it in a bowl large enough to fit your potatoes. I microwaved the Country Crock for about 30 seconds. Add a dash of salt and pepper and dunk each potato in the melted Country Crock mixture. Make sure all that yummy goodness gets into the potato layers. Reserve remaining melted Country Crock for later.

4. Pop your potatoes in the oven for about 35-40 minutes. Take them and sprinkle generously with your grated cheese and drizzle remaining melted Country Crock onto the tops of potatoes. Cook for another 15 minutes, or until fork tender and cooked all the way. Cool about 5 minutes, then serve! You end up with these wonderful potatoes that are slightly crispy on the outside, yet ooey and gooey on the inside.

So, now that you got your potatoes, you want dessert right? These 2-bite white chocolate pumpkin snickerdoodles will do the trick. Now I call these 2-bite snickerdoodles because they don’t flatten—they stay bon bon shaped! They’re dense, but have a lot of flavor and are great bite sized treats!

This recipe is also so easy that you can definitely get the kiddos involved. Look at the look of pure joy on my 13 year old brother’s face. Love that guy!

White Chocolate Pumpkin Snickerdoodle Bites: Makes 5-6 Dozen

Adapted from Six Sisters Stuff

Ingredients:

  1. 1/2 cup Country Crock Spread
  2. 1/2 cup shortening
  3. 1 cup white sugar
  4. 1/2 cup light brown sugar
  5. 3/4 cup unsweetened pumpkin puree
  6. 1 large egg
  7. 3 1/4 cup of flour
  8. 2 tsp of baking power
  9. 1 tsp of baking soda
  10. 1 cup white chocolate chips
  11. 1/2 tsp salt
  12. 1/2 tsp cinnamon
  13. 1/2 tsp of pumpkin pie spice

Topping:

  1. Cinnamon + sugar mixture (optional)

Steps:

1. Pre-heat your oven to 400 degrees. Mix together the margarine, shortening, sugars, pumpkin, and egg. I used my KitchenAid mixer, but you could also use your hand mixer or some elbow grease. Make sure to use a large bowl though because there’s lots of dough made from this recipe (which can easily be halved).

2. Once those ingredients are mixed, incorporate remaining ingredients (flour, baking powder, baking soda, salt, cinnamon, pumpkin pie spice, and white chocolate chips). REALLY mix it well! You don’t want to end up with cookies that have a flour aftertaste, so make sure to really work all the ingredients together well.

3. Put your dough in the freezer for about 10 minutes. This makes it easier to work with, especially if you’re using a cookie scoop, like I did.

4. Once your dough is chilled, use a cookie scoop or your hands to form into little balls. If desired, roll them into a cinnamon sugar mixture to coat. I did this on about half of my cookies, and I do think it helped amp up the flavor a bit, but you can omit this step.

5. Bake for about 8-10 minutes. They likely will not flatten, so don’t fret! Pumpkin puffs them up, but they’re still tasty. Unlike other cookies, I feel like these taste even better the day after. Once they’re out of the oven, let them cool and enjoy!

I didn’t taste or notice any difference when omitting the butter in favor of using Country Crock Spread by Unilever. It’s nice to know I can easily make that swap without sacrificing flavor. Now I know my Thanksgiving dinner will go off without a hitch!

What dishes could you use Country Crock Spread in this Thanksgiving?

Thank you to Good to Know & Unilever Spreads for being a sponsor. I was selected for this opportunity as a member of Clever Girls Collective. All opinions expressed here are my own.

Tuesday, October 23, 2012

DIY Kitchen Makeover {Reader Revamp}

This is a bit of something new on these pages. Ya see, sometimes I get emails from people and they’ve taken so much time and effort to write to me. It means so much. Especially when it’s something along the lines of, “Please help me not have an ugly kitchen!”

How can I say no?

Today we have Stephanie’s kitchen, and she emailed me about a month ago asking for some advice. So, I’m going to give her some ideas in this post, but I’m also hoping YOU will help her out. Sometimes a team of people can come up with way better ideas than one person.

Let’s help Stephanie! Here’s her email to me:

Dear Monica,

I LOVE your website and blog! Your tutorials are awesome. You have excellent taste! I have such a hard time imaging what the finished product with look like when I’m staring at ugly.

I’ve read your tutorial about staining your cabinets in your bathroom so many times. I’m really tempted to do this in my kitchen. I hate my kitchen, but I can’t afford to remodel it at this time. I was wondering if I could get your expert opinion on it. I’m sure you get bugged by people like me all the time, but I thought it might be worth a shot, because if you did reply, it would be awesome!

My appliances are black and the countertop is a very strange purple/grey color. I may just do a resurface kit for the countertops I found at Lowes or something. But can’t decide if the Java color of stain would look too dark on the cabinets next to the black fridge and oven or if I should do the Cherry color instead by General Finishes. I think I would add a tile backsplash and take off the two cupboards that have the ugly glass in them and just leave open shelves. Do you have any suggestions on color of the stain, tile, or paint?

I hope you are having a great day! Thank you for all of your tutorials that you put out there for us to read!

Thank you!!!

~Stephanie

And here are the photos she sent along:

Kitchen1

WindowAboveSink

So here’s my super cheap plan.

I would definitely stain the cabinets the espresso color (if you’re new here, I have the tutorial right over here). I think although the appliances are black, it’ll work.

Now personally, I love glass cabinets, so rather than take them off I’d add in some battery operated LED lights. I have these under my cabinets in my office, and I adore them. I’ve had them over a year, and the batteries still haven’t gone out. Adding in some light immediately classes up the glass and adds some nice interest. Rather than hop on a chair to turn them on, I just poke them with a ruler or pen.

Next, I’d swap out the hardware. It looks like you might have a standard 3” hole-to-hole opening, so it should make finding new hardware super duper easy. I’d recommend something modern in a satin nickel finish:

Amerock TEN26201-G10 Essential'z Collection Pull Arch Center to Center, Satin Nickel,3-Inch, 10-Pack

From Amazon, $24 for 10.

Or if you’re more traditional, maybe something more along these lines:

Amerock BP53030-G10 Mulholland 3-Inch Center Pull, Satin Nickel

From Amazon, $2.51 each.

In that open wall area near the window, I might add some glass shelving (or these nice stainless steel ones would work) for herbs/cute kitchen canisters/decor. Ooh, ooh…how about these floating Umbra shelves for cookbooks?

And maybe a fun menu chalkboard that would cover up the phone jack (get one of those canvas type ones that will just fit right over it). What might also look good is a simple roman shade on the window.

Unlike Stephanie, I don’t find her countertops particularly hideous, so I would probably leave them alone. I’ve seen a few people try those countertop makeover kits…and it looks like crap. Just my 2-cents, but if I were you, rather than spend $100 to paint them, I’d save up for some new solid surface countertops in 2013 if you hate them that much.

A few other things:

-I would move the coffee maker over to where the basket of stuff is. You could always get a mail/wall organizer to put on that wall to keep it off the countertops. This leaves the area to the left and right of your stove free for prep space.

-If you put shelving on the open wall to the left of the sink, you can move those plants onto it and keep that area free for pretty soap bottles. Also, a roman shade, even if left mostly open, could make the kitchen a ton more cheery and sophisticated. Oh and chic!

-Finally, if you do decide to stain your cabinets, I would recommend painting the walls just a faint, faint gray. Perhaps something like Silverpoint by Sherwin Williams. It’ll instantly cool, calm and elevate your kitchen from drab oak to tall, dark and handsome espresso.

Total cost for my plan:

-$100ish for staining supplies

-$60ish for new pulls

-$30 for paint (walls)

-$10 for lights

-$150 for misc. accessories (shelves, décor, etc.)

-$50 for supplies (paint rollers, tarps, etc.)

Total: $350-$400

Total Time Commitment: 3 weekends, max

What would you tell Stephanie to do to her kitchen? I think her space is lovely and with just a few small tweaks could be a STUNNING kitchen. Help Stephanie out in the comments section with your advice or encouragement.

Have a reader revamp you’d love my help with? Email me with the subject line “Reader Revamp Series” and briefly tell me how much I rock, how much your space sucks and a rough budget target plus about 3-5 photos. :)