Showing posts with label holidays. Show all posts

Friday, September 20, 2013

Friday Lust: Dining Tables & Chairs {Home Décor & Furniture}

Today’s Friday Lust post is all about dining tables and chairs. Ooh la la.

In my post earlier this week, I told you all about how much I hate our dining set. It was absolutely perfect for our apartment that we lived in from 2007-2010, but now it’s just not what I envision for my home. It’s also hard to scoot the stools/benches in once you sit down, and it’s just…not me.

DiningRoomMakeover05

It’s got 2 stools + 2 benches (and a wedge we’re not using that connects the 2 benches to form a L shape), so it sits about 6 people. It’s counter height and nearly impossible to find a table cover for. Sad face.

Here’s what I’d rather have:

I want a gorgeous, weathered pedestal or trestle table with really beautiful chairs that have tufting or nailhead accents. The overall vibe I am wanting is sort of like if Restoration Hardware and ZGallerie hooked up for a one-night stand and had a baby. I WANT THAT BABY. Rustic, glamorous, classy and timeless. I also love the weathered, hand scraped table look because if a friend slams a glass on the table, or I drop a fork onto it, it just adds to the character. I don’t want a normal, super smooth finish, cherry or espresso dining set.
And that may be why I can’t find anything I can friggin afford. Here’s what I have found so far. In a perfect world, I’d buy this table:
$1295 from Restoration Hardware
And then I’d buy 6 of these chairs:
$449 each from Restoration Hardware
And then I’d move on with my life. But unfortunately, I don’t have thousands to spend on this endeavor, so onto the copycat versions of these pieces. This table from World Market is a strong contender, but the finish is too dark…
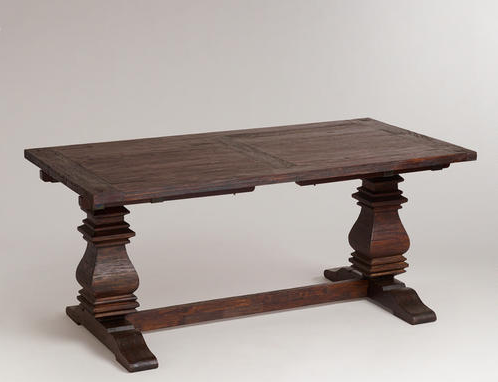
image
On sale for $499 through 9/30/13 @ World Market.
Then there’s the Cane Dining Table from Home Decorator’s Collection- I called to get the specs, and it seems like it will only seat 4 because the overhang at the edges is only 9 inches. Although, in a pinch, I don’t think it’s awful…but then again I wouldn’t be the one sitting at the edge. I’m also iffy on the color since it looks gray washed in one photo and really dark in another. On sale through 9/30/13- $599.
And another potential table from Home Decorator’s, but I wonder if the 48” size would be too small for my space? I’d like to be able to fit 6 people, so this may not work. I’m also not 100% on board with a circular table.
On sale through 9/30/19 for $359.
 
However, I’m about to contradict myself because I LOVE this round table from Ballard Designs:
image
 
Chairs are easy enough to find, and although they’re cheaper than RH’s version, they’re not that cheap, KWIM?
 
image
 
Sigh. I don’t know what to do. I want what I want, and I know this is not a project I’d ever want to DIY, so do I just save up for my dream dining set? I’ve thought about freshening up my current set with some slipcovers or something, but finding slipcovers for the 2 benches is proving to be quite a task.
 
Advice, thoughts? If anyone cares to sponsor my entire dining set, please let me know. (Hey, it never hurts to ask) :)

Tuesday, September 17, 2013

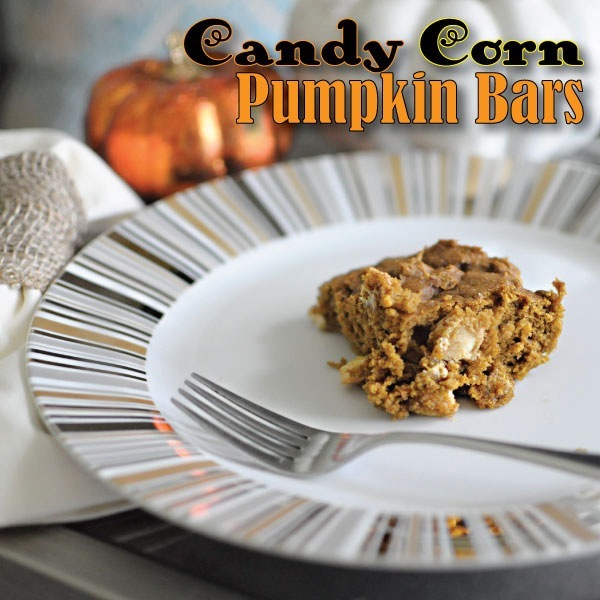
Candy Corn M&M’s Pumpkin Bars & Apple Cider Recipes #HarvestFun

In anticipation for fall, I’ve worked on 2 tasty fall inspired recipes as part of a sponsored post for Collective Bias®. These recipes are easy, delicious, and quick to make.

Here’s the first one!

#HarvestFun Candy Corn M&M's Pumpkin Bars #shop

Fall is definitely my favorite time of year. I get beyond ecstatic when I see the fall preview start at Bath & Body Works—I am PUMPED for all things pumpkin from that point onward. And fall also reminds me of taking drives with my mom around San Antonio. She’d take me to get my most favorite French vanilla cappuccino from the local gas station, and we’d drive around killing time. We’d shop, see a $1 movie, or just explore the town. Now that I don’t live quite that close to her, these sorts of recipes help bring a bit of nostalgia into my kitchen and heart.

Candy Corn M&M’s have been one of my other fall obsessions since they came out in 2011. They have the familiar taste of candy corn with a dash of sophistication because of the white chocolate. They melt in your mouth, and they’re so sweet and satisfying.

#HarvestFun Candy Corn M&M's Pumpkin Bars #shop

When thinking of fall goodies, I knew I had to find a way to use some delicious candy corn M&M’s and pumpkin. It may seem like an odd combo when you first think about it, but trust me, they’re a match made in heaven.

These candy corn M&M’s pumpkin bars are so moist, and they have all the familiar flavors of a pumpkin pie with the added sweetness of the candy corn M&M’s. The result is a cake bar that is anything but dense. I cannot get enough of these cake bars. I am sort of happy I only make one 8x8 pan at a time or else I’d be gaining a ton of weight. I think this fall recipe is perfect for potlucks, football games, or simply as a way to spruce up weeknight dinners.

#HarvestFun Candy Corn M&M's Pumpkin Bars #shop

But enough of my jibber jabber, you probably want the darn recipe already, right? Well here it is!

Candy Corn M&M’s Pumpkin Bars
MonicaWantsIt.com
Servings: 9 • Size: 1 cake bar
Ingredients:

  • 1/2 cup all-purpose flour
  • 1/2 cup whole-wheat flour (or just use another 1/2 cup of regular flour)
  • 2 tsp cinnamon
  • 1 tsp pumpkin pie spice
  • 1 tsp baking powder
  • 1/2 tsp baking soda
  • 1/2 tsp salt
  • 2 large eggs
  • 2/3 cup dark brown sugar
  • 1 cup canned pumpkin puree
  • 1/4 cup 2% milk
  • 1/4 cup melted butter
  • 1 tsp vanilla extract
  • 1/2 cup of Candy Corn M&M’s


Directions:
-Preheat oven to 350 degrees and spray an 8x8 pan with non-stick spray.

-Combine all dry ingredients in a bowl. In a separate bowl, whisk together eggs, brown sugar, and pumpkin until well mixed. Add in the milk, butter, and vanilla extract. Pour wet ingredients into dry ingredients, toss in the M&M’s and mix together.

-Pour it all into the greased 8x8 pan. Bake in the oven for about 15-20 minutes, or until toothpick inserted in the center comes out clean. Let cool for 30 minutes, cut into 9 cake bars, and enjoy!

#HarvestFun Candy Corn M&M's Pumpkin Bars #shop

#HarvestFun Candy Corn M&M's Pumpkin Bars #shop

The Candy Corn M&M’s are marbled throughout the bars, and they just melt when you take a bite. It’s the perfect amount of sweetness.

#HarvestFun Candy Corn M&M's Pumpkin Bars Recipe #shop

Each bite tastes better than the last. Ohmygosh.

#HarvestFun Candy Corn M&M's Pumpkin Bars Recipe #shop

And of course, you need a fall-esque drink to go along with these babies. How about some pumpkin spiced apple cider topped with homemade whipped cream? Yes. Definitely yes.

#HarvestFun Mott's Pumpkin Spiced Apple Cider Recipe #shop

I LOVE apple cider, especially when topped with whipped cream and a drizzle of caramel. It is warm, tasty, comforting, and whipping this cider up will make your entire house smell absolutely divine. It’s so easy, too, thanks to Mott’s 100% Apple Juice. Tart, yet sweet, and just perfect for fall baking and ciders. And topped with my homemade whipped cream? Well, let’s say you’ll never  need to spend money on fancy coffeehouse ciders again.

You’re welcome.

#HarvestFun Mott's Pumpkin Spiced Apple Cider Recipe #shop

Pumpkin Spiced Apple Cider w/Homemade Whipped Cream
MonicaWantsIt.com
Servings: 8 • Size: 8 oz./1 cup
Ingredients:

  • 64 oz. Mott’s 100% Apple Juice
  • 4 sticks of cinnamon
  • 4 tsp pumpkin pie spice

Homemade Whipped Cream (Optional)

  • 2 cups of heavy whipping cream
  • 4 tbsp powdered sugar (or Splenda for baking)
  • 2 tsp pumpkin pie spice
  • 1 tsp cinnamon


Directions for the Cider:
-In a heavy saucepan, pour in the Mott’s 100% Apple Juice, cinnamon sticks, and pumpkin pie spice. Bring it up to a boil using a whisk to constantly mix the cider. Once it comes up to a boil, remove from heat and allow to cool for a few minutes before serving. You could also put into a crockpot to keep warm, if needed.

Directions for the Whipped Cream:
-In a glass bowl, pour in your heavy whipping cream, powdered sugar, and spices and mix with a hand mixer until soft peaks start to form. Taste, and add more sugar/spices if needed or desired.

#HarvestFun Mott's Pumpkin Spiced Apple Cider Recipe #shop

I know that this cider has a lot of pumpkin pie spice in it, but that’s what makes it so good. Some sips you swear you taste pumpkin pie, and then the next sip you taste apple pie. Delish! Topped with the homemade whipped cream it’s just out of this world delicious. If you really want to make it gourmet, add in a drizzle of caramel. This recipe is also easily halved or quartered if you want to make it on demand.

#HarvestFun Mott's Pumpkin Spiced Apple Cider Recipe #shop

Mmm. I’m enjoying these a lot lately while blogging or watching football.

#HarvestFun Mott's Pumpkin Spiced Apple Cider Recipe #shop

I hope the Candy Corn M&M’s Pumpkin Bars and the Mott’s Pumpkin Spiced Apple Cider recipes will help get you in the fall spirit! I encourage you to create lots of wonderful memories this fall now that the weather is cooling off a bit. Take time to de-stress, enjoy life, and be with those you love.

What are your favorite fall/seasonal treats? I’d love to know!

And if you’d like to get more ideas and inspiration from M&M’s or Mott’s, make sure to follow them on social media (I do!):

For more great ideas visit the Fall Baking and Entertaining Pinterest Board.

Sunday, December 16, 2012

Lane Bryant Twitter Party 12/17 #LB12Days


Just a friendly reminder that there is still time to enter my giveaway for one of 2 Lane Bryant gift cards (see my post from earlier today), but if you want to have another shot at some holiday gift cards, then you might want to listen up...

There's a super fun Twitter party coming up where curvy gals can talk about getting all gussied up for the holidays. Maybe it's that fabulous company soirée or a family event where you want to dress to impress. Whether your favorite look is glam, modern, edgy, flirty or comfy chic, Lane Bryant has it all. You may get some ideas on how to put together amazing holiday looks. It may be cold outside, but you can still be smokin' hot, ladies!

Plus Lane Bryant has amazing special offers everyday, which you can learn about on their Facebook page.

So, join the @LaneBryant “Holiday Fashion Fun” Twitter Party this Monday, 12/17 at noon PT/3pm ET! Fab prizes! RSVP to win prizes, including $30 Lane Bryant gift cards! RSVP: http://clvr.li/128tjBx

The Details:


  • What: Lane Bryant “Holiday Fashion Fun” Twitter Party
  • When: Mon 12/17 noon PT/3pm ET
  • Where: On Twitter! CleverTweets: http://clvr.li/SYaCNf
  • Follow: Hashtag #LBHoliday @CleverGirlsColl @LaneBryantRSVP here: http://clvr.li/128tjBx
  • Prizes: 18, $30 Lane Bryant gift cards
I hope to participate even though I will be on the road. Yay for technology! :)

I was selected for this opportunity as a member of Clever Girls Collective, and the content and opinions expressed here are all my own.


Gorgeous Clothing for the Modern Gal {#LB12Days #PlusSize}

So, yeah, my goals of looking like Jessica Alba didn’t pan out this year. Nor last year. Nor the year before that.

I think as I get older I learn that beauty isn’t tied to a number, whether it be weight or dress size. Luckily, stores like Lane Bryant also agree with me, and they make gorgeous clothing, accessories and shoes for the modern plus size woman. Shopping in their stores is always a treat because of their friendly staff and beautiful dressing rooms, and this weekend’s shopping expedition was no exception. Lane Bryant stores leave me feeling happy and confident. I don’t want to be feel ashamed when I just want to feel pretty.

I’m trying to convince my husband we should finally DO something fun for New Year’s Eve and the holidays, so I am hoping this cute blouse, shoes and earrings will help convince him!

LB

I already have a pair of Lane Bryant classic black pants that I can pair with my sparkly blouse, and those heels are actually very comfy. I’m so not a heels person, but they are truly gorgeous.

Lane Bryant is having tons of special surprise offers just in time for the holidays, and today’s special offer will rock your socks. Here it is:

lb2

That is a GREAT special offer. Essentially you can buy a blouse and add on shoes for $1. Or a dress and get a cute sweater for $1. That’s a lot of value, just in time for the holidays. I’ll probably head back to a Lane Bryant store today just to take advantage because I love their pants and blouses for work. Confident, comfy, chic—that’s how I feel in their clothes. And with special surprise offers like these, I have no excuse to not splurge a little. Right?

And, because I want to spread some holiday cheer, I am giving away TWO $30 Lane Bryant gift cards to 2 very lucky people. It’s super easy to win, not complicated at all…

To enter to win one of the $30 gift cards, just pin your favorite holiday look(s) from the Lane Bryant website and include the #LB12Days hashtag in the caption, and leave me the link to your pin in the comments section of this post (not the link to your pinterest account, but your actual pin URL, one entry per person regardless of pins). Also leave me your email address so I can find you and mail you this fantabulous prize.

Contest is open from right now until December 18 at noon. 18+, US only. I’ll draw a winner on the 18th, and I’ll contact them via email. They’ll have 48 hours to respond before I give up and choose another.

With so many great special offers, Lane Bryant is a great choice for beautiful, curvy gal clothes this holiday season. Happy pinning!

I was selected for this opportunity as a member of Clever Girls Collective, and the content and opinions expressed here are all my own.

Sunday, November 18, 2012

Holiday Celebrations #HolidayGuide {Entertaining}

I love, love, love the holidays, but trying to select gifts or plan menus for holiday soirees can be overwhelming. And daunting.

Which is why I love it when other people put together guides for me to pick and choose things from that are of good quality and value.

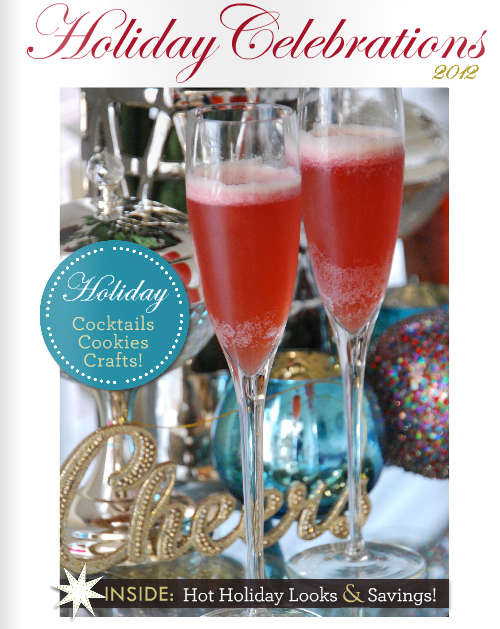
As a member of Social Fabric, I am excited to promote the Holiday Celebrations 2012 eguide created by Party Bluprints Inc. & Collective Bias.

image

The eguide contains fabulous recipes, like the Merry Mocktail pictured above (recipe on page 5) or the candied snickerdoodles seen below.

image

And while I love to have friends and family over during the holidays, preparing food and a menu really stresses me out. I always start off very ambitious, and then I give up and use something store bought and add a twist to it. I’ll be writing more about Tyson Bruschetta and how I incorporate this tasty new product into my party and snack rotation. It’s easy, affordable and tasty! Gotta love Any’tizers.

image

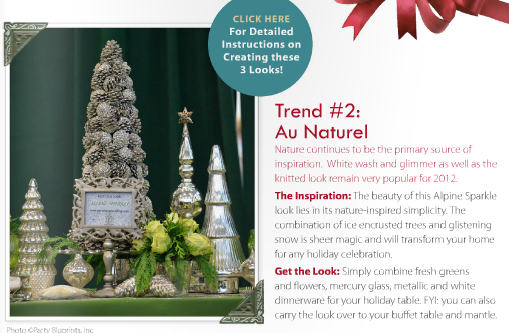
But besides entertaining, I also love to decorate my home, and this eguide offers a few ideas on how to DIY some décor.

image

And some fashion advice to make sure you dazzle at all those holiday gatherings:

image

I understand we’re all on a budget during the holidays, so make sure to flip through the 22-page eguide for some great savings from brands like Sears. This is a great way to save on holiday gifts for those fashionistas in your life.

image

The Holiday Celebrations 2012 eguide is a practical, fun, and easy way to get some ideas for holiday gifts, recipes and beauty/fashion ideas. Come back to my blog tomorrow to see 2 super easy Thanksgiving day recipes that you might want to consider adding to your Thanksgiving menu.

Do you use eguides or holiday guides to pick out gifts and prepare for the holidays?

Monday, October 1, 2012

Metallic Gourds Fall Wreath {DIY Tutorial}

Fall is here!

Well, officially it is. Unofficially, it is still sweat your arse off kinda hot down here in South Texas.

Nonetheless, I decided to make a pretty wreath for my dining room area. It was relatively inexpensive and it’s pretty easy to make. Like usual, I had to incorporate my love of metallics into my wreath.

MetallicGourdWreath

You’ll need some common craft supplies to whip up this wreath. I’m usually strictly a pumpkin kinda gal, but this year the gourds caught my attention. Ok, to be perfectly honest, I had no choice because that’s what came in the little bags from Dollar Tree: 1 pumpkin + gourds.

MetallicGourdWreath3

I bought 4 packages, but for this wreath you’ll only need 1 pack.

Supplies:

-1 pack of gourds from Dollar Tree

-1 Grapevine Wreath ($4 at Walmart currently)

-About 2 yards of mesh ribbon (I got mine at Hobby Lobby for 40% off, $4)

-Some pearly twig thingies (~$1 each at Hobby Lobby)

-Decorative fall leaves (~$1 for a pack of 12 at Hobby Lobby)

-Paint (primer + craft paint colors of your choice)

-Hot glue

-Scissors

-1 yard of burlap or ribbon to hang the wreath

-Glue Dots

-Floral Wire

-Paint brushes/foam brushes

-Knife

Total Cost: About $10-$15 depending on what you have on hand

MetallicGourdWreath2

First I took my wreath, and I wrapped the deco mesh all around it. I wanted to give the wreath some pizazz while still retaining the rustic look of the grapevine wreath.

MetallicGourdWreath4

MetallicGourdWreath5

Then I used some of my trusty 97-cents a can flat white spray paint to prime my Dollar Tree gourds. Note, I primed all of mine because I am using the leftovers as vase filler for my fall mantle. :)
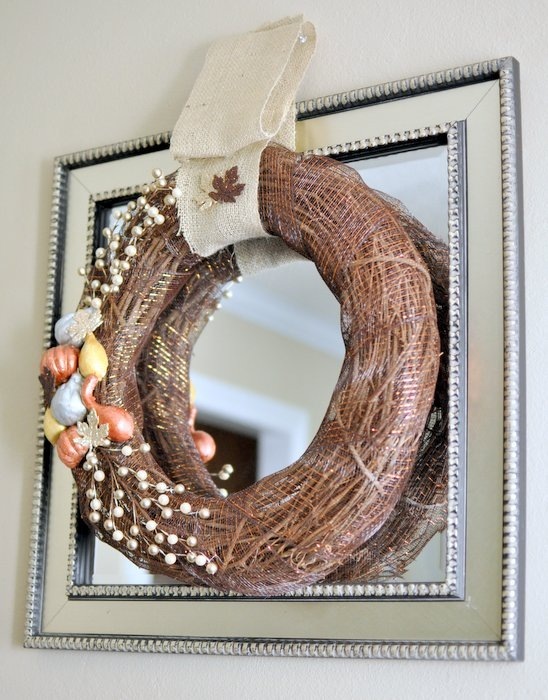
MetallicGourdWreath6

Once your gourds are dry, go ahead and paint them with 2 coats of your favorite craft paint. For my wreath, I used Martha Stewart Craft Paint in Rust, Gold and Sterling. For all my craft projects, I used to use foam brushes, but they didn’t really wash well for repeated use, so I am happy I invested in a set of Martha Stewart paint brushes. I’ve used them on walls, furniture, crafts, jewelry, etc. and they wash so easily with warm soapy water. They still look brand new. Love them, well worth the modest price. I’ve never had an issue with anything from the Martha Stewart crafts line from Plaid.

While my paint was drying, I placed my pearly twigs onto the wreath. I secured the small stems down with some basic 97-cent floral wire from Walmart since the pearls didn’t exactly lay flat. Then I curved the stems to the shape of the wreath.

MetallicGourdWreath7

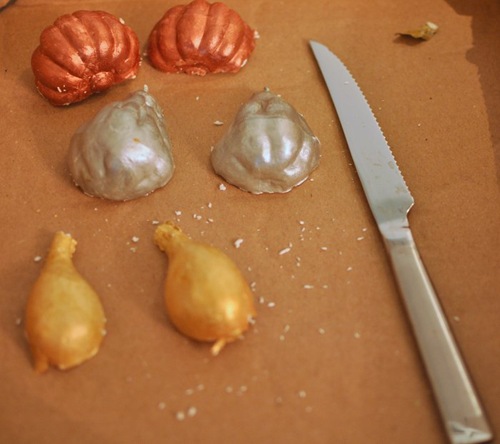
I checked if my gourds were totally dry, and I sliced them in half with a knife. Literally, a knife from my kitchen. The gourds are foam, so it didn’t take much effort at all.

MetallicGourdWreath8

I hot glued them onto the wreath and filled in any gaps with my glitter leaves from Hobby Lobby.

MetallicGourdWreath9

Using some spare burlap I had on hand, I cut a section of about 5” x 30” to create a way to hang the wreath in my dining room. Three thumbtacks hold the wreath up (and are covered by the burlap). To make the little fold in the burlap, I rolled the end up and in and secured with my super heavy duty Glue Dots. I adore Glue Dots. I embellished with a pair of leaves and was done!

MetallicGourdWreath10

MetallicGourdWreath11

MetallicGourdWreath12

My favorite part of this wreath is the contrast in the metallic colors and the mesh ribbon and pearls. Feast for the eyes.

MetallicGourdWreath13

And also, the burlap gives it a hint of country chic amidst all the high impact metallics and pearls.

MetallicGourdWreath14

It was just too darn pretty to hang on my front door. Now I get to gaze at my creation as I blog. Squee. I guess I should mention that I didn’t officially affix the mesh ribbon to the wreath. I wrapped it around, but I didn’t hot glue it onto the grapevine, so at the end of the season, I could feasibly unwrap the wreath and re-use. I do that a lot with wreaths because I hate to end up with 6 wreaths at the end of the holidays. Now I have a prop box of stuff for wreaths. I did hot glue the gourds, but I use a low-temp glue gun, so it usually means I can peel it off if I want to. Just a tip that can save you money on décor + help out if you don’t have a ton of storage for wreaths—figure out a way to make the accents stick while you have it on display, but not in a permanent way.

Again, Glue Dots y’all. Seriously.

I love my fall wreath! Last year I didn’t make one and opted for a Halloween wreath, but this year I am opposite. I want to just decorate for fall and enjoy it all the way until Black Friday when it all gets put away in favor of Christmas décor. I do love Halloween though. How do you all decorate for both fall and Halloween?

Tuesday, September 4, 2012

Metallic & Glittered Dollar Store Pumpkins {DIY Tutorial}

Anyone who’s read my blog during the fall/holiday season knows I am absolutely obsessed with metallic and glitter finishes in home décor accessories. I love the shiny finishes, and how most of the accents catch the light and bounce it around the room. Metallic and glitter pack a punch if you want to create a wow factor.

And obviously I am not the only one who feels this way because all the popular stores carry these sorts of finishes: Pottery Barn, Home Goods, ZGallerie and even Target all cash in on those of us who love the shiny things in life.

What’s fortunate for us DIY/crafty people is that with some simple dollar store décor and some great craft supplies, we too can create shiny, glittery things. Ooh. Aah.

I had emailed the folks at Plaid crafts to see if they wouldn’t mind sending me some glittery stuff to play with from the uber fab Martha Stewart line. Luckily, they said yes, so I am here today to show you 2 SSC (super simple crafts) using some of the cool stuff they sent me plus some stuff I bought. From start to finish they take less than an hour to do both, and they’re both kiddo friendly if you want to get them in on the fun. And unlike using glitter in powder/normal glitter form, using glitter paint is SO MUCH EASIER to clean up.

GlitterPumpkins

Supplies:

-2 pumpkins (ceramic, foam, plastic…it’ll all work) The ones I used are from Dollar Tree, $1 each

-Martha Stewart Metallic Paint in Rust

-Martha Stewart Glitter Paint in Brownstone

-Dark Brown Craft Paint (Normal Acrylic Craft Paint)

-Paint Brush/Sponge Brush (I used these and LOVE them)

-White Spray Paint in a Flat Finish (I use the 97-cent spray paint from Walmart)

So, you start off with your pumpkins. I usually take the price tag/UPC stickers off, and then I prime them with some super cheap flat spray paint. Usually, I just use white spray paint, but they also have gray and black, so if you’re doing something dark, you might want to use gray or black. Personally, I feel white is a great color to start with. Much like a blank canvas.

GlitterPumpkins1

GlitterPumpkins2

Once you’ve primed, let it dry about 15 minutes, and you’re ready to go. Remember that when priming you don’t need for it to be solid white to be “primed”.

GlitterPumpkins3

For the glitter pumpkin, take your glitter paint and do a light coat. It’ll look a smidge splotchy, but remember that light/thin coats work and dry so much better than thick coats. Not that I am speaking from experience…

Here’s coat 1. Very pretty and sheer. A little ethereal. I almost stopped here because I liked it so darn much.

GlitterPumpkins4

And onto coat 2:

GlitterPumpkins5

And finally coat 3:

GlitterPumpkins9

While each coat was drying (about 5 minutes/dry to the touch), I flip flopped between glitter pumpkin and metallic pumpkin. This way I could knock out 2 pumpkins at one time.

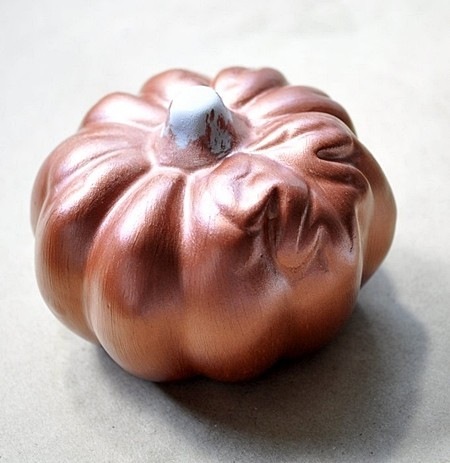
Here’s coat 1 of the metallic rust colored paint:

GlitterPumpkins6

Rust is such a gorgeous, metallic orange. It’s not your basic Halloween orange, it’s deep and almost copper like. I am in love.

GlitterPumpkins7

Here it is after two coats…

GlitterPumpkins8

Once the third/final coat was done on each, I painted the stem of the pumpkin using a dark brown color (burnt umber). On the metallic pumpkin, I painted the leaf the same color, but on the glitter pumpkin I wanted a pop of color, so I painted the leaf the rust color.

GlitterPumpkins10

GlitterPumpkins12

I love the brownstone glitter because it has brown, silver, gold, orange flecks of glitter in it. I’ve never seen anything like it. It would make a marvelous nail polish. Martha, please make one.

GlitterPumpkins13

The metallic is so rich and opaque. I didn’t think it’d work as well as it did.

GlitterPumpkins16

GlitterPumpkins15

I love them! I can’t wait to put these new pumpkins alongside my collection of other pumpkins. My collection has grown quite a bit the past 2 years, so adding in smaller, inexpensive pieces like these allow me to create a new feel with little money. This craft is something anyone can do. Wouldn’t they make great placecards, too?

If you need other pumpkin ideas, check out my other pumpkin related tutorials:

DSC_1721

{Mercury Glass Pumpkins}

DSC_1739

{Faux Mercury Glass (for non-glass pumpkins)}

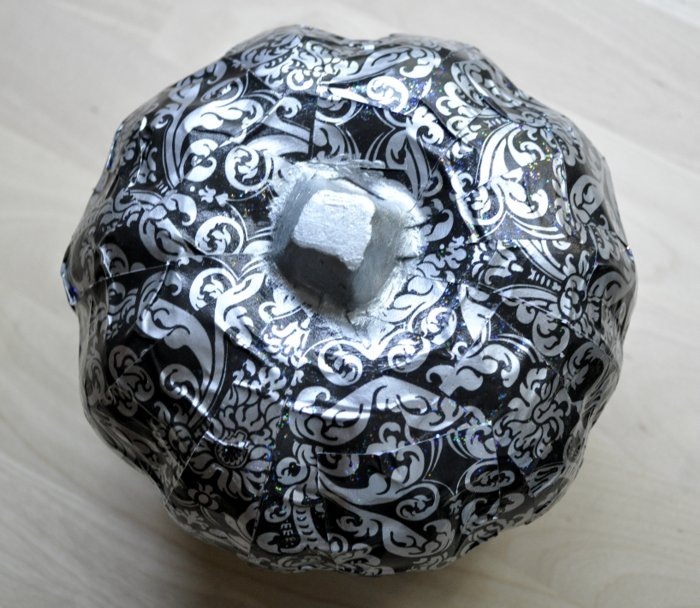
And coming up on Thursday… DAMASK PUMPKINS! <insert confetti here>

DamaskPumpkin06

Have you done any pumpkin crafting lately? I shy away from carving pumpkins, but I may give it a go this year. :)

Disclaimer: Plaid sent me some free craft supplies to use + I used/bought some other supplies of my own, but I was not otherwise compensated for this post.