Showing posts with label baking. Show all posts

Thursday, October 10, 2013

#EnergytoBurn Peanut Butter French Toast {Recipe}

Peanut Butter Stuffed French Toast #Recipe #EnergytoBurn #spon

This post/recipe are part of a sponsored campaign in collaboration with Latina Bloggers Connect and The National Peanut Board.

I love when I get asked to create recipes—especially when they deal with a tasty, affordable treat that I eat almost daily…peanut butter! Peanuts and peanut butter are a great source of protein, and they give me energy to get through the day. A serving of peanuts has almost 7 grams of protein per serving, and I need protein to stay satiated and not eat a bunch of junk food.

I’m not kidding you when I say I literally have peanuts with me literally everywhere. I have peanut snacks in the car and peanut butter at work. You can put peanut butter on just about anything like oatmeal, muffins, crackers, celery, fruit. Or you can be like me and eat it straight off the spoon. I don’t judge! My 3 p.m. snack usually consists of a peanut butter and an apple. Growing up I had pan tostado (toast) slathered with peanut butter and strawberry jelly for breakfast or an after school snack. It was so delicious, and in honor of Hispanic Heritage Month, I revamped my pan tostado recipe to a more fun, sophisticated dish that still marries together all those tasty flavors.

Peanut Butter Stuffed French Toast #Recipe #EnergytoBurn #spon

My peanut butter stuffed French toast brings together creamy, salty, sweet peanut butter with strawberries, bananas, and thick Texas toast. The result is a quick, impressive dish that is sure to please the entire family. I love a hearty, gourmet Sunday breakfast, but I am also really busy and don’t like spending hours in the kitchen. This peanut butter infused breakfast packs fruit, protein, and decadence and is ready in under 20-25 minutes. Plus, it’s a cheap meal for a family of 4.

Peanut Butter Stuffed French Toast
MonicaWantsIt.com
Servings: 4

Ingredients:

  • 8 slices of Texas toast (thick sliced white bread)
  • 1/2 pint of sliced strawberries
  • 2 bananas, sliced
  • 2 eggs
  • 1 cup heavy cream
  • 2/3 cup milk
  • 1/4 tsp cinnamon
  • 2 tsp vanilla extract
  • 1/2 cup creamy peanut butter with honey
  • Dash of salt

Directions:

  1. Slice strawberries and bananas thinly. Keep them in a bowl until ready to top French toast.
  2. In a bowl, use a hand mixer to beat heavy cream until it forms soft peaks and you have whipped cream. Add in 1 tsp of vanilla extract + peanut butter and whip until it becomes peanut butter whipped cream. Resist all temptation to eat all the whipped peanut butter.
  3. Preheat a non-stick pan or griddle to get ready to cook French toast. (Medium heat works best)
  4. In a pie dish or shallow baking pan, whisk together eggs, milk, 1 tsp of vanilla extract, cinnamon, and salt. Soak slices of Texas toast in the mixture (make sure to soak each side). Cook on each side about 2-3 minutes, or until golden brown.
  5. Place one slice of French toast on a plate, top with a heaping tablespoon or 2 of peanut butter whipped cream, then place other slice of French toast on top. Top with a generous serving of strawberries and bananas, and dust with powdered sugar, if desired.
  6. Eat and enjoy!

Peanut Butter Stuffed French Toast #Recipe #EnergytoBurn #spon

Strawberries really go well with the peanut butter because they’re sweet and tart, but the real star of the show is this peanut butter whipped cream!

Peanut Butter Stuffed French Toast #Recipe #EnergytoBurn #spon

The peanut butter whipped cream becomes so light and fluffy, so it simply melts into a frothy delight all over the plate. It’s like peanut butter syrup!

Peanut Butter Stuffed French Toast #Recipe #EnergytoBurn #spon

Peanut Butter Stuffed French Toast #Recipe #EnergytoBurn #spon

Peanut Butter Stuffed French Toast #Recipe #EnergytoBurn #spon

I swear to you…it’s as AMAZEBALLS as it looks on here. And I have to thank my amiga Lindsey for coming over to help me create and taste test this dish! We couldn’t get enough.

Peanut Butter Stuffed French Toast #Recipe #EnergytoBurn #spon

I thank Latina Bloggers Connect and The National Peanut Board for choosing me for this awesome campaign. You can view more peanut butter info, recipes, and nutrition facts at http://bit.ly/19x0OOp.

What are your favorite snacks or treats that incorporate peanuts or peanut butter? Will you try out my recipe?

Tuesday, September 17, 2013

Candy Corn M&M’s Pumpkin Bars & Apple Cider Recipes #HarvestFun

In anticipation for fall, I’ve worked on 2 tasty fall inspired recipes as part of a sponsored post for Collective Bias®. These recipes are easy, delicious, and quick to make.

Here’s the first one!

#HarvestFun Candy Corn M&M's Pumpkin Bars #shop

Fall is definitely my favorite time of year. I get beyond ecstatic when I see the fall preview start at Bath & Body Works—I am PUMPED for all things pumpkin from that point onward. And fall also reminds me of taking drives with my mom around San Antonio. She’d take me to get my most favorite French vanilla cappuccino from the local gas station, and we’d drive around killing time. We’d shop, see a $1 movie, or just explore the town. Now that I don’t live quite that close to her, these sorts of recipes help bring a bit of nostalgia into my kitchen and heart.

Candy Corn M&M’s have been one of my other fall obsessions since they came out in 2011. They have the familiar taste of candy corn with a dash of sophistication because of the white chocolate. They melt in your mouth, and they’re so sweet and satisfying.

#HarvestFun Candy Corn M&M's Pumpkin Bars #shop

When thinking of fall goodies, I knew I had to find a way to use some delicious candy corn M&M’s and pumpkin. It may seem like an odd combo when you first think about it, but trust me, they’re a match made in heaven.

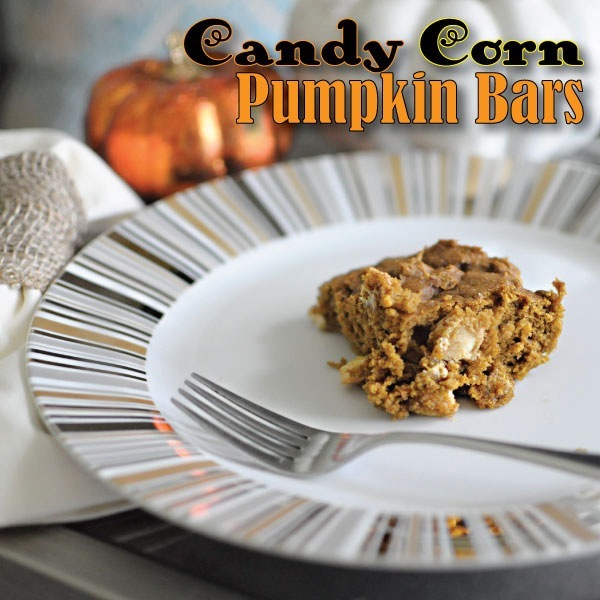
These candy corn M&M’s pumpkin bars are so moist, and they have all the familiar flavors of a pumpkin pie with the added sweetness of the candy corn M&M’s. The result is a cake bar that is anything but dense. I cannot get enough of these cake bars. I am sort of happy I only make one 8x8 pan at a time or else I’d be gaining a ton of weight. I think this fall recipe is perfect for potlucks, football games, or simply as a way to spruce up weeknight dinners.

#HarvestFun Candy Corn M&M's Pumpkin Bars #shop

But enough of my jibber jabber, you probably want the darn recipe already, right? Well here it is!

Candy Corn M&M’s Pumpkin Bars
MonicaWantsIt.com
Servings: 9 • Size: 1 cake bar
Ingredients:

  • 1/2 cup all-purpose flour
  • 1/2 cup whole-wheat flour (or just use another 1/2 cup of regular flour)
  • 2 tsp cinnamon
  • 1 tsp pumpkin pie spice
  • 1 tsp baking powder
  • 1/2 tsp baking soda
  • 1/2 tsp salt
  • 2 large eggs
  • 2/3 cup dark brown sugar
  • 1 cup canned pumpkin puree
  • 1/4 cup 2% milk
  • 1/4 cup melted butter
  • 1 tsp vanilla extract
  • 1/2 cup of Candy Corn M&M’s


Directions:
-Preheat oven to 350 degrees and spray an 8x8 pan with non-stick spray.

-Combine all dry ingredients in a bowl. In a separate bowl, whisk together eggs, brown sugar, and pumpkin until well mixed. Add in the milk, butter, and vanilla extract. Pour wet ingredients into dry ingredients, toss in the M&M’s and mix together.

-Pour it all into the greased 8x8 pan. Bake in the oven for about 15-20 minutes, or until toothpick inserted in the center comes out clean. Let cool for 30 minutes, cut into 9 cake bars, and enjoy!

#HarvestFun Candy Corn M&M's Pumpkin Bars #shop

#HarvestFun Candy Corn M&M's Pumpkin Bars #shop

The Candy Corn M&M’s are marbled throughout the bars, and they just melt when you take a bite. It’s the perfect amount of sweetness.

#HarvestFun Candy Corn M&M's Pumpkin Bars Recipe #shop

Each bite tastes better than the last. Ohmygosh.

#HarvestFun Candy Corn M&M's Pumpkin Bars Recipe #shop

And of course, you need a fall-esque drink to go along with these babies. How about some pumpkin spiced apple cider topped with homemade whipped cream? Yes. Definitely yes.

#HarvestFun Mott's Pumpkin Spiced Apple Cider Recipe #shop

I LOVE apple cider, especially when topped with whipped cream and a drizzle of caramel. It is warm, tasty, comforting, and whipping this cider up will make your entire house smell absolutely divine. It’s so easy, too, thanks to Mott’s 100% Apple Juice. Tart, yet sweet, and just perfect for fall baking and ciders. And topped with my homemade whipped cream? Well, let’s say you’ll never  need to spend money on fancy coffeehouse ciders again.

You’re welcome.

#HarvestFun Mott's Pumpkin Spiced Apple Cider Recipe #shop

Pumpkin Spiced Apple Cider w/Homemade Whipped Cream
MonicaWantsIt.com
Servings: 8 • Size: 8 oz./1 cup
Ingredients:

  • 64 oz. Mott’s 100% Apple Juice
  • 4 sticks of cinnamon
  • 4 tsp pumpkin pie spice

Homemade Whipped Cream (Optional)

  • 2 cups of heavy whipping cream
  • 4 tbsp powdered sugar (or Splenda for baking)
  • 2 tsp pumpkin pie spice
  • 1 tsp cinnamon


Directions for the Cider:
-In a heavy saucepan, pour in the Mott’s 100% Apple Juice, cinnamon sticks, and pumpkin pie spice. Bring it up to a boil using a whisk to constantly mix the cider. Once it comes up to a boil, remove from heat and allow to cool for a few minutes before serving. You could also put into a crockpot to keep warm, if needed.

Directions for the Whipped Cream:
-In a glass bowl, pour in your heavy whipping cream, powdered sugar, and spices and mix with a hand mixer until soft peaks start to form. Taste, and add more sugar/spices if needed or desired.

#HarvestFun Mott's Pumpkin Spiced Apple Cider Recipe #shop

I know that this cider has a lot of pumpkin pie spice in it, but that’s what makes it so good. Some sips you swear you taste pumpkin pie, and then the next sip you taste apple pie. Delish! Topped with the homemade whipped cream it’s just out of this world delicious. If you really want to make it gourmet, add in a drizzle of caramel. This recipe is also easily halved or quartered if you want to make it on demand.

#HarvestFun Mott's Pumpkin Spiced Apple Cider Recipe #shop

Mmm. I’m enjoying these a lot lately while blogging or watching football.

#HarvestFun Mott's Pumpkin Spiced Apple Cider Recipe #shop

I hope the Candy Corn M&M’s Pumpkin Bars and the Mott’s Pumpkin Spiced Apple Cider recipes will help get you in the fall spirit! I encourage you to create lots of wonderful memories this fall now that the weather is cooling off a bit. Take time to de-stress, enjoy life, and be with those you love.

What are your favorite fall/seasonal treats? I’d love to know!

And if you’d like to get more ideas and inspiration from M&M’s or Mott’s, make sure to follow them on social media (I do!):

For more great ideas visit the Fall Baking and Entertaining Pinterest Board.

Friday, August 9, 2013

DeLIGHTful Peach Cobbler {Recipe}

DeLIGHTful Peach Crisp Recipe: Peach cobbler doesn't have to be loaded with fat and calories. This version uses simple ingredients to amp up the flavor and tone down the calories.

Peach cobbler is one of those comfort foods that I can remember eating ever since I was a little girl. My mom and I would share a peach cobbler from Bill Miller’s in San Antonio. Or we’d buy those frozen ones and just nom nom nom at Sunday dinner. It’s sweet, gooey, satisfying. Plus it’s like a treasure hunt to eat all that delicious crust or crisp. Oh. Love.

DeLIGHTful Peach Crisp Recipe: Peach cobbler doesn't have to be loaded with fat and calories. This version uses simple ingredients to amp up the flavor and tone down the calories.

Most recipes call for a ton of sugar, butter, and all those sinfully delicious things that should be had very rarely. Well. Not anymore. I’ve been inspired so much in the kitchen after watching Kelsey’s Essentials on the Cooking Channel. She’s energetic, insightful, and really has empowered me to experiment in the kitchen and be fearless. She’s invigorated how I feel about food. If you haven’t watched her show, I highly recommend it. I never fail to learn something, and she’s the one that inspired me to buy some cast iron skillets. I cook everything in them now, and I’m just in love. I bought my cast iron skillets at Marshall’s for very little money. The small one I used in this recipe was $8 and the larger one was $15. What a bargain!

DeLIGHTful Peach Crisp Recipe: Peach cobbler doesn't have to be loaded with fat and calories. This version uses simple ingredients to amp up the flavor and tone down the calories.

One Sunday evening, my usual sweet treat craving kicked in and I had some peaches I needed to use stat. I experimented and out came this dish I am sharing with you today. It’s got the sweet, gooey, juicy, crispy and awesome taste/texture of a peach cobbler or crisp without all the guilt. Truly I think you could swap the peaches for apples or even pears and it’d be just as divine. With fall right around the corner, these sorts of desserts become my go-to favorites. Feel free to double or triple the recipe to serve more people. Betcha they won’t know it’s light!

You can even top this with ice cream or light whipped cream for a bit of extra decadence. Dig in!

Let me ask y’all: What are your favorite pies or cobblers? I love peach cobbler, but boy could I eat apple pie everyday. Sigh.

RECIPE:

DeLIGHTful Peach Crisp (Cobbler):
Peach cobbler doesn't have to be loaded with fat and calories. This version uses simple ingredients to amp up the flavor and tone down the calories. Enjoy!

Prep time: 5 minutes

Cook time: 20-25 minutes

Total time: 30 minutes

Yield: 2 Servings

Ingredients:

  • Filling:
  • 1 pound of peaches (3 large)
  • 1 tbsp. cornstarch
  • 1/4 cup Splenda
  • Dash of nutmeg
  • 1/4 tsp. cinnamon
  • 2 tsp. dark brown sugar
  • 1 tbsp. butter extract
  • 1 tbsp. water
  • Topping (Optional):
  • 1/4 cup quick cook oats
  • Dash of cinnamon
  • 1/4 cup of Splenda 
  • 2 tsp. dark brown sugar
  • 1/2 tbsp. butter

Cooking Directions:

  1. Preheat your oven to 350 degrees. Grab a small (8") cast iron skillet or a pie dish. Make sure it's well greased/floured. I use flour baking spray on my glass dishes.
  2. Slice all your peaches. I left the skin on, but do what you wish. Incorporate all the ingredients together in a bowl and ensure all the peaches are well coated. Pour peach mixture into dish. Put into the oven for about 15 minutes.
  3. Grab a small bowl and mix everything together for your optional topping. Pull the cobbler out of the oven and sprinkle the topping all over. Pop into oven for another 7-10 minutes or until the topping is nice and crisp/oats are golden brown.
  4. This recipe serves 2 people. Top with light whipped cream and enjoy!

Peaches03

Friday, June 14, 2013

Low Calorie Butter Cake Bars {Recipe}

At Walgreens, my husband and I are usually there for only one of 3 reasons.

1.) There’s a make-up sale. (Ok, that’s more me than my hubby.)

2.) We have a Redbox movie to return.

3.) Butter cake.

You see, Walgreens makes this delicious, pre-packaged butter cake that is irresistible. It’s flaky, sweet, buttery and about $1.29 each or you can buy 2 for $2.

Let’s face it…we buy 4.

Did I also mention my weight loss has sucked the past few months? Yeah. Wonder why.

Then I saw a recipe in Better Homes & Gardens’ May 2013 issue for gooey butter bars. They look JUST LIKE the morsels of awesomeness we love from Walgreens. Then I read the nutritional information- one 9x13 pan makes 24 bars for 209 calories each. Now, I’m no math whiz, but those would be some tiny squares. Even the cakes from Walgreens are like a 3x3” square for 220 calories.

So, I did what Monica does best. I found a way to lighten it up while still retaining that gooey, buttery, melt in your mouth flavor.

Low calorie butter cake bars via MonicaWantsIt.com

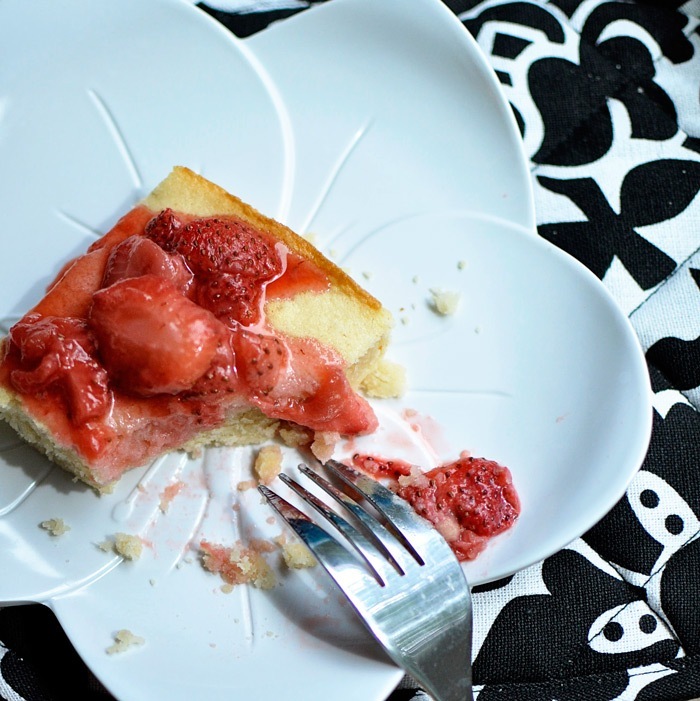
My recipe makes 15 decently sized squares for about 220 calories a piece (with strawberry topping), and you likely have all the ingredients at home already. To make it a bit more dessert-esque without a ton of calories, I made a strawberry topping for it. The end result is a buttery, flaky, shortbread like bar that is simple, sweet, tasty and perfect with a glass of iced tea. A southern treat for sure.

Here’s what you need (recipe adapted from Better Homes & Gardens’ May 2013 issue):

Crust:

  • 1/4 cup granulated sugar
  • 1.5 cups of flour
  • 1/2 cup of butter

Bars:

  • 2/3 cup softened butter
  • 1.25 cups of Splenda for baking
  • 1/4 light corn syrup
  • 1 egg
  • 1/2 tsp vanilla extract
  • 1 cup flour
  • 2/3 cup half and half

Strawberry Topping:

  • 8 oz of sliced strawberries
  • 1/4 cup of Splenda

Low calorie butter cake bars via MonicaWantsIt.com

Preheat your oven to 350 degrees. To make the crust, you combine the flour and sugar together. Then, using a pastry blender or your clean, dry hands, incorporate the butter until it’s all nice and finely crumbled together. Get a 9x13 pan lined with parchment paper, and pat your crust down.

Now for the bars, beat the softened butter with a hand mixer for about 30 seconds. Gradually add in the Splenda. Once that’s all mixed well, add in the corn syrup, egg, and vanilla extract. Alternately add in the flour and half and half and continue beating it all together. Your mixture may look a bit thick and curdled, which is ok. Carefully spoon the mixture over the crust and pop in the oven for about 30 minutes.

Low calorie butter cake bars via MonicaWantsIt.com

While that’s baking, put your sliced strawberries in a sauce pan with the Splenda. Simmer on medium until the strawberries and Splenda reduce to a nice topping consistency. If you like your sauce a little more saucey, add in about a tbsp of water. I chilled my topping in the freezer for about 15 minutes while my bars cooled.

Once your bars are cool, cut into 15 squares, top with some strawberries and enjoy!

Low calorie butter cake bars via MonicaWantsIt.com

My favorite part about this is definitely the crust, but even more so, the topping! The sauce seeps into the butter bar and it’s heaven on a plate.

Low calorie butter cake bars via MonicaWantsIt.com

The flavor profiles are amazing. Butter, strawberries, and a flaky crust. Delish! Plus, by swapping some of the sugar for Splenda, we get to eat a bit more and save calories. I’m all for that.

Low calorie butter cake bars via MonicaWantsIt.com

Sigh. I can’t wait to whip up another batch of these. Who needs Walgreens, right?

This is a simple treat that is sure to please anyone. Maybe you’ll try it out this summer at a BBQ or something.

And while we’re cutting calories and trying to be healthy this summer, I thought I’d mention Diet To Go’s Summer Shape-Up sweepstakes on Facebook. You can enter to win one month of meals. You can read official rules right here. Good luck!

What’s your favorite summer treat?

Monday, November 19, 2012

Thanksgiving Dishes with Country Crock {Recipe}


I adore Thanksgiving because it gives me an excuse to try new recipes. My favorite recipes to try out at Thanksgiving time usually revolve around 2 of my favorite dishes: potatoes and desserts.

For these recipes that I’m going to share with you today I was asked to swap butter and use a Unilever spread instead. I chose Country Crock, and I was super pleased with the results. You’ll also be happy to know that the recipes were tested on a 13-year old boy and a 30 year old guy and they both LOVED recipes.

Because they’re that good!

First up is a super easy potato side dish that is sure to please! The end result looks fancy, but I swear it doesn’t require a ton of effort.

Cheesy Hasselback Potatoes: Serves 4

Adapted from FoodNetwork.com

Ingredients:

  1. 4, 4-5 oz. potatoes (weight is before they’re peeled)
  2. 3 oz. of cheese (1.5 ounces per cheese type, grated) I used gruyere and white Vermont cheddar
  3. 1/2 cup of Country Crock Spread (melted)
  4. Salt/Pepper to Taste
  5. Bowl of water with dash of lemon juice

Steps:

1. Pre-heat your oven to 425-degrees. Rinse and peel potatoes, then soak in water with lemon juice. This keeps them from browning.

2. Once all your potatoes are peeled, thinly slice each potato about 3/4 of the way through in 1/4 inch slices like this:

I am so not a chef and my knife skills are not fab by any means, so just do your best!

3. Get your 1/2 cup of Country Crock Spread and melt it in a bowl large enough to fit your potatoes. I microwaved the Country Crock for about 30 seconds. Add a dash of salt and pepper and dunk each potato in the melted Country Crock mixture. Make sure all that yummy goodness gets into the potato layers. Reserve remaining melted Country Crock for later.

4. Pop your potatoes in the oven for about 35-40 minutes. Take them and sprinkle generously with your grated cheese and drizzle remaining melted Country Crock onto the tops of potatoes. Cook for another 15 minutes, or until fork tender and cooked all the way. Cool about 5 minutes, then serve! You end up with these wonderful potatoes that are slightly crispy on the outside, yet ooey and gooey on the inside.

So, now that you got your potatoes, you want dessert right? These 2-bite white chocolate pumpkin snickerdoodles will do the trick. Now I call these 2-bite snickerdoodles because they don’t flatten—they stay bon bon shaped! They’re dense, but have a lot of flavor and are great bite sized treats!

This recipe is also so easy that you can definitely get the kiddos involved. Look at the look of pure joy on my 13 year old brother’s face. Love that guy!

White Chocolate Pumpkin Snickerdoodle Bites: Makes 5-6 Dozen

Adapted from Six Sisters Stuff

Ingredients:

  1. 1/2 cup Country Crock Spread
  2. 1/2 cup shortening
  3. 1 cup white sugar
  4. 1/2 cup light brown sugar
  5. 3/4 cup unsweetened pumpkin puree
  6. 1 large egg
  7. 3 1/4 cup of flour
  8. 2 tsp of baking power
  9. 1 tsp of baking soda
  10. 1 cup white chocolate chips
  11. 1/2 tsp salt
  12. 1/2 tsp cinnamon
  13. 1/2 tsp of pumpkin pie spice

Topping:

  1. Cinnamon + sugar mixture (optional)

Steps:

1. Pre-heat your oven to 400 degrees. Mix together the margarine, shortening, sugars, pumpkin, and egg. I used my KitchenAid mixer, but you could also use your hand mixer or some elbow grease. Make sure to use a large bowl though because there’s lots of dough made from this recipe (which can easily be halved).

2. Once those ingredients are mixed, incorporate remaining ingredients (flour, baking powder, baking soda, salt, cinnamon, pumpkin pie spice, and white chocolate chips). REALLY mix it well! You don’t want to end up with cookies that have a flour aftertaste, so make sure to really work all the ingredients together well.

3. Put your dough in the freezer for about 10 minutes. This makes it easier to work with, especially if you’re using a cookie scoop, like I did.

4. Once your dough is chilled, use a cookie scoop or your hands to form into little balls. If desired, roll them into a cinnamon sugar mixture to coat. I did this on about half of my cookies, and I do think it helped amp up the flavor a bit, but you can omit this step.

5. Bake for about 8-10 minutes. They likely will not flatten, so don’t fret! Pumpkin puffs them up, but they’re still tasty. Unlike other cookies, I feel like these taste even better the day after. Once they’re out of the oven, let them cool and enjoy!

I didn’t taste or notice any difference when omitting the butter in favor of using Country Crock Spread by Unilever. It’s nice to know I can easily make that swap without sacrificing flavor. Now I know my Thanksgiving dinner will go off without a hitch!

What dishes could you use Country Crock Spread in this Thanksgiving?

Thank you to Good to Know & Unilever Spreads for being a sponsor. I was selected for this opportunity as a member of Clever Girls Collective. All opinions expressed here are my own.

Wednesday, July 25, 2012

Cream Cheese Glazed Red Velvet Loaves {Recipe}

Today I have a delicious, quick and easy recipe inspired by the new Renuzits Tempting Indulgences Air Fresheners.

Time to dig in! I am a member of the Collective Bias™ Social Fabric® Community.  This content has been compensated as part of a social shopper insights study for Collective Bias™. and Renuzit #CBias #SocialFabric

I was sent the red velvet cake scent and the chocolate covered cherries scent. Now, I will be totally honest in saying that I do not think the red velvet cake scent smells anything like red velvet cake. My friends and family were over on Sunday, and they agreed. I hope Renuzits will improve their formula for that one because it smells a little more like cough syrup than red velvet cake.

The chocolate covered cherries scent is spot on, and that’s really cool. You can have your kitchen smell like a bakery without all that work.

I would love to make red velvet cake from scratch, but it always comes out dry. Cake mix it is! I'm making everything else from scratch though. :) I need cream cheese for my cream cheese glaze. With all the other flavors, I decide to go with fat free since you wouldn't be able to tell the difference.

But I love baking, so I went out to Walmart to pick up items to make a red velvet cake that’s more like a loaf/banana nut bread type of dessert. Not cupcakes, not a sheet cake…more like I could have a slice of it with coffee in the morning. And instead of icing, I wanted a glaze and some nuts. I decided on a cream cheese glaze and candied pecans to go over my red velvet loaves. I cheat, and I totally use a box mix for red velvet cake because all the recipes I’ve made from scratch come out very dry. However, the cream cheese glaze and candied pecans I made all on my own. Overall, prep time is about 20 minutes for cake, pecans and glaze and actual oven time is about 40 minutes. In an hour you can have delicious red velvet cake glazed with cream cheese and candied pecans.

Yum!

My local Walmart didn’t have this new line of scents/fragrances in stores yet, but if you’re curious about the scents (red velvet cake, chocolate covered cherries and crème brulee) you should look for them at your local Walmart store soon!

Ingredients:

Red Velvet:

-1 box of red velvet cake mix

-Eggs, water, oil (or whatever your boxed cake mix calls for)

-1/4 cup of chocolate chips (optional)

Cream Cheese Glaze:

-1 package of fat free cream cheese

-1/2 cup of powdered sugar

-1/2 tbsp of vanilla extract

-4 tbsp of Coldstone Creamery Sweet Cream Creamer (or milk)

Candied Pecans:

-2 oz. package of chopped pecans

-1/4 of 1 egg white

-3 tbsp of sugar

-1/2 tsp of salt

And candied pecans...

What I did first was turn my oven to 350, and mix my ingredients together for the pecans, and pop them into the oven for 10 minutes. Make sure to put your pecans on parchment paper so they don’t stick to your pan.

I get home, and I get to baking!

Next, I made my cake mix according to the instructions on the package, BUT I added ¼ cup of mini chocolate chips. It gives it an extra surprise in there. Now, here’s where I went a different route and baked the red velvet cake in 2 loaf/bread pans. This makes it easy to keep one at home and take one to work so I am not tempted! I did have to adjust the baking time to about 40 minutes since the loaf pans are deeper than regular cake pans.

And then I make my cream cheese glaze.

While the pecans are cooling and the cake is baking, I beat together all the ingredients for my cream cheese glaze. It helps if your cream cheese is room temperature, and it also helps if you beat that first on medium (until creamy) and then add in the other items.

RedVelvetCake03

The secret to my cream cheese glaze is using Sweet Cream creamer instead of milk, but you can use milk, too. I just think it gives the glaze that extra layer of flavor.

RedVelvetCake05

RedVelvetCake06

Finally, once your loaves are done let them cool for about 20 minutes, top with the cream cheese glaze and pecans. Now dig in!

I’m glad I got to sample the new Renuzits Tempting Indulgences scents. And I love their slogan: “Make Every Day Sweeter”.

Any excuse to make a dessert!

You can see more of the Renuzits family of products online:

Renuzit website:  http://www.renuzit.com/

Renuzit Facebook page: http://www.facebook.com/Renuzit

I am a member of the Collective Bias™ Social Fabric® Community.  This shop has been compensated as part of a social shopper insights study for Collective Bias™ and Renuzit #CBias #SocialFabric #TemptYourSenses

Sunday, March 25, 2012

Bananas Foster Bread Spread {Recipe #EasterMeals}

Sometimes when people show up unannounced (“the pop-in”) or you’re hosting company over between meals or late at night, you sometimes wonder what to serve that’s not too heavy nor too light. Personally, I try to keep any appetizers or food I make very simple so I am not stressed. A great way to do that is by having some gourmet bread on hand and being able to whip up a bread spread. In 15 minutes flat, you can have a lovely treat for company to munch on.

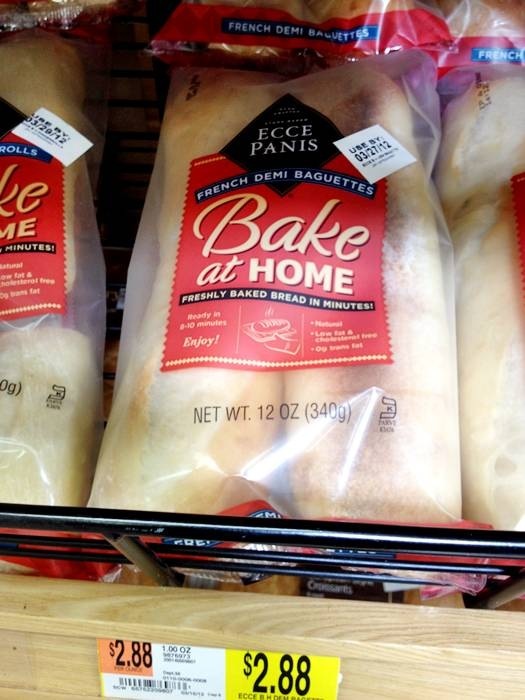
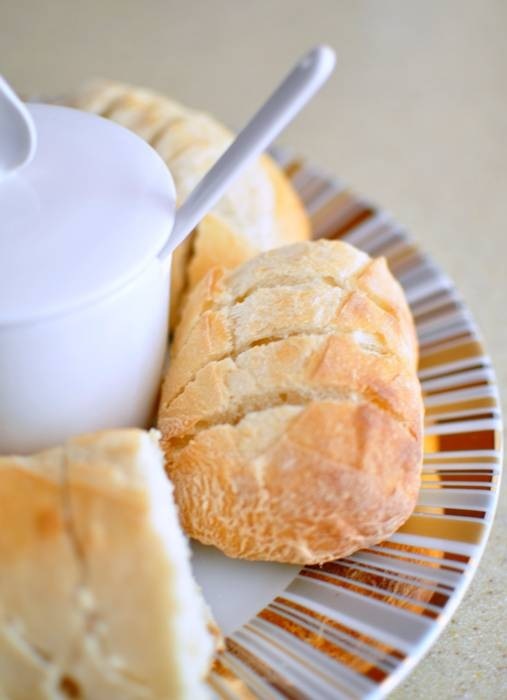
My husband and I love gourmet bread, but hate for it to be expensive or taste stale/old once you get home. Luckily we’ve discovered Ecce Panis bread while shopping at Walmart. It’s a take-and-bake bread which means you can have fresh baked bread in minutes.

Baguettes! Fancy bread that bakes up quickly and will be a delicious snack after a long day of working around the house. Perfect for entertaining too. You can have fresh baked bread in minutes!

Usually when you think of bread spreads you think of garlic butter, herb butter, olive oil or a simple jam/compote. Well, I thought I’d get creative and use one of my favorite desserts as an inspiration for a spread that’s perfect for brunch or perfect for a late night Wii marathon with friends. It’s sweet, creamy and requires ingredients you likely have on hand.

EccePanis01

Ingredients:

-Package of Ecce Panis baguettes

-2 RIPE bananas (I used 1.5 bananas)

-1 block of fat free cream cheese

-2 tbsp of caramel topping

-1/4 cup of chopped pecans

-1/3 cup Splenda/Sugar

-1 tsp of vanilla extract (not shown)

Now, for this spread I didn’t use anything but a big spoon and a bowl. No mixers, etc. are needed as long as you pick ripe bananas and let your cream cheese get to room temperature.

Step 1- Preheat oven to 375 and set your timer for 9 minutes. Pop your baguettes in the oven and grab a large spoon and bowl.

I get home and put the Ecce Panis baguettes in the oven...

Step 2- Slice up bananas into the bowl. I started off with 1 banana and then ended up adding another 1/2 of a banana to get that flavor profile to come across more.

EccePanis03

Step 3- Add in block of cream cheese and vanilla extract. Combine and mush bananas as you go.

EccePanis04

Step 4- Once your bananas, cream cheese and vanilla extract are all in harmony, add in 2 tbsp of caramel topping.

Whip up my bananas foster inspired spread...

Step 5- Add in 1/3 cup of sugar. You can add more or less depending on how sweet you want your spread. I wanted mine slightly sweet. Mix until all ingredients are combined.

EccePanis07

Step 6- Put that in the freezer for about 5 minutes while we get the bread out of the oven. Slice it on the diagonal, about 1/4 inch thick per slice.

EccePanis08

Step 7- Now grab a large plate, place your spread in a small ramekin and top with pecans (note: if your guests have nut allergies, you might want to half the spread or leave the pecans to the side as an option). Place your bread around the plate.

EccePanis09

EccePanis10

If you make this ahead of time, make sure to keep the spread chilled in the fridge. Since it has cream cheese, you don’t want it to be sitting out for a long period of time.

EccePanis11

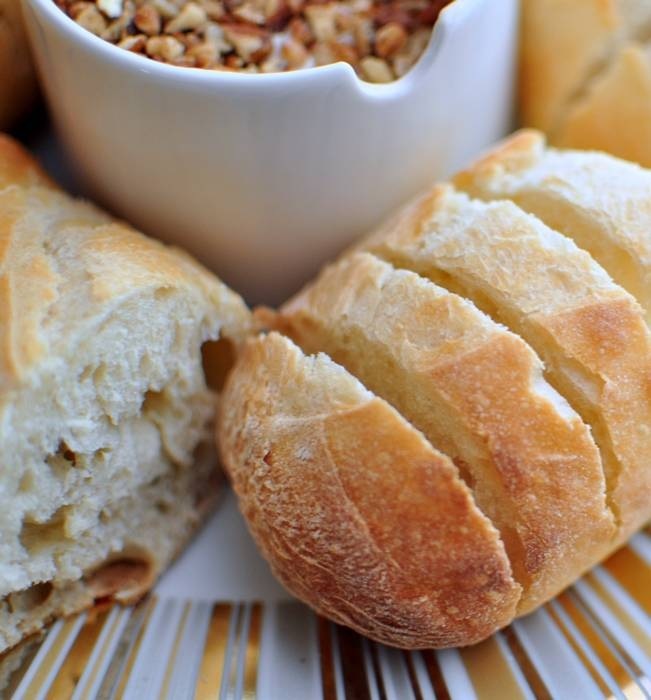
The spread is so good over warm Ecce Panis bread. It’s creamy, has good flavors like banana and caramel and the pecans add that bit of bite to it that sends this spread from ordinary to fab. This spread would be great on anything. And really, when the ingredients/flavors all compliment each other, you can’t go wrong. So, I know Easter is coming up and for those who have to plan Easter Meals, maybe you can do something like this? Just an idea.

EccePanis12

Yummy. Mmm.

And 10 minutes later am enjoying fresh baked bread with a tasty, sweet bread spread. Can't top that!

Hope you enjoyed my easy, delicious bananas foster bread spread recipe.

This shop has been compensated as part of a social shopper insights study for Collective Bias. #CBias #EasterMeals