Showing posts with label review. Show all posts

Wednesday, October 23, 2013

Gevalia Mocha Latte #CupofKaffe

Gevalia cafe-style K-Cups #CupofKaffe #shop

As part of a shopper insights campaign for Collective Bias, I was tasked with creating latte art using Gevalia’s new café-style K-Cups. You can view my shopping journey over on my Google+ page. It was harder than I thought it was going to be, but I’ll delve more into that later.

Gevalia cafe-style K-Cups #CupofKaffe #shop

The new Gevalia café-style K-Cups come in three varieties: Cappuccino, Caramel Macchiato, and Mocha Latte. I chose Mocha Latte because I love mocha/chocolate inspired drinks. These new K-Cups are pretty awesome in that you can have that rich, foamy, coffeehouse style drink at home in under 2 minutes using your Keurig. Although it’s a 2-step process, it’s not complicated at all, I swear. You first take the froth packet (see below), and pour it into a mug. Step 2 involves putting the mug under your Keurig spout/dispenser and brewing the Gevalia Mocha Latte K-Cup over the froth in the mug using the 8 oz. setting on your Keurig, and you pretty much have a delicious, gourmet latte from the convenience of your own home. And the calories are only 80 per serving, so it’s a treat that I can have daily without stressing. It is delicious!

Gevalia cafe-style K-Cups #CupofKaffe #shop

So, something I failed to think about before attempting latte art was how dark mocha drinks can be. I tried powdered sugar and a stencil…no luck. I tried the toothpick trick to bring the liquid through the foam and make a design…no luck.

I was stumped on how to make simple latte art. Then I thought of a super easy idea that anyone can do. Cookies!

These are thin shortbread/wafer type vanilla cookies. They go well with anything, and they are a blank canvas. Then I thought, well, how can I decorate them and amp up the flavor of the Gevalia Mocha Latte drink?

Gevalia cafe-style K-Cups #CupofKaffe #shop

Caramel! I poured some caramel syrup into a squeezy bottle, and drew a cute heart on the cookie.

Gevalia cafe-style K-Cups #CupofKaffe #spon

Pretty easy, just go slowly! You can also make initials, draw a flower, happy face, etc. Plus you can really use any syrup that has color to it and a flavor profile that will complement your drink.

Then you gently place it onto the foam of the mocha latte and enjoy! These may seem like an extra step, but it’d be so cute to do this sort of thing on Christmas morning, right?

Gevalia cafe-style K-Cups #CupofKaffe #spon

It’s so simple, and who doesn’t love cookies with their coffee? I found that if I just used a spoon to scoop the cookie out, and I had a tasty treat to munch on with my coffee. I also found that just letting the cookie sit in there makes my mocha latte heaven in a cup. The gooey pieces of mocha-soaked cookie swirling around are AMAZING. But, just so you know, the foam holds it up well enough that it doesn’t get soggy instantly.

Gevalia cafe-style K-Cups #CupofKaffe #spon

There you have it! A super quick latte (with art) thanks to new Gevalia café-style K-Cups. You can find a coupon for $1.50 off these new K-Cups over here. If you want to learn more about the Gevalia product line, check them out online/social media. They often do free samples, so it’s worth it to follow their streams so you can get deals and samples.

What is your favorite K-Cup? I’ve only had my Keurig for 2 months, and I’d love to hear about which products you love!

Thursday, October 10, 2013

#EnergytoBurn Peanut Butter French Toast {Recipe}

Peanut Butter Stuffed French Toast #Recipe #EnergytoBurn #spon

This post/recipe are part of a sponsored campaign in collaboration with Latina Bloggers Connect and The National Peanut Board.

I love when I get asked to create recipes—especially when they deal with a tasty, affordable treat that I eat almost daily…peanut butter! Peanuts and peanut butter are a great source of protein, and they give me energy to get through the day. A serving of peanuts has almost 7 grams of protein per serving, and I need protein to stay satiated and not eat a bunch of junk food.

I’m not kidding you when I say I literally have peanuts with me literally everywhere. I have peanut snacks in the car and peanut butter at work. You can put peanut butter on just about anything like oatmeal, muffins, crackers, celery, fruit. Or you can be like me and eat it straight off the spoon. I don’t judge! My 3 p.m. snack usually consists of a peanut butter and an apple. Growing up I had pan tostado (toast) slathered with peanut butter and strawberry jelly for breakfast or an after school snack. It was so delicious, and in honor of Hispanic Heritage Month, I revamped my pan tostado recipe to a more fun, sophisticated dish that still marries together all those tasty flavors.

Peanut Butter Stuffed French Toast #Recipe #EnergytoBurn #spon

My peanut butter stuffed French toast brings together creamy, salty, sweet peanut butter with strawberries, bananas, and thick Texas toast. The result is a quick, impressive dish that is sure to please the entire family. I love a hearty, gourmet Sunday breakfast, but I am also really busy and don’t like spending hours in the kitchen. This peanut butter infused breakfast packs fruit, protein, and decadence and is ready in under 20-25 minutes. Plus, it’s a cheap meal for a family of 4.

Peanut Butter Stuffed French Toast
MonicaWantsIt.com
Servings: 4

Ingredients:

  • 8 slices of Texas toast (thick sliced white bread)
  • 1/2 pint of sliced strawberries
  • 2 bananas, sliced
  • 2 eggs
  • 1 cup heavy cream
  • 2/3 cup milk
  • 1/4 tsp cinnamon
  • 2 tsp vanilla extract
  • 1/2 cup creamy peanut butter with honey
  • Dash of salt

Directions:

  1. Slice strawberries and bananas thinly. Keep them in a bowl until ready to top French toast.
  2. In a bowl, use a hand mixer to beat heavy cream until it forms soft peaks and you have whipped cream. Add in 1 tsp of vanilla extract + peanut butter and whip until it becomes peanut butter whipped cream. Resist all temptation to eat all the whipped peanut butter.
  3. Preheat a non-stick pan or griddle to get ready to cook French toast. (Medium heat works best)
  4. In a pie dish or shallow baking pan, whisk together eggs, milk, 1 tsp of vanilla extract, cinnamon, and salt. Soak slices of Texas toast in the mixture (make sure to soak each side). Cook on each side about 2-3 minutes, or until golden brown.
  5. Place one slice of French toast on a plate, top with a heaping tablespoon or 2 of peanut butter whipped cream, then place other slice of French toast on top. Top with a generous serving of strawberries and bananas, and dust with powdered sugar, if desired.
  6. Eat and enjoy!

Peanut Butter Stuffed French Toast #Recipe #EnergytoBurn #spon

Strawberries really go well with the peanut butter because they’re sweet and tart, but the real star of the show is this peanut butter whipped cream!

Peanut Butter Stuffed French Toast #Recipe #EnergytoBurn #spon

The peanut butter whipped cream becomes so light and fluffy, so it simply melts into a frothy delight all over the plate. It’s like peanut butter syrup!

Peanut Butter Stuffed French Toast #Recipe #EnergytoBurn #spon

Peanut Butter Stuffed French Toast #Recipe #EnergytoBurn #spon

Peanut Butter Stuffed French Toast #Recipe #EnergytoBurn #spon

I swear to you…it’s as AMAZEBALLS as it looks on here. And I have to thank my amiga Lindsey for coming over to help me create and taste test this dish! We couldn’t get enough.

Peanut Butter Stuffed French Toast #Recipe #EnergytoBurn #spon

I thank Latina Bloggers Connect and The National Peanut Board for choosing me for this awesome campaign. You can view more peanut butter info, recipes, and nutrition facts at http://bit.ly/19x0OOp.

What are your favorite snacks or treats that incorporate peanuts or peanut butter? Will you try out my recipe?

Wednesday, October 9, 2013

Tuc Away Table {Review}

TucTable01

So, I was sent a Tuc Away Table to review, and I have mixed feelings about it. When I first was approached about the review, I said yes because I thought it’d be like the Pier 1 Imports hayworth C-table that I love so much. And it’s not. I use my Pier 1 table to type on my iPad, put my beer/dinner, or put a bowl of popcorn. If I do those things on the Tuc Away table, I risk knocking them over if I have a sudden arm movement. Also, the low height makes it super easy for Pee Wee (my pooch) to steal my food.

As you can see, compared to the Pier 1 table, the Tuc Away Table is really short. And if you’re not used to having a table there, you may you will get up all of sudden and scratch the beejeezus out of your knee on said table. I should know, I have a nasty scratch that is healing because of the table. I didn’t put it on the side of the sofa because I don’t have room, so I wanted it to be more like a table for guests to put drinks/food on.

TucTable02

I will say that the quality is FAB. It is beautiful, it is high quality, but I do think the height and the overly complicated, yet seemingly simple-ish, set-up instructions take away from it. The table, which is heavy (in a good way), comes with a little ruler contraption that you use to measure the space under the couch where you’ll be putting the table. Using that number, you put the bracket into the holes on the back of the table that match that number. However, if you’re like me, you’ll measure wrong, put the bracket in 2 holes that aren’t the same number, and fiddle with it for about 10 minutes until it’s snug and secure.

Not a huge deal, but a tad inconvenient.

Also, it’s expensive! They run about $70+, which is a little steep. With a few improvements, this could be a great product. The one thing I do love, besides the finish/quality, is that the top folds down and then it almost just kinda blends into the profile of whatever furniture it’s attached to.

TucTable03

To sum it up…

The pros:

  • Good quality
  • Pretty wood color
  • Semi-easy to set-up
  • Good for dorms/low profile beds/kids room/accent chairs/recliners (if you have room on the sides)

The cons

  • Too short
  • Overpriced
  • Semi-complicated set-up
  • Limited options for the wood finish
  • It’d be nice to have a pocket for remotes or something

So, there ya have it. You can view their set-up videos and check out the finishes at http://www.tucawaytables.com/

Do you have similar tables in your home? Do you like accent tables?

Tuesday, October 8, 2013

Tai Pei Review & BOGO Free Offer

Tai Pei Food Review

I got over my fear of Asian food thanks to this campaign from SocialMoms. I am usually not the type to seek out Asian style entrees, but I am trying to be more adventurous with my food choices, and I am also trying to not eat out at lunch as much. I got some coupons to try out Tai Pei entrees, and at only $2.18 each, they are a bargain lunch for the working woman (and man!).

My lunch hour consists of about a 5 minute drive home, so I like to maximize my 50 minutes at home by trying to prepare lunch in under 10 minutes. The Tai Pei entrees I tried are ready in about 6 minutes, plus 2 minutes of cooling time. So, in those 8 minutes, I wash dishes, let the dog out, check my email, and then I’m ready to enjoy my lunch. My fave was definitely the beef & broccoli.

Tai Pei Food Review

I loved that there are actual broccoli florets. and not just a bunch of stems. There was also a good amount of meat, but as always, I wish there was a tad more. The great thing is that you can just heat it up and eat—no plate required! I will note that you do not take off the plastic wrapper before you microwave it, so just a tip about that. My instinct was to remove the wrapper. The portion is great (not too much, not too little), and even my hubby loved the entrees. We both work at the same employer, so we come home for lunch together and Tai Pei Asian Foods provide quick, affordable, tasty meals for anyone that is on the go.

Tai Pei Food Review

I know a lot of my readers are calorie/portion conscious, and these entrees come in at under 450 calories, plus you can always add more veggies. The sodium is a smidge high, so drink lots of water when you have these meals. Overall, I highly recommend the Tai Pei line of foods, and you should check your local grocery store to see if they have the Asian Garden entrees which are geared a little more towards health conscious folks like me. They also have appetizers that look really good, too. I’ll definitely be adding Tai Pei meals to my lunch meal options.

If you’d like to give them a try, you can print out a buy one, get one free (BOGO Free) coupon right over here: http://bit.ly/1aLwKkF

You can also view all the Tai Pei line of food products at www.taipeifood.com

What are your favorite Asian/frozen meals? What do you do for quick lunches during the work week when you’re busy?

Tuesday, October 1, 2013

Open Faced Pot Roast Sandwich { Easy Meals}

Open Faced Pot Roast Sandwich Recipe #KraftRecipeMakers #shop #cbias

My husband and I are sort of thrilled I was chosen for this sponsored Collective Bias campaign with #KraftRecipeMakers because we are always so short on time and stressed from work to cook. Sometimes we come home to quickly eat dinner and then have to go back to work. I know…no fun!

We use that as a constant excuse to eat out, and it doesn’t do our waist lines and bank account any favors. The new Kraft Recipe Makers line (seen below) takes the guess work out of “What to make?” or “What’s a good, quick meal?” I loved how affordable the product was, and it’s definitely something I’ll be adding to my Walmart shopping list from now on. The meal starter kit was about $3, and there’s several recipes on the box to help you get inspired or creative. Overall, this recipe can feed a family of four for about $20. Try doing that at a restaurant!

Open Faced Pot Roast Sandwich Recipe #KraftRecipeMakers #shop #cbias

Personally, I like using meal helpers like this because they take the fuss out of a home cooked meal. I love, love, love pot roast, but I hate all the prep and stuff that can go with it. These open faced pot roast sandwiches are super easy, there’s literally under 15 minutes of prep, and it is delicious. My house smelled like heaven while this roast was cooking. Pairing simple, fresh ingredients with the Kraft Recipe Makers can make any night, even a tiresome weeknight, a special occasion. Quick, easy family meals don’t have to be a chore.

I made this as a crockpot recipe, because it’s super quick to get this going in the morning as I head out, and when I come home after work dinner is literally ready to be served. It simply doesn’t get any easier than that, folks.

The recipe is at the end of this blog post, but I do want to highlight a few things I did to put this recipe over the top.  I whipped out my trusty cast iron skillet to give my chuck roast a crispy, peppery crust. Any pan can work; I just happen to be kind of obsessed with my cast iron skillet right now.

Open Faced Pot Roast Sandwich Recipe #KraftRecipeMakers #shop #cbias

This herb sauce? Oh. Em. Gee. It’s so tasty, and it really brings out the savory, mouthwatering flavors of pot roast. Bravo, Kraft!

Open Faced Pot Roast Sandwich Recipe #KraftRecipeMakers #shop #cbias

When picking out a bread for your sandwiches, try to pick something like a garlic herb loaf. It’ll make your entire recipe/dish a bit more flavorful, and who doesn’t love tasty, crusty bread? Yum.

Open Faced Pot Roast Sandwich Recipe #KraftRecipeMakers #shop #cbias

And finally, it really is super simple to start with this…

Open Faced Pot Roast Sandwich Recipe #KraftRecipeMakers #shop #cbias

And end up with this. Yes, those are homemade mashed potatoes, and no it didn’t take me more than 10 minutes. Pinky promise!

Open Faced Pot Roast Sandwich Recipe #KraftRecipeMakers #shop #cbias

Open Faced Pot Roast Sandwiches
MonicaWantsIt.com
Servings: 4
Ingredients:

  • 1 Kraft Recipe Makers Kit (New England Pot Roast Kit)
  • 2.5 lbs. beef chuck roast
  • 1 bag of baby carrots (1 lb.)
  • 1 white onion, sliced
  • 16 oz. bag of microwaveable baby reds (found in produce section)
  • 1/2 stick of butter
  • 1/2 cup of milk
  • 2 oz. light cream cheese
  • Salt & Pepper
  • 1 loaf/8 slices of bread (I used garlic herb from Walmart)
  • Cheddar cheese, shredded

Directions:
  1. Sear your chuck roast in a cast iron skillet on both sides. Coat chuck roast with pepper before searing each side (no salt!).
  2. Throw your baby carrots, sliced onion, and chuck roast into a slow cooker/crockpot. Pour the Kraft Recipe Makers Classic Herb Simmer Sauce all over the roast. Set your slow cooker to cook on high for about 7-8 hours. A slightly larger roast will yield a longer cooking time.
  3. When there’s 15 minutes of cooking time left (or when you come home from work/shopping/etc.) pour the finishing sauce over the roast and allow to cook for 15 more minutes. In the meantime…
  4. Warm-up or lightly toast your slices of bread with some butter. I threw my slices in a 350 degree oven for about 7 minutes while I made the mashed potatoes.
  5. Throw your microwaveable baby reds in the microwave for 6-7 minutes. Once they’re cooked, toss in a bowl and mash with milk, cream cheese, butter, and salt/pepper to taste.
  6. Grab a plate, arrange 2 slices of bread, top with about 1/2 cup of mashed potatoes, and a hearty serving of pot roast. A dash of cheddar cheese adds gooey awesomeness.

That’s it! Maybe 10 minutes of prep before tossing it into the slow cooker, and maybe another 15 minutes to prep to serve and you have a tasty, semi-homemade meal that your entire family can quickly enjoy. And if you want to be extra fabulous, you can arrange your bread so that you end up with a heart shaped sandwich.

KraftRecipeMakers6

Awww. :)

Every bite is better than the previous one. I love the buttery bread, the creamy mashed potatoes, and the salty, savory pot roast in each bite. These sorts of recipes make me want to eat at home rather than eat out. Am I right?! Daniel and I could eat this once a week and not get bored. No more stress eating out for us!

You can find out more about the awesome products by Kraft Foods over on their Facebook page.

What are your favorite pot roast recipes? Do you enjoy cooking with a slow cooker in your home? Let’s talk about it in the comments section (please!)

Thursday, August 29, 2013

Healthy Smiles #OralbWOW

#spon: I'm required to disclose a relationship between our site and Oral Care Influencer Network. This could include the Oral Care Influencer Network providing us w/content, product, access or other forms of payment.

So, I wrote about my love affair with my new toothbrush because it keeps my teeth healthy and shiny, plus it keeps my dentist off my butt. It’s a good experience all around. Well, as part of the #OralbWOW experiment I got sent the toothbrush without the charger. Cruel and usual punishment, you say? Not quite…well, maybe.

No, no, really it’s that Oral-B wants to know what we’re willing to do to get our hands on our chargers. Give up our first born? Go without deodorant to work? No caffeine for a week? Well, I don’t have a child, don’t want people at work to murder me, and I don’t want to murder anyone due to lack of caffeine. What exactly am I willing to do to get my Oral-B Deep Sweep TRIACTION 1000 power toothbrush charger?

I narrowed it down to these 3 things that I’m willing to give up now that I’ve gone a few days without my beloved toothbrush:

  • I’d give up watching the Cooking Channel for a week. This pains me because I really love all the shows on there, especially dealing with fancy cocktails!
  • I’d be willing to give up my latest obsession with iced peach tea. I can’t get enough, and I am just constantly wanting peach tea in any iced format lately. Obsessed.
  • And this one probably pains me the most, but I’d be willing to sacrifice one happy hour outing with friends. :-(

There you have it—I really want my darn charger! I got used to the toothbrush, so having to use the manual one is like a non-fun form of torture. I review all products I get really honestly because I know friends and family read this blog, so I mean it when I say that this toothbrush rocks. I have tried other rechargeable toothbrushes in the past and wasn’t too thrilled or satisfied to really make the switch. The Oral-B Deep Sweep toothbrush is truly great due to how well it battles plaque and other yucky things that make for unhealthy smiles. In conjunction with flossing and using a good toothpaste, it can really help makeover your smile.

But don’t take just my word for it! You can read others’ experiences during the #OralbWOW experiment right over here.

Thanks to Oral-B for allowing me to participate in this fun opportunity, and I hope I get my charger soon! (Hint, hint!)

Like Oral-B on Facebook

Follow Oral-B on Twitter & visit the wowexperiment.com to see what happens when people switch to power brushing.

Monday, August 26, 2013

Healthier Smiles with #OralbWOW

#spon: I'm required to disclose a relationship between our site and Oral Care Influencer Network. This could include the Oral Care Influencer Network providing us w/content, product, access or other forms of payment.

I hate to admit that although my mom has been in the dental profession for like over 25 years, I really despise going to the dentist. I almost feel like they judge us a bit, right? “You drink a lot soda, eh?” or something along those lines. This summer I forced myself to go for a cleaning and check-up, and I had a few cavities. At 28 years old, it’s not fun to be told these things, but I vowed to take better care of my teeth so I could have a healthier smile. One of my least favorite things is flossing…well, to be more specific, I hate flossing the my top, back teeth. I always make myself gag, and I have to really work at it everyday to make sure I am doing my dental homework.

Luckily, the kind folks over at Oral-B sent me the new Oral-B Deep Sweep TRIACTION 1000 power toothbrush, with a retail value up to $64.99, to test out for their #OralbWOW experiment. It seemed like perfect timing given my lackluster dental check-up.

This toothbrush, in conjunction with daily flossing and brushing twice a day, has made my dental homework easier and more effective. I’m crossing my fingers it’ll help me get an A+ at the dentist when I go back. It has powerful bristles that really tackle plaque, which is something my dentist told me to focus on when looking for a toothbrush/toothpaste regimen. The TRIACTION 1000 works marvelously! Here are some of my favorite features:

  • I feel the little bristles at the top working on/in-between my teeth and gums. I can literally feel them scrubbing.
  • Every 30 seconds the brush vibrates telling me to move onto another quadrant of my mouth. This means I brush my teeth for a FULL 2 minutes,
  • Rechargeable battery + replaceable heads= earth friendly toothbrush
  • I feel I get a deeper clean than when using a manual toothbrush- this kind of surprised me

The first word that literally came to mind when I first used it was, “Wow!” A deep clean, fresh feeling without a visit to the dentist’s office. I will definitely keep using the Oral-B deep sweep from now on, and I think my hubby will, too, as soon as we buy him his own toothbrush head. I think this new brush will lead to a happy dentist and a happy Monica.

You can check out Oral-B on social media for great news, promotions, and tips on maintaining oral health and a beautiful smile! Plus you can learn from others who have participated in the #OralbWOW experiment and read their reviews and thoughts on this awesome new toothbrush.

Like Oral-B on Facebook

Saturday, June 29, 2013

#NIVEAIndulgence {Health & Beauty}

I was sent a pretty awesome kit from Nivea as part of the #NIVEAIndulgence challenge. What is that? Basically, for 10 consecutive days, I replaced my usual body wash/soap products with the NIVEA products I was sent to see if my skin felt any different, etc. The kit also included a scented candle, plush bathrobe, and a $50 gift card to Bed, Bath & Beyond to help create my own little bathroom oasis. I was like, “Count me in!” I usually try to just hurry up and get in and out of the shower, so I tried really hard to just unwind and enjoy a spa like experience for 10 days.

Win a $150 #NIVEAIndulgence kit thru 7/10/13 @ monicawantsit.com

Boy was it worth it! As you can see above, I was sent NIVEA Touch of Smoothness (moisturizing body wash) and NIVEA Touch of Renewal (lathering body scrub). I used both during the challenge, and a dollop’s worth on my blue loofah proved to be plenty. I’ll review them both individually:

NIVEA Touch of Smoothness:

  • The scent is AWESOME! It’s clean, fresh, and a welcome deviation from my usual floral-esque body wash choices.
  • Left me feeling very soft and moisturized in really rough spots like my elbows/knees.
  • No oily feeling afterward.
  • Suds up really nicely.

NIVEA Touch of Renewal:

  • Smells clean and refreshing.
  • Has little microbeads that help exfoliate. I wish there were more of them! :( I really think more microbeads would take this to another level.
  • I’ve found when using scrubs I tend to have to use more product—not the case here. Lathers up really well and I felt smooth and clean afterwards.
  • Of the 2 products, this one probably felt a bit more “spa” like, but I still think I prefer the other body wash just a tad. Both are great though!

Overall, using the 2 products left me feeling clean, soft, moisturized and pampered. And taking this time for myself also helped a lot after stressful days. If I forgot to put on lotion, I was still not ashy/dry on my elbows like usual, so I do think these products helped my skin soak up the NIVEA goodness. My favorite thing other than the cosmetic perks of nicer/smoother skin is the scent. It’s clean and simple. Love it!

Win a $150 #NIVEAIndulgence kit thru 7/10/13 @ monicawantsit.com

To complete my bathroom oasis, I used the $50 gift card to Bed, Bath & Beyond to purchase a Bluetooth iHome speaker so I could blast my tunes while I am in the shower.

Win a $150 #NIVEAIndulgence kit thru 7/10/13 @ monicawantsit.com

My husband uses it a lot too, and we love how sleek the white speaker looks on our marble countertops. I feel like I am in a fancy hotel bathroom every time I take a shower. My other favorite part of my bathroom oasis is my shower itself. It’s a semi-circle and the door slides on a track.

Win a $150 #NIVEAIndulgence kit thru 7/10/13 @ monicawantsit.com

I’ve had this shower for almost a year, and I cannot get enough of it. It’s so modern!

Win a $150 #NIVEAIndulgence kit thru 7/10/13 @ monicawantsit.com

Thanks to the #NIVEAIndulgence challenge, I have pampered myself into softer, smoother skin that feels great to the touch. Although every time I get into my bathrobe, I fall asleep. It’s so plush and luxe. I’ve never had a bathrobe before and now I look for excuses to put it on. All the time. Also, I’ve created a #NIVEAIndulgence Pinterest board about things that I think of when I think of indulgence. I dream of indulgent things like spa days, facial treatments, expensive shoes, luxurious naps, tasty food, and exotic destinations. What do you dream of when you think about indulgence?

Well, I want you to indulge and pamper yourself like I got to, so I’m giving away a #NIVEAIndulgence kit like I received!

You’ll get:

  • 2 NIVEA products
  • Scented candle
  • Plush bathrobe
  • $50 Bed, Bath & Beyond gift card
  • Total value: $150

You can enter below using Rafflecopter. The contest is open from June 29 until July 10. Must be in the US and 18+ to enter/win.

a Rafflecopter giveaway

The content and opinions on this blog are purely those of the author and do not reflect the views of Beiersdorf Inc., or any of its affiliates. The author has been compensated with free products as part of the author’s participation in this promotion. Even though the author of this blog receives compensation for the posts or advertisements, the author will always provide his or her honest opinion, finding, belief, or experience on those products. Any product claim, statistic, quote or other representation about a product should be verified with the manufacturer, provider or party in question. In addition, the author is professionally and/or personally acquainted with the manufacturer of the products being reviewed. Any results described by the author may not be typical of what consumers should generally expect. Lastly, the author of the blog is not responsible for any comments made in comment section of this blog.

Tuesday, March 26, 2013

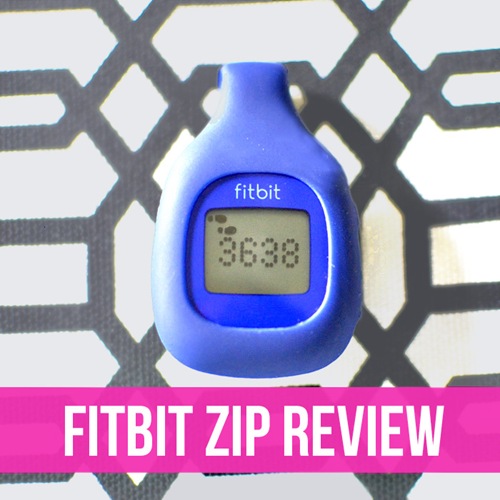
Fitbit Zip Review {Health & Fitness}

FitBit Review

Hi everyone! I’m here to give you all my review of my new Fitbit Zip. Now, I will totally be upfront with you all about 2 things.

1.) I paid for this myself.

2.) I did so much research before buying this damn thing that it is SHAMEFUL.

So about #2… I was debating between a Bodybugg, Fitbit One, and the Fitbit Zip. I pretty much scratched off the Bodybugg from my list really quickly because they require a subscription fee to access all the data, and I found the armband to be rather obnoxious. I didn’t want it to be totally obvious that I was wearing a weight loss/fitness device, especially at work. Not that I am embarrassed, but I just didn’t want the extra attention or looks. No thanks!

Then I started debating between the Fitbit One and the Fitbit Zip. Now, without going into a ton of details, here are the main differences between the 2 devices:

-Price: The Fitbit Zip is about $60 and the Fitbit One is about $100.

-The Fitbit One tracks your sleeping patterns, stairs/floors climbed, and has a vibrating alarm to gently wake you up in the morning.

-Both track your steps, distance traveled, and calories burned.

At first, I was thinking of splurging on the Fitbit One, because hey for $40 I get a bit more data. Then I started thinking that I don’t really climb stairs (none at home or work), and that I don’t really think I would do much with sleep data. To me, my sleep is what it is. I try to get as much as I need, but I have a 99-cent sleep app that really gives me all the information I care to know.

So I finally decided on the Fitbit Zip. The MSRP is about $60, although Amazon has them at about the $50 range. Honestly, I am a total cheap ass because spending money STRESSES ME OUT. Like I seriously will agonize over $4 cosmetics at Walgreens. I guess it’s because I grew up that way, and I am still that way now. I call it thrifty.

Yeah. $50. Ugh. I waited.

I was at Target on my birthday, and I saw that they had the blue Fitbit Zip for $35…but they were all sold out. I checked my Target app, and sure enough both Targets we frequent were sold out. Curses.

Not one to be deterred, I checked the Target app again about a week later when we were in another city and BAM! They had 2. I snagged one up, and now I’ve had this little guy for almost 2 weeks.

Here’s what I love:

  • It’s made me walk more. I used to avoid getting up at work to go do mundane tasks, and now I actively look for opportunities to get more steps in. Same thing at home. If I forgot something in another room, I am eager to get up and get it. It’s weird how a little device can make me want to work harder. It is really hard to get 10,000 steps a day on days I don’t exercise. I am lucky if I hit 5K. Hmph.
  • I feel it’s accurate. I truly do. I don’t think it’s giving me extra steps or anything.
  • The calories burned information is so valuable! I’ve been struggling with weight loss lately, so it’s nice to be able to look at data and develop a game plan. Looking at a week’s worth of data, I see I burn about 2100-2500 calories a day. This helped me come up with my daily calorie goal to help me lose 1 to 1.5 pounds a week. Before my Fitbit, I was relying on internet calculators to help me determine that.
  • I clip it onto my bra in the morning, and I don’t think about it until I shower or change for bed. The little clip is super snug, so I am not at all worried about losing it. If you’re a guy, you can clip it to your waist band/belt.
  • I can check my stats by either looking at my Fitbit screen or just checking my iPhone 4S. It uses bluetooth technology to sync with my iPhone so I can see if I need to get up and be more active, etc. HOWEVER, the Fitbit Zip can only do this with iPhone 4S and 5 (don’t know about Android phones, sorry!) because it requires some sort of fancy new bluetooth technology. It does come with a bluetooth dongle to be able to sync wirelessly using a computer. :)
  • No need to remember to charge it; it uses a replaceable watch battery that has to be replaced every 6 months or so.
  • No fancy subscription required.
  • Totally syncs with MyFitness Pal flawlessly!

Here’s what I don’t love:

  • Not waterproof! Not that I swim,  but if I accidentally leave this on a bra and throw it in the wash…bye, bye Fitbit Zip!
  • Not backlit. If I want to check my stats in the dark (without my iPhone), it’s nearly impossible.

That’s pretty much it. I absolutely love this little gadget, and I think it would totally be worth the $50-$60. Will the novelty wear off? Hhmm. Maybe. I don’t know, I’m pretty determined to lose 100 pounds and have like 87 to go, so I think this will be a fun way to stay motivated and beat my previous weeks, etc. On the Fitbit website you can create a profile and add friends and such so you can get uber competitive if you want. Here’s the link to my Fitbit profile if you want to friend me.

I read some reviews that called this a fancy pedometer, and I would disagree. If you really drill down into the data and features, it’s truly a valuable health tool. You don’t even have to want to lose weight to find the data useful.

I guess the other bad thing is that now I really want the Fitbit Aria scale so I can really over analyze all the data!

If you have any questions, leave them in the comments or email me at monicawantsit@gmail.com :)

Would you want a Fitbit Zip?

Friday, February 1, 2013

Diet To Go Review {Health & Weight Loss}

It’s funny how many people tweeted, wrote or Facebooked me to ask, “What are those meals you’ve been eating?”

Well, I was sent 4 days of food from DietToGo.com to review and give my honest opinion about. I finished the meals about a week and a half ago, but I am just now getting some time to write about my experience. Work is CRAZY INSANE. Everytime I think it’s going to settle down a bit, it so doesn’t.

So, I didn’t want to do the review rushed/halfway when I knew I wanted to point out some things.

I didn’t take pictures of all my meals because I get hungry and forget, but I did luckily get pictures of my favorite meals. That is one thing I will honestly say—the majority of the meals were TASTY. There were a few that I hated purely because it’s just not stuff I would normally, ever eat. Those dishes were a quinoa salad thing and a greek breakfast burrito. I tried to eat those and just could not. But if you like those foods, you might enjoy those dishes.

Here’s one of my favorite meals…it’s a reuben sandwich. I left off the salad thing that went on it to make it a reuben, so this was like a tasty grilled sandwich to me. The bread was like french toast and the cheese was plentiful and really gooey and yummy. Two thumbs up! It came with a fruit salad on the side that was super sweet and tasty.

While I thought the dinners and lunches were good overall, I thought where Diet To Go would prove really valuable for me personally is breakfast. Somehow that is the meal I have trouble with. I either eat something bland and am hungry, or I splurge and blow my whole day. The Diet To Go breakfasts were all A+ in my book (minus the greek breakfast burrito).

I tried 2 different kinds of muffins, and they were good. Now, the texture is different than a bakery muffin, but I sort of expected that because these are WAY lower in calories. The muffins were dense, in a good way, so they took me awhile to eat and digest. I was full with just the muffin. I want to know what magical stuff is in there, because I wasn’t expecting to be that satiated with a muffin. The muffin breakfast pack also came with juice (which I gave to the hubby) and yogurt. Simple, but tasty.

I thought the muffins were as good as it gets, but wait…the waffles. OH MY GOSH THE WAFFLES!

Sooooo good.

I stuck the breakfast pack in my purse on my way to work:

Then I dug in once I got to my desk:

So. Darn. Good. Delicious. Chewy. Filling. Sigh. I want more waffles. I could eat them everyday. The portion was uber generous.

Now I know a lot of you may be asking yourself if I think it’s a good value. Well, I got 4 days for free, and honestly… I liked it. It was nice to be heading out in the morning and just grab a breakfast. For lunch it was easy to just pick what I wanted to eat. It’s easy, and when I figured out the cost, it’s a bit better of a value than eating out at a restaurant…

And then there’s the sodium issue. Yes, there is a lot of sodium. There’s no way to prance around that issue. The way I look at it is that McDonald’s may be cheaper, and have just as much sodium, and maybe a Subway sub has less calories but more sodium. It is a concern though, and one I know so many people have. I feel you. I looked at the sodium and just drank more water, but yes, I was concerned.

Yeah. I don’t know what more to say about the sodium. There’s so many aspects to losing weight, and it’s hard to be perfect on all of them. My focus is calories in vs. calories out, try to make healthy choices, and exercise often.

You should do what’s best for you. Do I think that Diet To Go can help people lose weight? Absolutely. It takes the guess work out of it, it’s all there for you. Do I think it’s expensive? Yes and no. I think the meals are well thought out and coordinated, pretty filling, and it’s a tool to help keep calories under control, and if you want to lose weight, this might be a good way of doing it.

The food is tasty, and I wish they had a breakfast only plan.

Or if they just want to send me muffins, I’m down with that, too. And waffles, please.

I know many of you were waiting for my review, and I hope that I covered all my bases, but if you want to ask me a question, leave it in the comments and I’ll reply there. Or you can also email me privately at monicawantsit@gmail.com