Showing posts with label entertaining. Show all posts

Wednesday, October 23, 2013

Gevalia Mocha Latte #CupofKaffe

Gevalia cafe-style K-Cups #CupofKaffe #shop

As part of a shopper insights campaign for Collective Bias, I was tasked with creating latte art using Gevalia’s new café-style K-Cups. You can view my shopping journey over on my Google+ page. It was harder than I thought it was going to be, but I’ll delve more into that later.

Gevalia cafe-style K-Cups #CupofKaffe #shop

The new Gevalia café-style K-Cups come in three varieties: Cappuccino, Caramel Macchiato, and Mocha Latte. I chose Mocha Latte because I love mocha/chocolate inspired drinks. These new K-Cups are pretty awesome in that you can have that rich, foamy, coffeehouse style drink at home in under 2 minutes using your Keurig. Although it’s a 2-step process, it’s not complicated at all, I swear. You first take the froth packet (see below), and pour it into a mug. Step 2 involves putting the mug under your Keurig spout/dispenser and brewing the Gevalia Mocha Latte K-Cup over the froth in the mug using the 8 oz. setting on your Keurig, and you pretty much have a delicious, gourmet latte from the convenience of your own home. And the calories are only 80 per serving, so it’s a treat that I can have daily without stressing. It is delicious!

Gevalia cafe-style K-Cups #CupofKaffe #shop

So, something I failed to think about before attempting latte art was how dark mocha drinks can be. I tried powdered sugar and a stencil…no luck. I tried the toothpick trick to bring the liquid through the foam and make a design…no luck.

I was stumped on how to make simple latte art. Then I thought of a super easy idea that anyone can do. Cookies!

These are thin shortbread/wafer type vanilla cookies. They go well with anything, and they are a blank canvas. Then I thought, well, how can I decorate them and amp up the flavor of the Gevalia Mocha Latte drink?

Gevalia cafe-style K-Cups #CupofKaffe #shop

Caramel! I poured some caramel syrup into a squeezy bottle, and drew a cute heart on the cookie.

Gevalia cafe-style K-Cups #CupofKaffe #spon

Pretty easy, just go slowly! You can also make initials, draw a flower, happy face, etc. Plus you can really use any syrup that has color to it and a flavor profile that will complement your drink.

Then you gently place it onto the foam of the mocha latte and enjoy! These may seem like an extra step, but it’d be so cute to do this sort of thing on Christmas morning, right?

Gevalia cafe-style K-Cups #CupofKaffe #spon

It’s so simple, and who doesn’t love cookies with their coffee? I found that if I just used a spoon to scoop the cookie out, and I had a tasty treat to munch on with my coffee. I also found that just letting the cookie sit in there makes my mocha latte heaven in a cup. The gooey pieces of mocha-soaked cookie swirling around are AMAZING. But, just so you know, the foam holds it up well enough that it doesn’t get soggy instantly.

Gevalia cafe-style K-Cups #CupofKaffe #spon

There you have it! A super quick latte (with art) thanks to new Gevalia café-style K-Cups. You can find a coupon for $1.50 off these new K-Cups over here. If you want to learn more about the Gevalia product line, check them out online/social media. They often do free samples, so it’s worth it to follow their streams so you can get deals and samples.

What is your favorite K-Cup? I’ve only had my Keurig for 2 months, and I’d love to hear about which products you love!

Thursday, October 10, 2013

#EnergytoBurn Peanut Butter French Toast {Recipe}

Peanut Butter Stuffed French Toast #Recipe #EnergytoBurn #spon

This post/recipe are part of a sponsored campaign in collaboration with Latina Bloggers Connect and The National Peanut Board.

I love when I get asked to create recipes—especially when they deal with a tasty, affordable treat that I eat almost daily…peanut butter! Peanuts and peanut butter are a great source of protein, and they give me energy to get through the day. A serving of peanuts has almost 7 grams of protein per serving, and I need protein to stay satiated and not eat a bunch of junk food.

I’m not kidding you when I say I literally have peanuts with me literally everywhere. I have peanut snacks in the car and peanut butter at work. You can put peanut butter on just about anything like oatmeal, muffins, crackers, celery, fruit. Or you can be like me and eat it straight off the spoon. I don’t judge! My 3 p.m. snack usually consists of a peanut butter and an apple. Growing up I had pan tostado (toast) slathered with peanut butter and strawberry jelly for breakfast or an after school snack. It was so delicious, and in honor of Hispanic Heritage Month, I revamped my pan tostado recipe to a more fun, sophisticated dish that still marries together all those tasty flavors.

Peanut Butter Stuffed French Toast #Recipe #EnergytoBurn #spon

My peanut butter stuffed French toast brings together creamy, salty, sweet peanut butter with strawberries, bananas, and thick Texas toast. The result is a quick, impressive dish that is sure to please the entire family. I love a hearty, gourmet Sunday breakfast, but I am also really busy and don’t like spending hours in the kitchen. This peanut butter infused breakfast packs fruit, protein, and decadence and is ready in under 20-25 minutes. Plus, it’s a cheap meal for a family of 4.

Peanut Butter Stuffed French Toast
MonicaWantsIt.com
Servings: 4

Ingredients:

  • 8 slices of Texas toast (thick sliced white bread)
  • 1/2 pint of sliced strawberries
  • 2 bananas, sliced
  • 2 eggs
  • 1 cup heavy cream
  • 2/3 cup milk
  • 1/4 tsp cinnamon
  • 2 tsp vanilla extract
  • 1/2 cup creamy peanut butter with honey
  • Dash of salt

Directions:

  1. Slice strawberries and bananas thinly. Keep them in a bowl until ready to top French toast.
  2. In a bowl, use a hand mixer to beat heavy cream until it forms soft peaks and you have whipped cream. Add in 1 tsp of vanilla extract + peanut butter and whip until it becomes peanut butter whipped cream. Resist all temptation to eat all the whipped peanut butter.
  3. Preheat a non-stick pan or griddle to get ready to cook French toast. (Medium heat works best)
  4. In a pie dish or shallow baking pan, whisk together eggs, milk, 1 tsp of vanilla extract, cinnamon, and salt. Soak slices of Texas toast in the mixture (make sure to soak each side). Cook on each side about 2-3 minutes, or until golden brown.
  5. Place one slice of French toast on a plate, top with a heaping tablespoon or 2 of peanut butter whipped cream, then place other slice of French toast on top. Top with a generous serving of strawberries and bananas, and dust with powdered sugar, if desired.
  6. Eat and enjoy!

Peanut Butter Stuffed French Toast #Recipe #EnergytoBurn #spon

Strawberries really go well with the peanut butter because they’re sweet and tart, but the real star of the show is this peanut butter whipped cream!

Peanut Butter Stuffed French Toast #Recipe #EnergytoBurn #spon

The peanut butter whipped cream becomes so light and fluffy, so it simply melts into a frothy delight all over the plate. It’s like peanut butter syrup!

Peanut Butter Stuffed French Toast #Recipe #EnergytoBurn #spon

Peanut Butter Stuffed French Toast #Recipe #EnergytoBurn #spon

Peanut Butter Stuffed French Toast #Recipe #EnergytoBurn #spon

I swear to you…it’s as AMAZEBALLS as it looks on here. And I have to thank my amiga Lindsey for coming over to help me create and taste test this dish! We couldn’t get enough.

Peanut Butter Stuffed French Toast #Recipe #EnergytoBurn #spon

I thank Latina Bloggers Connect and The National Peanut Board for choosing me for this awesome campaign. You can view more peanut butter info, recipes, and nutrition facts at http://bit.ly/19x0OOp.

What are your favorite snacks or treats that incorporate peanuts or peanut butter? Will you try out my recipe?

Wednesday, October 9, 2013

Tuc Away Table {Review}

TucTable01

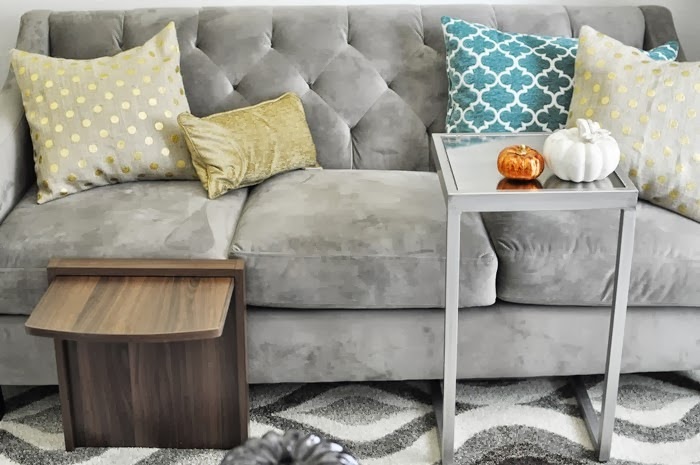
So, I was sent a Tuc Away Table to review, and I have mixed feelings about it. When I first was approached about the review, I said yes because I thought it’d be like the Pier 1 Imports hayworth C-table that I love so much. And it’s not. I use my Pier 1 table to type on my iPad, put my beer/dinner, or put a bowl of popcorn. If I do those things on the Tuc Away table, I risk knocking them over if I have a sudden arm movement. Also, the low height makes it super easy for Pee Wee (my pooch) to steal my food.

As you can see, compared to the Pier 1 table, the Tuc Away Table is really short. And if you’re not used to having a table there, you may you will get up all of sudden and scratch the beejeezus out of your knee on said table. I should know, I have a nasty scratch that is healing because of the table. I didn’t put it on the side of the sofa because I don’t have room, so I wanted it to be more like a table for guests to put drinks/food on.

TucTable02

I will say that the quality is FAB. It is beautiful, it is high quality, but I do think the height and the overly complicated, yet seemingly simple-ish, set-up instructions take away from it. The table, which is heavy (in a good way), comes with a little ruler contraption that you use to measure the space under the couch where you’ll be putting the table. Using that number, you put the bracket into the holes on the back of the table that match that number. However, if you’re like me, you’ll measure wrong, put the bracket in 2 holes that aren’t the same number, and fiddle with it for about 10 minutes until it’s snug and secure.

Not a huge deal, but a tad inconvenient.

Also, it’s expensive! They run about $70+, which is a little steep. With a few improvements, this could be a great product. The one thing I do love, besides the finish/quality, is that the top folds down and then it almost just kinda blends into the profile of whatever furniture it’s attached to.

TucTable03

To sum it up…

The pros:

  • Good quality
  • Pretty wood color
  • Semi-easy to set-up
  • Good for dorms/low profile beds/kids room/accent chairs/recliners (if you have room on the sides)

The cons

  • Too short
  • Overpriced
  • Semi-complicated set-up
  • Limited options for the wood finish
  • It’d be nice to have a pocket for remotes or something

So, there ya have it. You can view their set-up videos and check out the finishes at http://www.tucawaytables.com/

Do you have similar tables in your home? Do you like accent tables?

Tuesday, October 1, 2013

Open Faced Pot Roast Sandwich { Easy Meals}

Open Faced Pot Roast Sandwich Recipe #KraftRecipeMakers #shop #cbias

My husband and I are sort of thrilled I was chosen for this sponsored Collective Bias campaign with #KraftRecipeMakers because we are always so short on time and stressed from work to cook. Sometimes we come home to quickly eat dinner and then have to go back to work. I know…no fun!

We use that as a constant excuse to eat out, and it doesn’t do our waist lines and bank account any favors. The new Kraft Recipe Makers line (seen below) takes the guess work out of “What to make?” or “What’s a good, quick meal?” I loved how affordable the product was, and it’s definitely something I’ll be adding to my Walmart shopping list from now on. The meal starter kit was about $3, and there’s several recipes on the box to help you get inspired or creative. Overall, this recipe can feed a family of four for about $20. Try doing that at a restaurant!

Open Faced Pot Roast Sandwich Recipe #KraftRecipeMakers #shop #cbias

Personally, I like using meal helpers like this because they take the fuss out of a home cooked meal. I love, love, love pot roast, but I hate all the prep and stuff that can go with it. These open faced pot roast sandwiches are super easy, there’s literally under 15 minutes of prep, and it is delicious. My house smelled like heaven while this roast was cooking. Pairing simple, fresh ingredients with the Kraft Recipe Makers can make any night, even a tiresome weeknight, a special occasion. Quick, easy family meals don’t have to be a chore.

I made this as a crockpot recipe, because it’s super quick to get this going in the morning as I head out, and when I come home after work dinner is literally ready to be served. It simply doesn’t get any easier than that, folks.

The recipe is at the end of this blog post, but I do want to highlight a few things I did to put this recipe over the top.  I whipped out my trusty cast iron skillet to give my chuck roast a crispy, peppery crust. Any pan can work; I just happen to be kind of obsessed with my cast iron skillet right now.

Open Faced Pot Roast Sandwich Recipe #KraftRecipeMakers #shop #cbias

This herb sauce? Oh. Em. Gee. It’s so tasty, and it really brings out the savory, mouthwatering flavors of pot roast. Bravo, Kraft!

Open Faced Pot Roast Sandwich Recipe #KraftRecipeMakers #shop #cbias

When picking out a bread for your sandwiches, try to pick something like a garlic herb loaf. It’ll make your entire recipe/dish a bit more flavorful, and who doesn’t love tasty, crusty bread? Yum.

Open Faced Pot Roast Sandwich Recipe #KraftRecipeMakers #shop #cbias

And finally, it really is super simple to start with this…

Open Faced Pot Roast Sandwich Recipe #KraftRecipeMakers #shop #cbias

And end up with this. Yes, those are homemade mashed potatoes, and no it didn’t take me more than 10 minutes. Pinky promise!

Open Faced Pot Roast Sandwich Recipe #KraftRecipeMakers #shop #cbias

Open Faced Pot Roast Sandwiches
MonicaWantsIt.com
Servings: 4
Ingredients:

  • 1 Kraft Recipe Makers Kit (New England Pot Roast Kit)
  • 2.5 lbs. beef chuck roast
  • 1 bag of baby carrots (1 lb.)
  • 1 white onion, sliced
  • 16 oz. bag of microwaveable baby reds (found in produce section)
  • 1/2 stick of butter
  • 1/2 cup of milk
  • 2 oz. light cream cheese
  • Salt & Pepper
  • 1 loaf/8 slices of bread (I used garlic herb from Walmart)
  • Cheddar cheese, shredded

Directions:
  1. Sear your chuck roast in a cast iron skillet on both sides. Coat chuck roast with pepper before searing each side (no salt!).
  2. Throw your baby carrots, sliced onion, and chuck roast into a slow cooker/crockpot. Pour the Kraft Recipe Makers Classic Herb Simmer Sauce all over the roast. Set your slow cooker to cook on high for about 7-8 hours. A slightly larger roast will yield a longer cooking time.
  3. When there’s 15 minutes of cooking time left (or when you come home from work/shopping/etc.) pour the finishing sauce over the roast and allow to cook for 15 more minutes. In the meantime…
  4. Warm-up or lightly toast your slices of bread with some butter. I threw my slices in a 350 degree oven for about 7 minutes while I made the mashed potatoes.
  5. Throw your microwaveable baby reds in the microwave for 6-7 minutes. Once they’re cooked, toss in a bowl and mash with milk, cream cheese, butter, and salt/pepper to taste.
  6. Grab a plate, arrange 2 slices of bread, top with about 1/2 cup of mashed potatoes, and a hearty serving of pot roast. A dash of cheddar cheese adds gooey awesomeness.

That’s it! Maybe 10 minutes of prep before tossing it into the slow cooker, and maybe another 15 minutes to prep to serve and you have a tasty, semi-homemade meal that your entire family can quickly enjoy. And if you want to be extra fabulous, you can arrange your bread so that you end up with a heart shaped sandwich.

KraftRecipeMakers6

Awww. :)

Every bite is better than the previous one. I love the buttery bread, the creamy mashed potatoes, and the salty, savory pot roast in each bite. These sorts of recipes make me want to eat at home rather than eat out. Am I right?! Daniel and I could eat this once a week and not get bored. No more stress eating out for us!

You can find out more about the awesome products by Kraft Foods over on their Facebook page.

What are your favorite pot roast recipes? Do you enjoy cooking with a slow cooker in your home? Let’s talk about it in the comments section (please!)

Tuesday, September 24, 2013

Rustic Cast Iron Breakfast Pizza {Recipe}

Rustic Cast Iron Breakfast Pizza Recipe: One dish meals from monicawantsit.com

Breakfast is my most favorite meal of the day, especially on weekends. As with all my cooking, I hate making anything that takes a long time and/or requires 5 different pots or pans.

No thank you.

Rustic Cast Iron Breakfast Pizza Recipe: One dish meals from monicawantsit.com

This dish is the anti-thesis to all of that. It’s all made in one cast iron skillet…and a small saucepan if you opt for gravy. It’s simple, delicious, filling and QUICK. You can have this from kitchen to table in under half an hour. I made this for Sunday breakfast, and then we ate the leftovers for Sunday lunch. This dish is perfect for brunch or breakfast, or heck, why not dinner? You likely have most of the ingredients on hand.

I use a cast iron skillet for this recipe because I am obsessed with the great crust and flavors that develop when cooking with cast iron. If you don’t have one, and don’t want to buy one, a 9x13 Pyrex dish will work, too.

Rustic Cast Iron Breakfast
MonicaWantsIt.com
Servings: 4-6

Ingredients:

  • 1 can of jumbo buttermilk biscuits (8 count)
  • 4 large eggs
  • 1/3 cup of milk
  • Salt/Pepper
  • 6 strips of cooked bacon
  • 1 tsbp butter

Gravy Ingredients:

  • 2 tbsp butter
  • 2 tbsp flour
  • 1 1/4 cup of milk
  • 1/2 cup shredded gruyere cheese
  • Salt/Pepper to taste
Pizza Directions:

Preheat oven to 425 degrees. Cook up 6 strips of bacon and drain excess fat onto paper towel. In a bowl, whisk together salt, pepper, milk and eggs until well mixed. Crumble the 6 strips of bacon into bite sized pieces and toss into egg mixture.

Open can of biscuits and form a crust on bottom of greased cast iron pan. Pour egg/bacon mixture over the biscuits and bake for about 15-17 minutes.

Cut into 4-6 servings using a pizza cutter and enjoy!

Gravy Directions:

Melt butter in small saucepan, add in flour to make a roux, then mix in milk. Bring up to a boil, whisking constantly. Reduce heat, add in cheese until melted, and add in salt and pepper to taste. I like my country gravy with a lot of pepper—I probably used 2 tbsp worth. The gruyere cheese adds a smoky flavor, but feel free to omit it or add in your fave cheese.

Rustic Cast Iron Breakfast Pizza Recipe: One dish meal from monicawantsit.com

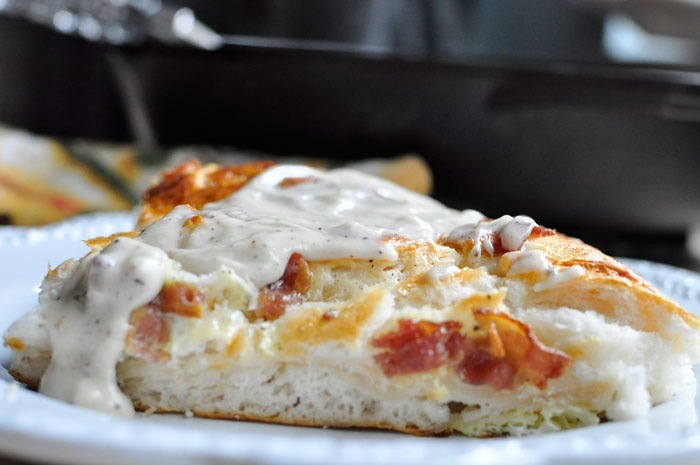
The gravy adds a salty, decadent touch. Plus, who doesn’t like biscuits and gravy…WITH BACON?!

Rustic Cast Iron Breakfast Pizza Recipe: One dish meal from monicawantsit.com

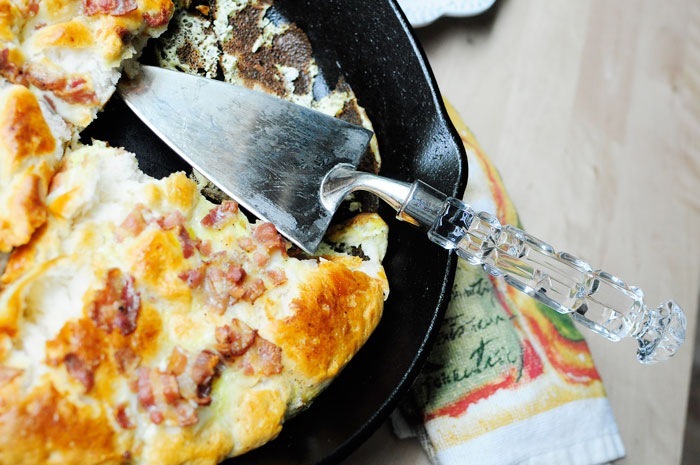
It’s kind of funny how this totally does look like a pizza! The biscuits puff up and form a crust that is reminiscent of a pan pizza crust. Nom nom nom.

Rustic Cast Iron Breakfast Pizza Recipe: One dish meal from monicawantsit.com

You can really get creative with this recipe and use turkey bacon, or use pepperoni, or add in veggies like spinach and tomatoes. The possibilities are endless. This recipe is sure to please even the pickiest eaters, and I think it’d be fun for kiddos to eat.

What are your favorite Sunday morning foods?

Friday, September 20, 2013

Friday Lust: Dining Tables & Chairs {Home Décor & Furniture}

Today’s Friday Lust post is all about dining tables and chairs. Ooh la la.

In my post earlier this week, I told you all about how much I hate our dining set. It was absolutely perfect for our apartment that we lived in from 2007-2010, but now it’s just not what I envision for my home. It’s also hard to scoot the stools/benches in once you sit down, and it’s just…not me.

DiningRoomMakeover05

It’s got 2 stools + 2 benches (and a wedge we’re not using that connects the 2 benches to form a L shape), so it sits about 6 people. It’s counter height and nearly impossible to find a table cover for. Sad face.

Here’s what I’d rather have:

I want a gorgeous, weathered pedestal or trestle table with really beautiful chairs that have tufting or nailhead accents. The overall vibe I am wanting is sort of like if Restoration Hardware and ZGallerie hooked up for a one-night stand and had a baby. I WANT THAT BABY. Rustic, glamorous, classy and timeless. I also love the weathered, hand scraped table look because if a friend slams a glass on the table, or I drop a fork onto it, it just adds to the character. I don’t want a normal, super smooth finish, cherry or espresso dining set.
And that may be why I can’t find anything I can friggin afford. Here’s what I have found so far. In a perfect world, I’d buy this table:
$1295 from Restoration Hardware
And then I’d buy 6 of these chairs:
$449 each from Restoration Hardware
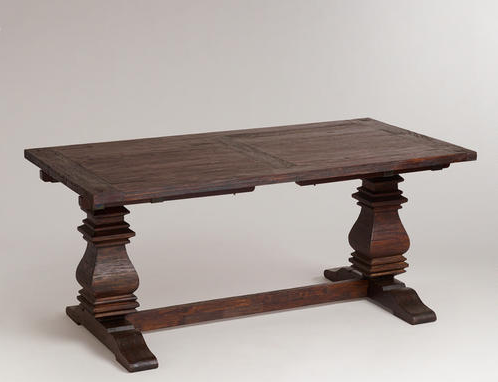
And then I’d move on with my life. But unfortunately, I don’t have thousands to spend on this endeavor, so onto the copycat versions of these pieces. This table from World Market is a strong contender, but the finish is too dark…
image
On sale for $499 through 9/30/13 @ World Market.
Then there’s the Cane Dining Table from Home Decorator’s Collection- I called to get the specs, and it seems like it will only seat 4 because the overhang at the edges is only 9 inches. Although, in a pinch, I don’t think it’s awful…but then again I wouldn’t be the one sitting at the edge. I’m also iffy on the color since it looks gray washed in one photo and really dark in another. On sale through 9/30/13- $599.
And another potential table from Home Decorator’s, but I wonder if the 48” size would be too small for my space? I’d like to be able to fit 6 people, so this may not work. I’m also not 100% on board with a circular table.
On sale through 9/30/19 for $359.
 
However, I’m about to contradict myself because I LOVE this round table from Ballard Designs:
image
 
Chairs are easy enough to find, and although they’re cheaper than RH’s version, they’re not that cheap, KWIM?
 
image
 
Sigh. I don’t know what to do. I want what I want, and I know this is not a project I’d ever want to DIY, so do I just save up for my dream dining set? I’ve thought about freshening up my current set with some slipcovers or something, but finding slipcovers for the 2 benches is proving to be quite a task.
 
Advice, thoughts? If anyone cares to sponsor my entire dining set, please let me know. (Hey, it never hurts to ask) :)

Wednesday, September 18, 2013

Dining Room Facelift {#DIY Home Décor}

This post is going to have a ton of pictures, so I totally apologize in advance if I cause you to go over your data plan for you mobile users.

My dining room has kind of stayed as is, plus or minus seasonal décor, ever since I did this reveal post last year. Well, the hubster and I have been lusting after a new dining table, so we rearranged the space a bit to see what it’d feel like in a different configuration. Ok, and I sort of lied…I’ve been lusting after a new dining table while my husband is 100% OK with the set we have.

It is the bane of my existence. But more about that in a post later this week.

We flip flopped the layout and now it looks like this when you walk in:

DiningRoomMakeover01

Now the dining table is what greets you when you walk in (before it was the sofa), and I’ll admit I despised the layout the first few days…Now I LOVE IT! It flows nicely, the room feels more spacious—which is a challenge since the room is about 10 feet wide and 30 feet long. Yeah, seriously narrow and long.

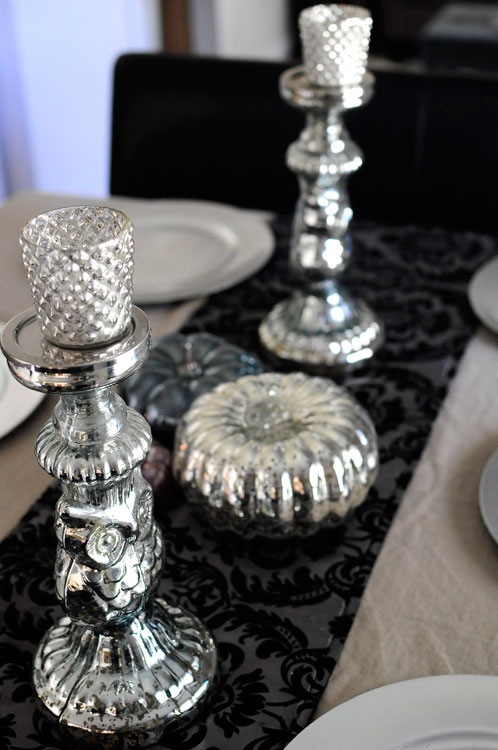
The chandelier is centered beautifully over the table, and mercury and jewel tone accents add drama to the space.

DiningRoomMakeover08

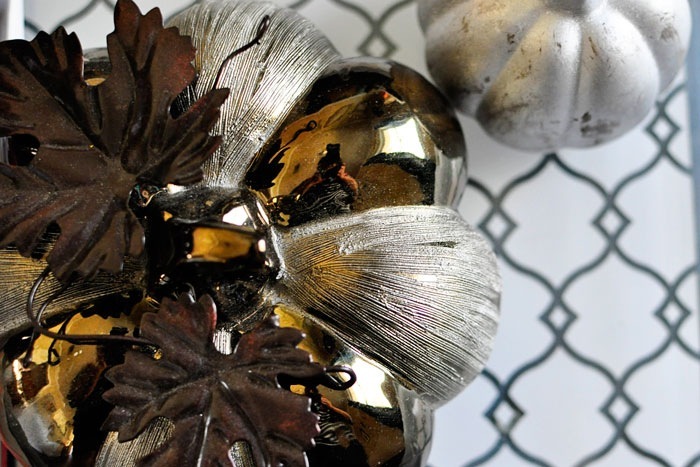
The candlesticks and mercury glass pumpkin are from one of my top 5 favorite stores: ZGallerie. The blue and magenta pumpkins are from Hobby Lobby, and the flocked damask runner is a wedding leftover from Kohl’s holiday collection back in 2008. Silver chargers are 98-cents each at Walmart.

DiningRoomMakeover14

Past the dining table, is a comfy, luxe seating area perfect for cocktails with the gals. Plus, there’s a doorway that leads straight to the kitchen, so that it’s easy to get refills on drinks or check on the puffed pastry in the oven.

DiningRoomMakeover15

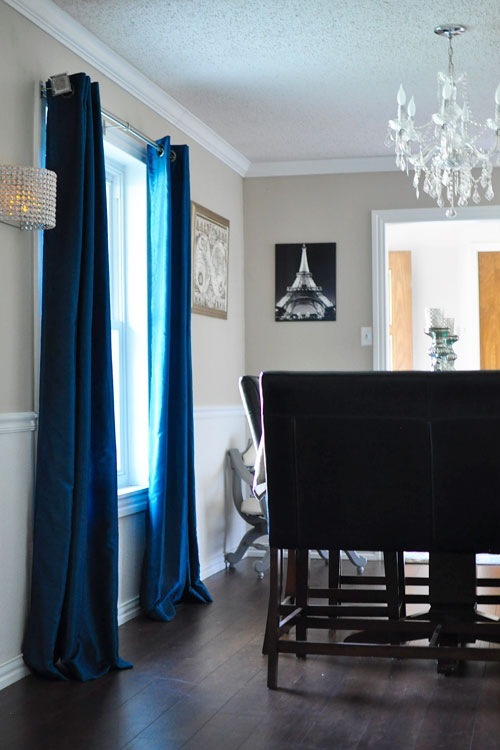
And if you haven’t noticed, I finally splurged on some curtains with COLOR. My other ones were 5 different shades of beige, and these are STUNNING. They are a gorgeous peacock blue color, but when the light hits them, they can morph into having more green or blue. I am in love! The price is oh so right—these gorgeous SIlkana Teal Curtains are only $52 for a pair, and they are worth every penny. They do not totally block out the light, but they do filter it so it just softly embraces a room. Highly recommend!

DiningRoomMakeover23

And now onto more pictures and less of me talking…

DiningRoomMakeover02

DiningRoomMakeover07

DiningRoomMakeover27

DiningRoomMakeover25

DiningRoomMakeover13


DiningRoomMakeover04

DiningRoomMakeover03

Pee Wee always comes into my blog photo shoots to give his approval.

DiningRoomMakeover10

Or to lounge.

DiningRoomMakeover12

That mirrored table off to the left developed a HUGE crack out of nowhere. Ugh. So now a nice serving tray from World Market covers that sucker up.

DiningRoomMakeover11

DiningRoomMakeover19

DiningRoomMakeover20

I’m still obsessed with my ghost chair. I’m writing this very sentence right now while sitting in my ghost chair from Overstock. It’s so comfy. I think my circa 2008 Dell PC is an eyesore. Maybe Santa will bring me a new all in one PC this year…or maybe a Mac? Hhmm.

DiningRoomMakeover18

This frame is one of those fugly gold frames you can find at garage sales. While the gold may be old/ugly, a coat of spray paint can work wonders! Plus, look at those gorgeous, ornate elements on the frame.

DiningRoomMakeover17

DiningRoomMakeover09

DiningRoomMakeover06

These flocked damask pillows were a great score at JCP a few years back. I got 4 of them for $6 each.

DiningRoomMakeover21

The mirrors are from Kirkland’s and were about $10 each. They always have sales and coupons (plus you can use coupons from your phone), so I always go to Kirkland’s for affordable home décor such as mirrors, vase filler, and pumpkins for fall.

DiningRoomMakeover24

DiningRoomMakeover05

There you have it! Again, the primary “makeover” aspect of this simply involved moving around furniture, and bringing in accents from other rooms, but in the interest of full disclosure, I did splurge on the following:

  • New Silkana Teal Window Panels (4 panels, $100 total)
  • New trellis patterned pillow ($15 at Ross)
  • New magenta pumpkin ($4 at Hobby Lobby)
  • New black lamp shade ($10 at Ross)
  • New bright white bulbs ($12 at Walmart)

Total: About $150 for a whole new look!

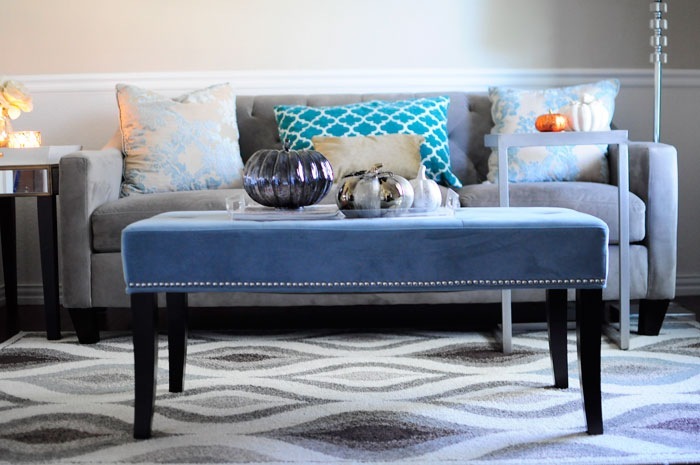
I have this obsession for pumpkins, so I love being able to scatter them throughout my home. The dining room won’t get to enjoy the fall décor too much since I have been selected for a super awesome opportunity that I’ll tell you about later this week. IT IS EXCITING!! I am so over the moon about it and can’t wait to gush all the details to you lovely people.

There are a few things I want to change about the space, in addition to getting rid of the dining table. I’d love a luxe throw with a fun geometric or damask print, a bar cart, wine fridge, recessed lights, a tufted storage ottoman, more wall décor, mirrored/acrylic serving tray, metallic pillows, and a less “beige” wall color. Oh and a gorgeous arm chair! I’ll be working on those during the next phase of my dining room facelift. :)

What do you think of my “new” dining room? Like? Love? Want to come over and have drinks with me?

If you have any questions about anything in my dining/office/living room area, please feel free to leave a comment and I’ll reply to you in the comments as soon as I can.

But here are some questions I am anticipating and will just answer now: