Showing posts with label look for less. Show all posts

Wednesday, October 9, 2013

Tuc Away Table {Review}
TucTable01

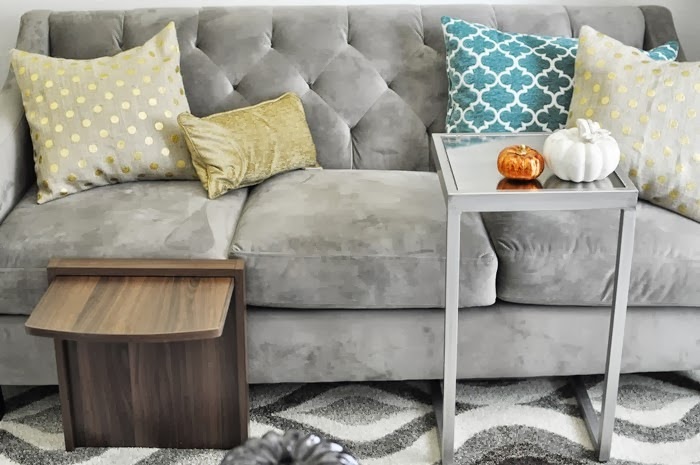
So, I was sent a Tuc Away Table to review, and I have mixed feelings about it. When I first was approached about the review, I said yes because I thought it’d be like the Pier 1 Imports hayworth C-table that I love so much. And it’s not. I use my Pier 1 table to type on my iPad, put my beer/dinner, or put a bowl of popcorn. If I do those things on the Tuc Away table, I risk knocking them over if I have a sudden arm movement. Also, the low height makes it super easy for Pee Wee (my pooch) to steal my food.

As you can see, compared to the Pier 1 table, the Tuc Away Table is really short. And if you’re not used to having a table there, you may you will get up all of sudden and scratch the beejeezus out of your knee on said table. I should know, I have a nasty scratch that is healing because of the table. I didn’t put it on the side of the sofa because I don’t have room, so I wanted it to be more like a table for guests to put drinks/food on.

TucTable02

I will say that the quality is FAB. It is beautiful, it is high quality, but I do think the height and the overly complicated, yet seemingly simple-ish, set-up instructions take away from it. The table, which is heavy (in a good way), comes with a little ruler contraption that you use to measure the space under the couch where you’ll be putting the table. Using that number, you put the bracket into the holes on the back of the table that match that number. However, if you’re like me, you’ll measure wrong, put the bracket in 2 holes that aren’t the same number, and fiddle with it for about 10 minutes until it’s snug and secure.

Not a huge deal, but a tad inconvenient.

Also, it’s expensive! They run about $70+, which is a little steep. With a few improvements, this could be a great product. The one thing I do love, besides the finish/quality, is that the top folds down and then it almost just kinda blends into the profile of whatever furniture it’s attached to.

TucTable03

To sum it up…

The pros:

  • Good quality
  • Pretty wood color
  • Semi-easy to set-up
  • Good for dorms/low profile beds/kids room/accent chairs/recliners (if you have room on the sides)

The cons

  • Too short
  • Overpriced
  • Semi-complicated set-up
  • Limited options for the wood finish
  • It’d be nice to have a pocket for remotes or something

So, there ya have it. You can view their set-up videos and check out the finishes at http://www.tucawaytables.com/

Do you have similar tables in your home? Do you like accent tables?

Wednesday, September 18, 2013

Dining Room Facelift {#DIY Home Décor}

This post is going to have a ton of pictures, so I totally apologize in advance if I cause you to go over your data plan for you mobile users.

My dining room has kind of stayed as is, plus or minus seasonal décor, ever since I did this reveal post last year. Well, the hubster and I have been lusting after a new dining table, so we rearranged the space a bit to see what it’d feel like in a different configuration. Ok, and I sort of lied…I’ve been lusting after a new dining table while my husband is 100% OK with the set we have.

It is the bane of my existence. But more about that in a post later this week.

We flip flopped the layout and now it looks like this when you walk in:

DiningRoomMakeover01

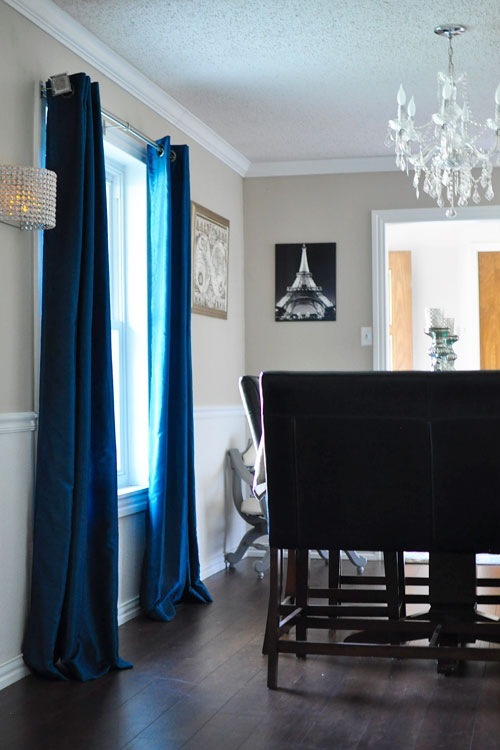
Now the dining table is what greets you when you walk in (before it was the sofa), and I’ll admit I despised the layout the first few days…Now I LOVE IT! It flows nicely, the room feels more spacious—which is a challenge since the room is about 10 feet wide and 30 feet long. Yeah, seriously narrow and long.

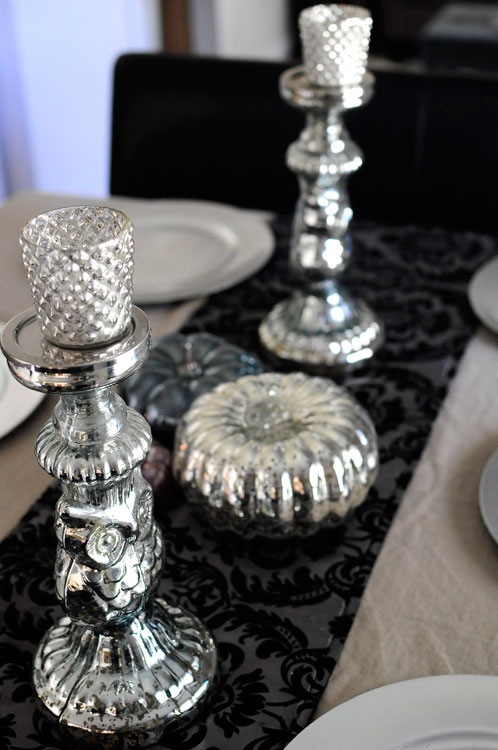
The chandelier is centered beautifully over the table, and mercury and jewel tone accents add drama to the space.

DiningRoomMakeover08

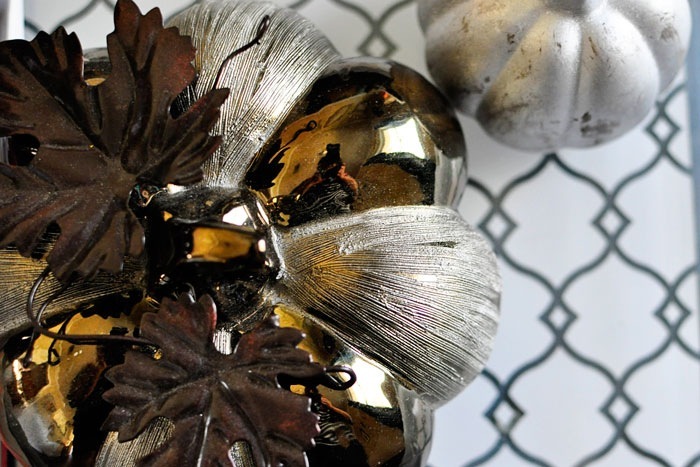
The candlesticks and mercury glass pumpkin are from one of my top 5 favorite stores: ZGallerie. The blue and magenta pumpkins are from Hobby Lobby, and the flocked damask runner is a wedding leftover from Kohl’s holiday collection back in 2008. Silver chargers are 98-cents each at Walmart.

DiningRoomMakeover14

Past the dining table, is a comfy, luxe seating area perfect for cocktails with the gals. Plus, there’s a doorway that leads straight to the kitchen, so that it’s easy to get refills on drinks or check on the puffed pastry in the oven.

DiningRoomMakeover15

And if you haven’t noticed, I finally splurged on some curtains with COLOR. My other ones were 5 different shades of beige, and these are STUNNING. They are a gorgeous peacock blue color, but when the light hits them, they can morph into having more green or blue. I am in love! The price is oh so right—these gorgeous SIlkana Teal Curtains are only $52 for a pair, and they are worth every penny. They do not totally block out the light, but they do filter it so it just softly embraces a room. Highly recommend!

DiningRoomMakeover23

And now onto more pictures and less of me talking…

DiningRoomMakeover02

DiningRoomMakeover07

DiningRoomMakeover27

DiningRoomMakeover25

DiningRoomMakeover13


DiningRoomMakeover04

DiningRoomMakeover03

Pee Wee always comes into my blog photo shoots to give his approval.

DiningRoomMakeover10

Or to lounge.

DiningRoomMakeover12

That mirrored table off to the left developed a HUGE crack out of nowhere. Ugh. So now a nice serving tray from World Market covers that sucker up.

DiningRoomMakeover11

DiningRoomMakeover19

DiningRoomMakeover20

I’m still obsessed with my ghost chair. I’m writing this very sentence right now while sitting in my ghost chair from Overstock. It’s so comfy. I think my circa 2008 Dell PC is an eyesore. Maybe Santa will bring me a new all in one PC this year…or maybe a Mac? Hhmm.

DiningRoomMakeover18

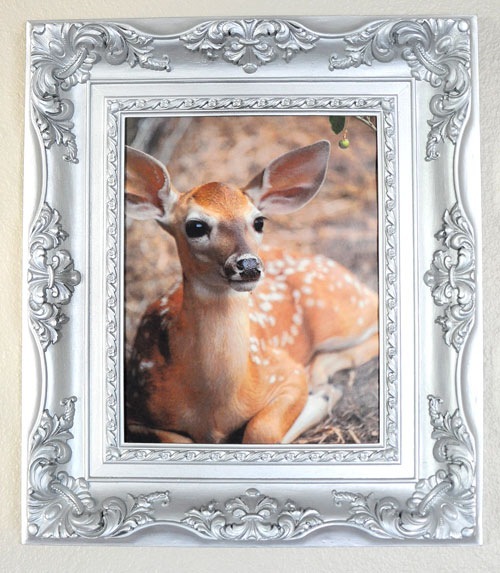
This frame is one of those fugly gold frames you can find at garage sales. While the gold may be old/ugly, a coat of spray paint can work wonders! Plus, look at those gorgeous, ornate elements on the frame.

DiningRoomMakeover17

DiningRoomMakeover09

DiningRoomMakeover06

These flocked damask pillows were a great score at JCP a few years back. I got 4 of them for $6 each.

DiningRoomMakeover21

The mirrors are from Kirkland’s and were about $10 each. They always have sales and coupons (plus you can use coupons from your phone), so I always go to Kirkland’s for affordable home décor such as mirrors, vase filler, and pumpkins for fall.

DiningRoomMakeover24

DiningRoomMakeover05

There you have it! Again, the primary “makeover” aspect of this simply involved moving around furniture, and bringing in accents from other rooms, but in the interest of full disclosure, I did splurge on the following:

  • New Silkana Teal Window Panels (4 panels, $100 total)
  • New trellis patterned pillow ($15 at Ross)
  • New magenta pumpkin ($4 at Hobby Lobby)
  • New black lamp shade ($10 at Ross)
  • New bright white bulbs ($12 at Walmart)

Total: About $150 for a whole new look!

I have this obsession for pumpkins, so I love being able to scatter them throughout my home. The dining room won’t get to enjoy the fall décor too much since I have been selected for a super awesome opportunity that I’ll tell you about later this week. IT IS EXCITING!! I am so over the moon about it and can’t wait to gush all the details to you lovely people.

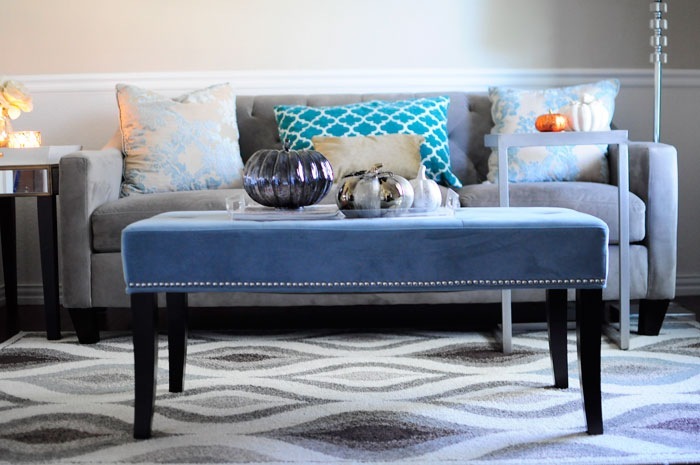
There are a few things I want to change about the space, in addition to getting rid of the dining table. I’d love a luxe throw with a fun geometric or damask print, a bar cart, wine fridge, recessed lights, a tufted storage ottoman, more wall décor, mirrored/acrylic serving tray, metallic pillows, and a less “beige” wall color. Oh and a gorgeous arm chair! I’ll be working on those during the next phase of my dining room facelift. :)

What do you think of my “new” dining room? Like? Love? Want to come over and have drinks with me?

If you have any questions about anything in my dining/office/living room area, please feel free to leave a comment and I’ll reply to you in the comments as soon as I can.

But here are some questions I am anticipating and will just answer now:

Sunday, December 16, 2012

Lane Bryant Twitter Party 12/17 #LB12Days


Just a friendly reminder that there is still time to enter my giveaway for one of 2 Lane Bryant gift cards (see my post from earlier today), but if you want to have another shot at some holiday gift cards, then you might want to listen up...

There's a super fun Twitter party coming up where curvy gals can talk about getting all gussied up for the holidays. Maybe it's that fabulous company soirée or a family event where you want to dress to impress. Whether your favorite look is glam, modern, edgy, flirty or comfy chic, Lane Bryant has it all. You may get some ideas on how to put together amazing holiday looks. It may be cold outside, but you can still be smokin' hot, ladies!

Plus Lane Bryant has amazing special offers everyday, which you can learn about on their Facebook page.

So, join the @LaneBryant “Holiday Fashion Fun” Twitter Party this Monday, 12/17 at noon PT/3pm ET! Fab prizes! RSVP to win prizes, including $30 Lane Bryant gift cards! RSVP: http://clvr.li/128tjBx

The Details:


  • What: Lane Bryant “Holiday Fashion Fun” Twitter Party
  • When: Mon 12/17 noon PT/3pm ET
  • Where: On Twitter! CleverTweets: http://clvr.li/SYaCNf
  • Follow: Hashtag #LBHoliday @CleverGirlsColl @LaneBryantRSVP here: http://clvr.li/128tjBx
  • Prizes: 18, $30 Lane Bryant gift cards
I hope to participate even though I will be on the road. Yay for technology! :)

I was selected for this opportunity as a member of Clever Girls Collective, and the content and opinions expressed here are all my own.


Monday, September 24, 2012

Pottery Barn Halloween Votives {DIY Knock-Off}

Halloween is just about a month away, so this means it’s time to think about all those spooktacular things you can create to decorate your home. We don’t have many trick-or-treaters, nor a Halloween soiree, so I tend to keep my Halloween décor minimal, chic and no fuss. But, this doesn’t mean I don’t thoroughly enjoy the things I do make.

PotteryBarnVotives

Last year I made spider web votives, and this year I spotted some votives I love from Pottery Barn. Problem is…I don’t love the price tag. Never fear, Monica is here with a version that is so easy and inexpensive. Chances are you have most everything you need already, and if you don’t it’ll cost about $1.50 per votive if you have to run to your nearest Walmart & Dollar Tree.

Let’s do this.

PotteryBarnComparison

Supplies:

-Vellum (Vellum gives the frosted appearance of a candle, and individual sheets are about 20-cents at craft stores.)

-Printer

-PDF Template (Created by yours truly…you’re welcome!)

-1 LED Tealight (They’re 2 for $1 at Dollar Tree, which is where I bought mine)

-Votive/tealight holder (I have a TON on hand, but if not, they’re 50-cents each at Walmart or Amazon)

-Scissors/paper trimmer

-Double-sided tape (Regular could work, too)

Total Cost: ~$1.50 each

Savings: $8 per candle holder or about 80% each

Time: Should take no more than 5 minutes per votive holder

Step 1:

Plop your vellum into your printer, and print out the votive templates. Cut out each votive using scissors or a paper trimmer.

Step 2:

PotteryBarnVotives1

Now we want the appearance of beefier candle holders, just like the PB version. So, grab a piece of double sided tape, and add it to one of the ends of your wrap. Circle the other end over and press until you have a nice cylindrical tube of sorts.

Step 3:

As you can see, my sleeve is quite larger than my votive holder (which still has candle wax in it…oh well!) This will create the “look” and this is also why we are using LED tealights and not real tealights that could catch on fire and burn your house down. Don’t be cheap; get the LED tealights!

PotteryBarnVotives2

Plop an LED tealight, upside down, into each votive holder. Like this:

PotteryBarnVotives13

Not only does this actually illuminate the design by forcing the light to the middle/bottom, it also means you don’t have to flip each one over to turn them off. Just reach, switch it to off, and move on. Easy peasy.

Step 4:

Place sleeve over the glass and place wherever you want some mood lighting.

PotteryBarnVotives6

So easy! This seriously is a super simple craft that packs a lot of punch, without worrying about creating a fire hazard.

PotteryBarnVotives5

But, if you want some classier backgrounds instead of black, I got ya covered.

Here’s moroccan skeleton head:

PotteryBarnVotives8

And damask skeleton head:

PotteryBarnVotives9

And if your pair all of them together, you have yourself quite the trio.

PotteryBarnVotives12

So, at a savings of over $8 per votive holder + super easy directions= FAB, nearly free décor.

Hope you enjoy the free printable, and if you make any please send me pics! I’d love to see how you all use the printable. Would also make for good napkins rings!

What’s your favorite décor for Halloween?

Tuesday, September 4, 2012

Metallic & Glittered Dollar Store Pumpkins {DIY Tutorial}

Anyone who’s read my blog during the fall/holiday season knows I am absolutely obsessed with metallic and glitter finishes in home décor accessories. I love the shiny finishes, and how most of the accents catch the light and bounce it around the room. Metallic and glitter pack a punch if you want to create a wow factor.

And obviously I am not the only one who feels this way because all the popular stores carry these sorts of finishes: Pottery Barn, Home Goods, ZGallerie and even Target all cash in on those of us who love the shiny things in life.

What’s fortunate for us DIY/crafty people is that with some simple dollar store décor and some great craft supplies, we too can create shiny, glittery things. Ooh. Aah.

I had emailed the folks at Plaid crafts to see if they wouldn’t mind sending me some glittery stuff to play with from the uber fab Martha Stewart line. Luckily, they said yes, so I am here today to show you 2 SSC (super simple crafts) using some of the cool stuff they sent me plus some stuff I bought. From start to finish they take less than an hour to do both, and they’re both kiddo friendly if you want to get them in on the fun. And unlike using glitter in powder/normal glitter form, using glitter paint is SO MUCH EASIER to clean up.

GlitterPumpkins

Supplies:

-2 pumpkins (ceramic, foam, plastic…it’ll all work) The ones I used are from Dollar Tree, $1 each

-Martha Stewart Metallic Paint in Rust

-Martha Stewart Glitter Paint in Brownstone

-Dark Brown Craft Paint (Normal Acrylic Craft Paint)

-Paint Brush/Sponge Brush (I used these and LOVE them)

-White Spray Paint in a Flat Finish (I use the 97-cent spray paint from Walmart)

So, you start off with your pumpkins. I usually take the price tag/UPC stickers off, and then I prime them with some super cheap flat spray paint. Usually, I just use white spray paint, but they also have gray and black, so if you’re doing something dark, you might want to use gray or black. Personally, I feel white is a great color to start with. Much like a blank canvas.

GlitterPumpkins1

GlitterPumpkins2

Once you’ve primed, let it dry about 15 minutes, and you’re ready to go. Remember that when priming you don’t need for it to be solid white to be “primed”.

GlitterPumpkins3

For the glitter pumpkin, take your glitter paint and do a light coat. It’ll look a smidge splotchy, but remember that light/thin coats work and dry so much better than thick coats. Not that I am speaking from experience…

Here’s coat 1. Very pretty and sheer. A little ethereal. I almost stopped here because I liked it so darn much.

GlitterPumpkins4

And onto coat 2:

GlitterPumpkins5

And finally coat 3:

GlitterPumpkins9

While each coat was drying (about 5 minutes/dry to the touch), I flip flopped between glitter pumpkin and metallic pumpkin. This way I could knock out 2 pumpkins at one time.

Here’s coat 1 of the metallic rust colored paint:

GlitterPumpkins6

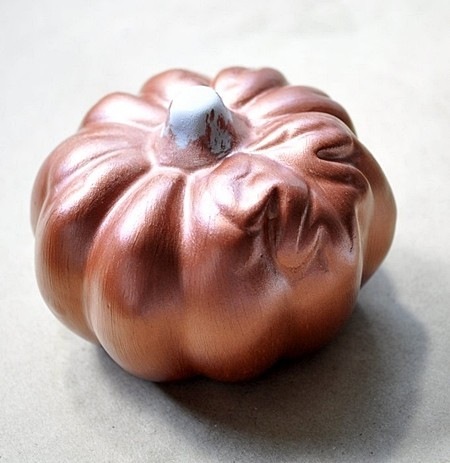
Rust is such a gorgeous, metallic orange. It’s not your basic Halloween orange, it’s deep and almost copper like. I am in love.

GlitterPumpkins7

Here it is after two coats…

GlitterPumpkins8

Once the third/final coat was done on each, I painted the stem of the pumpkin using a dark brown color (burnt umber). On the metallic pumpkin, I painted the leaf the same color, but on the glitter pumpkin I wanted a pop of color, so I painted the leaf the rust color.

GlitterPumpkins10

GlitterPumpkins12

I love the brownstone glitter because it has brown, silver, gold, orange flecks of glitter in it. I’ve never seen anything like it. It would make a marvelous nail polish. Martha, please make one.

GlitterPumpkins13

The metallic is so rich and opaque. I didn’t think it’d work as well as it did.

GlitterPumpkins16

GlitterPumpkins15

I love them! I can’t wait to put these new pumpkins alongside my collection of other pumpkins. My collection has grown quite a bit the past 2 years, so adding in smaller, inexpensive pieces like these allow me to create a new feel with little money. This craft is something anyone can do. Wouldn’t they make great placecards, too?

If you need other pumpkin ideas, check out my other pumpkin related tutorials:

DSC_1721

{Mercury Glass Pumpkins}

DSC_1739

{Faux Mercury Glass (for non-glass pumpkins)}

And coming up on Thursday… DAMASK PUMPKINS! <insert confetti here>

DamaskPumpkin06

Have you done any pumpkin crafting lately? I shy away from carving pumpkins, but I may give it a go this year. :)

Disclaimer: Plaid sent me some free craft supplies to use + I used/bought some other supplies of my own, but I was not otherwise compensated for this post.