Showing posts with label goodwill. Show all posts

Tuesday, January 17, 2012

Restoration Hardware Furniture {DIY Tutorial}

In a happy, magical place there exists a Monica who can buy Restoration Hardware furniture without having to save up for 6 months.

I am not that Monica. Darn it.

I am the Monica who has to scour Goodwill, garage sales and thrift stores to find secondhand furniture with potential. It’s a thing I love to do and hate to do all at the same time. But when I score, I score big.

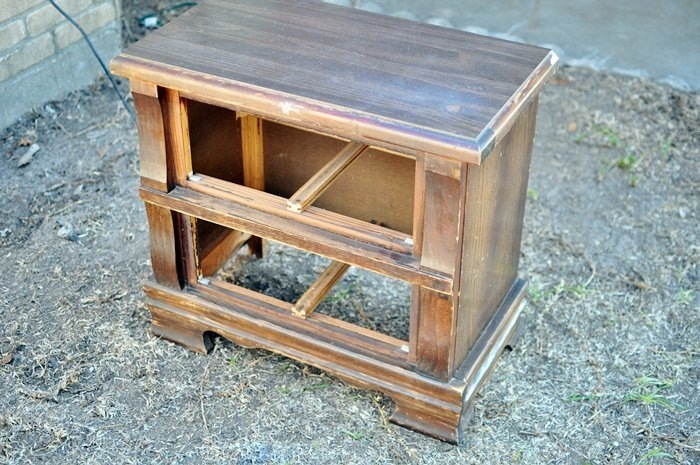
The goods: 2 Goodwill nightstands I bought for $6.50 each back in 2010.

The task: Make them look kinda like these nightstands. (ie: dentil detail, weathered gray/reclaimed wood look…but kinda glam)

image

From Restoration Hardware, $1045 each.

image

From Overstock, $690 each

The supplies:

-Nightstands (mine were laminate + wood)

-2 cans of flat white spray paint (the 98-cent Walmart kind will do)

-Latex paint (I chose a dark gray/brown color: Urbane Bronze by Sherwin Williams in a satin finish)

-Sand paper

-3” paint brush

-Tack cloth

-Cheesecloth or a lint-free rag

-Optional: replacement hardware

Okay, let’s get started. My nightstand was made of mostly laminate (top/sides) yet the drawers have a wood front. I didn’t treat the wood differently than the laminate. Also, this method is fool proof. Anyone can do this. Even you. Yes, you.

You need to scrub down your furniture to make sure it is clean. Super clean. I usually use Lysol wipes for that step. Also, if there are any holes/pieces that need to be filled/glued do that now. One of the side pieces broke off to one of the nightstands, so we just put that sucker on there with liquid nails. I also needed to drill new holes for the handles, so I filled those holes, too.

Nightstand06

Nightstand05

Now we’re ready to sand.

Nightstand07

It may look a little crazy when you sand, but it’ll all be ok. Generally try to go in the direction of the grain/faux grain.

Nightstand08

Wipe off all sawdust with tack cloth. I do this twice to make sure it’s dust free.

Now, we prime. Here’s my most favorite primer- the 98-cent can from Walmart. I used about 1.5 cans for my 2 nightstands. Apply one coat (lightly) to the nightstand + drawers. I do use the spray paint adapter thing (seen below in black) so my finger doesn’t hurt when using cheap spray paint. Best $2 investment ever.

Nightstand09

It will look splotchy. Don’t cry. This is normal. :) You do not want a solid white finish.
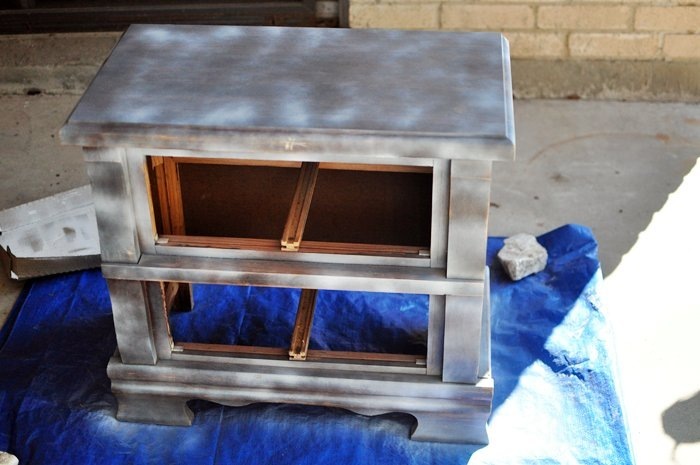
Nightstand10

Let the first coat of primer dry about 20-30 minutes, then do a 2nd coat. It will still look splotchy. This is ok. It will be fine, I swear.

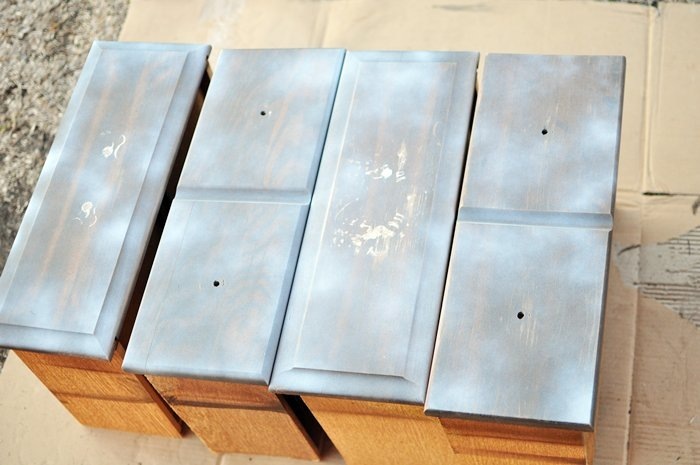
Nightstand11

Nightstand01

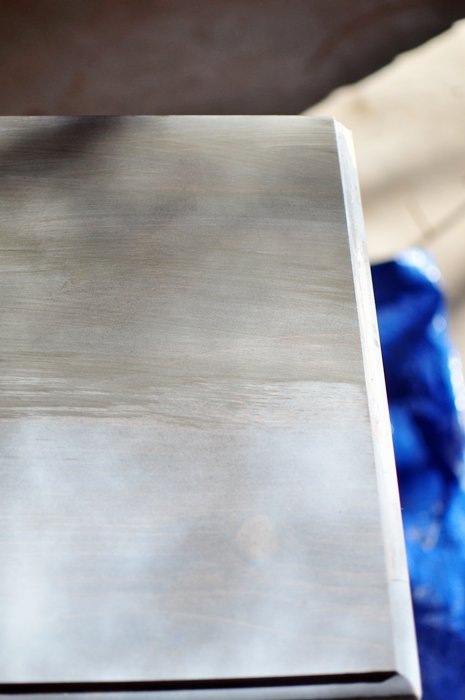
Ok, so once both coats of primer are dry (spray 1st coat, wait 20 minutes, spray 2nd coat, wait 30 minutes), you can paint. Sort of. What you’re going to do is get your brush, dip it into the paint ever so slightly and start brushing it onto the nightstand. This is almost dry brushing (as in, do not saturate your brush with paint).

Nightstand13

My gorgeous paint color: Urbane Bronze by Sherwin Williams.

Nightstand14

Here’s an example of what it should look like. You can tell I’ve brushed on some paint in the top half of the photo, while the bottom half illustrates how the nightstand looks with just primer.
Nightstand15

But what happens if you get too much paint on your brush and onto the nightstand? Just wipe some off (GENTLY!) I used some cheesecloth for this and it worked well. Do one coat of the dry brushing, let it dry for about 30 minutes and then do coat 2. You can basically do as many or as little coats as you’d like. For my nightstands I did 3 light, light coats. I love.

Nightstand16

I then brought them inside to make sure they were both about the same color. They won’t be identical, but that’s ok with me for this project.

Nightstand17

And now they have their spot in their new home (our master bedroom) and they got some fancy hardware from Hobby Lobby.

Nightstand18

That lamp is getting a makeover, too. For now, it stays black.

The smooth, satin finish is lovely. You could also add poly after the paint has dried. I am lazy and haven’t done so yet, but I likely will. Maybe.

Nightstand20 Nightstand23

Love the dentil finish. Makes it look a bit nicer, while the curves on the bottom make it look a little shabby chic.

Nightstand24

Nightstand22

And there you have it! A fool proof tutorial on how to achieve that coveted Restoration Hardware/Pottery Barn/Ballard Designs weathered gray reclaimed wood kinda thing. Whew. That’s a lot of words. I want to remind you that it works on wood or laminate furniture, and it’s so cheap compared to buying this stuff from a store.

Restoration Hardware price: $1045+ each ($2030+ for a pair)

Monica’s Luxe for Less price: $20 each ($40 for the pair)

That’s almost TWO THOUSAND DOLLARS in savings. Fist pump.

Is this something you’d try out? I can only imagine how great this would look on a buffet or kitchen table. Let me know if you try out my tutorial!

Be back tomorrow with some more painting/staining questions. I think I need y’alls help.

And I leave you all with a cute picture of Pee Wee…look at those eyes. I melt.

Nightstand26

Tuesday, August 30, 2011

Chair Makeover {DIY Tutorial}

DSC_0336

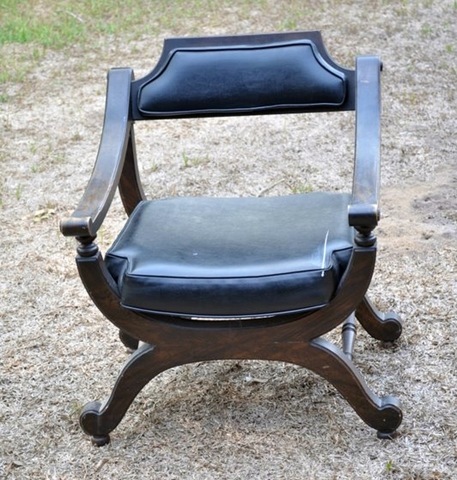
Today I am going to give you all a quick, easy tutorial for how to revamp an old chair and give it a new life. I bought this chair in August 2009 for about $20 at Goodwill. That may seem a bit steep for an old chair, but I thought the chair was unique enough that it’d be worth the $20.

So, it has sat around for 2 years and finally got it’s big makeover this weekend, and boy am I thrilled with the results.

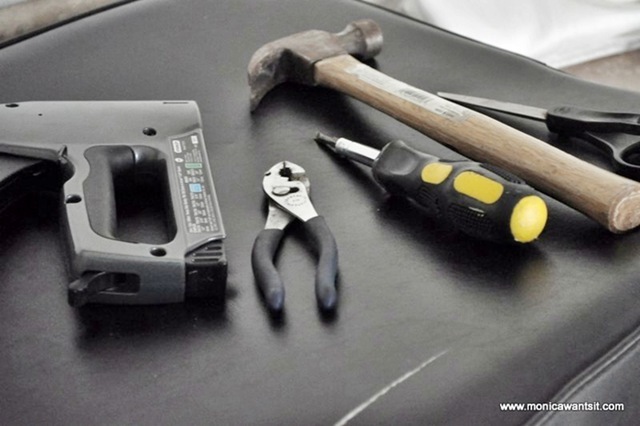
Some supplies you’ll need to reupholster the chair (staple gun, pliers, screwdriver, hammer and scissors):

DSC_0266

And you’ll also need the following:

-2 cans of FLAT white spray paint (96-cents each at Wal-Mart…this is essentially your primer)

-2 cans of Krylon spray paint (this is always my go-to spray paint)

-Sand paper

-Dust rag

-2 yards of fabric (depending on size/type of chair)

DSC_0242

First step is to clean and dust the chair THOROUGHLY. Any dust/dirt left on the chair will become part of your finish. CLEAN IT WELL. Sand any imperfections/rough spot. Remove sanding dust with a tack cloth/rag. Then remove any cushions, etc. that you want to reupholster.

DSC_0247

As to not kill the grass any further, I set my chair on a plastic sheet from Dollar Tree. Then I lightly applied a coat of primer, waited 30 minutes and then applied another coat:

DSC_0257

It’s ok if the coverage is splotchy. Really. Don’t worry, it’ll all be ok. I promise. While that is drying, it’s the perfect time to start recovering your cushions with your new fabric. I used a vinyl-ish, damask/jacquard print I got at a garage sale for $5. It’s Pee Wee proof, I think. Mostly I got it because the color is a gorgeous pearly, neutral and it’s damask. OK…mostly because it’s damask-ish, not going to lie.

I’ve never done a chair revamp before, so I kinda wung it. I ripped off the fabric and used it as a template for how much material to cut out:

DSC_0261

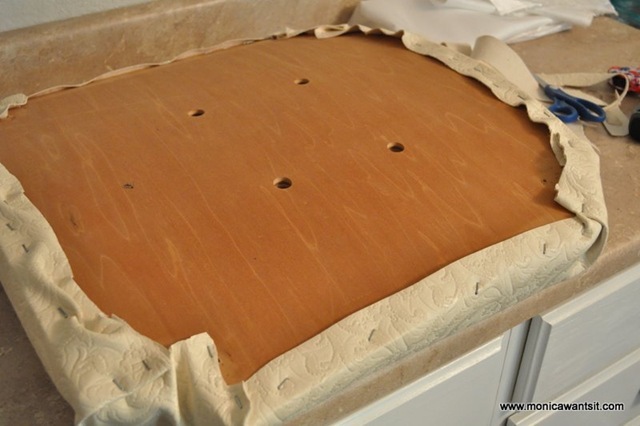
And I also had to remove a billion staples:

DSC_0259

I found it easiest to use the pliers and grab onto the BOTTOM half of the staple and with a swift motion yank it out. If you yank the top of the staple, you spend 30 seconds trying to wiggle it out, which leads to hand cramps and DIY fatigue. Just trust me on this one. Now, if you don’t want to remove 1.2 billion staples, you could hammer them in with a hammer and move on. I do recommend taking them out though.

DSC_0279

DSC_0287

The back cushion was easy to reupholster, but the seat cushion…omg. It was difficult because of the corners. I am still not 100% happy with the way they turned out, but for now it’ll have to do. Basically, until my husband can help me manhandle that seat cushion, this is as good as it’s going to get. I don’t want to claim to be perfect, so I’m just keeping it real with you all that sometimes you have to be OK with the imperfections and/or hide them with a pillow/crop it out of the photo. 

I did one side at a time, tightening and checking the front of the seat cushion for alignment/tautness:

DSC_0289

DSC_0290

Until I was done and ended up with this (FYI: I did trim away excess fabric):

DSC_0298

See? The corners aren’t perfect. Sigh. Oh well. I’m going to say my inspiration was a vintage chair and vintage stuff ain’t perfect.

Then I went outside and spray painted 2 light coats of classic gray Krylon glossy spray paint onto the chair frame:

DSC_0262

I love the neat accents on the chair. I feel it makes it more unique. As do all the random dents.

DSC_0265

Let it dry at LEAST an hour. I let my chair frame dry overnight. While it was drying, I watched the VMAs and was thoroughly disappointed with the Britney Spears tribute and Lady Gaga’s decision to look like Ray Romano:

image image

Credit: MTV.com & Google Images

Next, it’s time to screw your cushions back into place and admire your pretty new chair.

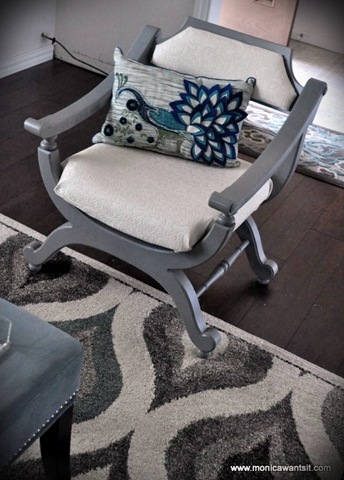
DSC_0305

DSC_0307

I took a break to check Twitter and came back to find this little boy making himself comfy (he threw my pretty peacock pillow on the floor! Boys…):

DSC_0326

And then he decided he did indeed want the pillow:

DSC_0348

Well, whether you call it a chair or a dog bed, you can totally tackle this easy, beginner DIY project. Mine came in at about $35-$40 total, but if you find or have a chair on hand, this could cost you under $10 for only about 2 hours worth of time/effort. I think it’ll serve as a lovely accent piece in our dining room makeover, and it saves me from dropping mucho money on a new accent chair.

Have you worked on anything lately? Have tips for DIY chair makeovers?

Friday, March 11, 2011

Living Beautifully {By Lacey}

Hi all! Thanks Monica for letting me share your virtual space through this guest post. You can find me at www.laceywilson15.blogspot.com. I'm a full-time public relations professional and I enjoy all things crafty, thrifty and pink.

xoxo,

Lacey Wilson

@laceywilson15

I love to change things up when it comes to home décor. I have to admit it’s a bit addictive. The only problem is, if you change your décor as often as you change your shoes, the price to decorate your space can equal the cost of a few Manolos.

Being a bit budget-conscious, I found a new hobby in thrift-store shopping for most of my home décor needs. Ok, I’m not going to lie, it took me awhile to get the hang of it…and I still reach for my hand sanitizer whenever I leave, but I feel a sense of accomplishment when I can find something at a discounted price, then refurbish/repaint/reuse it.

The key to incorporating thrift store finds into your DIY projects can be challenging but here are a few tips for those who are willing to give it a shot:

  • Have a list of purposes, not items (ex: mail organizer rather than basket). This will help you keep an open mind when browsing.
  • Keep an eye out of items that are sturdy…which leads me to my next point: 
  • Overlook color and in some instances, fabric. You will be amazed at what spray paint and a little stroll down the upholstery aisle will do. 
And if you’re still not sure what to look for, try these for starters:
  • Remnant fabric to cover an old bulletin cork board 
  • Magazines – look for retro or fashion magazine covers to frame 
  • Small plates for candle holders 
  • Bookcases + curtain rods to create a gift-wrapping station 
  • Picture frames – you can easily repaint them and you’ll spend just pennies compared to buying new ones. (See this one below, embellished with some wallpaper.)


For a little inspiration, here are some of my favorite before and after projects:


So whether you're shopping for first-hand items or perusing the local thrift stores, always remember, your home can be fabulous no matter the budget.

-------------------------------------------------------------------

Thanks so much Lacey! Doesn’t she have a lovely sense of style? I love her damask bench and chandelier makeover- stunning! Also, I can totally relate to having the heebie-jeebies when you go thrifting, but once you find some good stuff, you will be addicted! I know this first hand since I started actively thrifting in mid-2009 and have scored some lovely treasures. Carry a tape measure, hand sanitizer and an open imagination and you shall be golden! Want your own little treasure? Leave Lacey some love in the comments section to be entered for a free pair of floral earrings.

Sunday, December 12, 2010

Living Room Reveal {Finally}

The moment you’ve all been waiting for is here! And by all, I mean probably a handful of you, but I’d like to think everyone is on the edge of their seats waiting for my before and after post. I debated on posting the how-to before I did the BIG reveal, but I think it’s best to do it after. So, stay tuned to my blog within the next few days if you’d like to know HOW I painted the wood paneling in my living room and brought it to current modern times with a lot of hardwork + some helpful hints I learned along the way. Are we set?

Oh, and FYI this is going to be a LONG, picture intensive post. Grab some coffee. Order a pizza. I’ll wait. In fact, I am totally drinking red wine right now while I type this up. Look, it’s almost noon. Don’t judge.

My inspiration for this project came from Young House Love and you all. There were times I thought I was absolutely insane for listening to a bunch of strangers on the internet telling me to just paint my wood paneling. I was so upset at times during this project, that I almost wished I hadn’t even started it. Then, last night as I was thoroughly relishing in my living room, I was very thankful that enough people care about my woes and decorating problems to give me advice, encouragement and well wishes through the whole painting ordeal. From the bottom of my formerly wood-paneled heart, I thank you.

Aww, I just got teary eyed. That is how much I love my living room. I know I said I wasn’t going to post a how-to, but I did want to explain the timeline of my project. I started Monday, November 22nd. We were done painting the wood paneling about November 25th. We took a break over the weekend, and on Tuesday,  November 30th, we began painting the trim (which was also dark wood…oh the joy). Finally, last weekend, December 4-5th, we finished the door trim and bookshelves (they are built INTO the wood paneling- seriously). This past week, we’ve been doing touch-ups and decorating for the holidays. I would safely say, we probably spent about 80-100 hours on this project. But we had a lot of painting to do, and painting grooved wood paneling is insanely time consuming. If it takes you less time, please don’t tell me. I will cry.

Ready? Well, let’s go!

This is what it looked like (before obviously) when you stepped into our foyer area:

DSC_0781

And here’s what it looks like now:

DSC_1298

DSC_0798

DSC_1360

DSC_0782

DSC_1294

DSC_0973

DSC_1315

DSC_0792

DSC_1326

DSC_0802

DSC_1347

DSC_0803

DSC_1328

I think that about covers the before & afters, so now let’s get down to the details!

The bookshelves are built-into the wood paneling like I mentioned before. However, I wanted them to look as if they stand on their own, so I painted the wood paneling white as opposed to the gray I used on the walls. The shelves are what held up this whole post because I am awful at designing vignettes/shelves, so eventually I just tried my best and moved on.

DSC_1380

I added LED battery lights to the top shelf to highlight the top areas. $14 for the pair at Home Depot.

DSC_1299

DSC_1300

DSC_1310

DSC_1383

DSC_1384

DSC_1385

And yes, 2 of the frames are empty. I don’t know what to put in there, so for now, they stay as is. I just bought those at Kohls from the Elle Décor collection. They were 70% off.

DSC_1307

DSC_1305

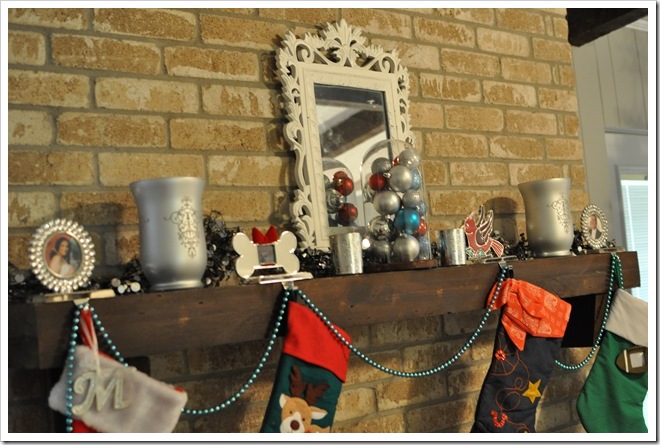
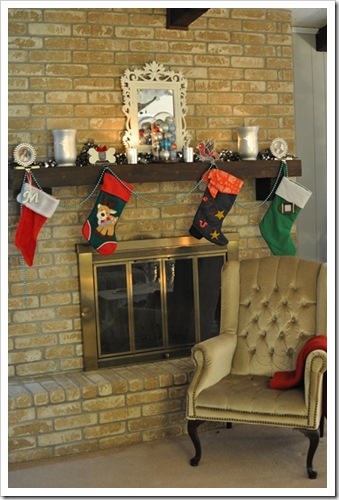
Since it’s the holiday season, my mantle is decorated as such. The mirrored/sparkly garland is from Hobby Lobby, and all the other stuff I had from last year or acquired it at estate/garage sales.

DSC_1312

DSC_1318

DSC_1321

I don’t do the matchy-matchy stocking thing because we each picked one to match our personalities. Well, except mine since I can’t find my damask stocking. Curses.

DSC_1335

DSC_1348

DSC_1349

DSC_1351

DSC_1355

DSC_1268

DSC_1286

I know I mentioned we were going to buy a new coffee table, but instead we decided to use the white one we had already revamped last year. Teal baskets were $4 each at World Market. It works for now. The trellis tray is from Target last year.

DSC_1333

DSC_1332

I love these beige/blue damask chenille pillows at snagged at JCPenney for $4.00 each a week or so ago.

DSC_1341

DSC_1339

Mercury glass votives from Target that were 99-cents each. Score! Lurve me some mercury glass. Big vase is from Target and was a wedding gift (we actually got 2!).

DSC_1345

Our wedding guestbook is on the coffee table. I love reading the comments and such people wrote in our photo guestbook. Makes me cry and laugh, usually. Also makes for good conversations if people flip through it.

DSC_1346

DSC_1356

DSC_1375

I usually despise faux florals, but these are gorgeous, gorgeous, gorgeous! Snagged them for 25-cents last Saturday at a garage sale.

DSC_1378

The lamp base + shade was about $35 total at Wal-Mart. I really wanted a crystal ball lamp. And I also really wanted a mirrored end table, and we found this one for $65.00 at a furniture store in town that is going out of business. Here’s another empty Elle Décor frame that was 70% off. Candle is from Pottery Barn. 

DSC_1239

DSC_1336

DSC_1337

And there ya have it! Sorry my pictures aren’t all magazine worthy- I am still learning as I go with my Nikon D5000. I’d like to thank Young House Love again for their tutorial, and I’d also like to give a shout out to Décor Chick! Her office paint color was the first paint color my husband was ever all excited about. The paint color on the walls is Mindful Gray by Sherwin Williams. The trim paint is bright white in high gloss by Kilz (available only at Wal-Mart). On all the painted surfaces, we painted with Kilz oil-based primer since we were covering up dark wood. And a huge thanks to all the lovely peeps on Twitter who helped me along the way! We couldn’t have done this without you all. Most of the accessories I already had on hand and are usually from Goodwill or garage sales. I am cheap like that.

Our walls are also bare right now because I didn’t want to rush putting up mirrors/frames/artwork until I figured out the look or motif we want in our living room walls. And hey, that just gives me more blogging material later, right?

Would I ever paint wood paneling again? NO. It was so much work, but for us, it turned out to be the best thing we could have done for our home right now. More on that in the upcoming how-to post.

Well, I’d love to hear your comments, thoughts and suggestions on my big, fabulous living room makeover!

And that’s a wrap.

This post is linked up at:

image