Showing posts with label bedroom. Show all posts

Monday, November 12, 2012

I Wanna See Your Peacock {Home DIY}

Have you heard the Katy Perry song, "Peacock”?

She’s so not talking about peacocks, y’all. Ohmygosh it’s scandalous.

And would have made a great song in Magic Mike

Yup.

But I’m not here to chat about Channing Tatum’s amazing bod in that movie nor about Katy Perry songs.

On Pinterest, the peacock colored wall trend is huge. Everyone who is anyone has a wall in their home with that color, and it looks fab and chic. Yet much like most trends these days, if I try them on myself, I look like a sausage stuffed into skinny jeggings.

No business. Just no business.

So, I gathered up my inspirational photos and narrowed down my peacock-teal paint colors to Plumage from the now defunct Martha Stewart line and Deep Sea Dive by Sherwin Williams.

I wanted the result to look as bright, yet bold and deep as they do in the photos below.

Via Teal & Lime

Via Young House Love

I got Plumage color matched at Sherwin Williams + I had a sample of Deep Sea Dive in the garage. The result on my master bedroom accent wall was atrocious.

See?

Plumage. Onto Deep Sea Dive by Sherwin Williams.

Meh.

I finally just caved and realized that dark, deep, bold colors were NOT going to work in my master bedroom space.  And that’s because one whole wall is a set of sliding glass doors with plenty o’ natural light beaming in.

Sigh. I guess I’ll just have to bring in the color with bold accessories and a variety of textures.

So, what did I do with that accent wall? Well, what the other half of people on Pinterest are doing…stripes.

Forgive the awful quality of all these photos…they’re Instagrams. They look so wonderful on my phone though. Hmph.

That brings me to my next conundrum… accent colors.

I want our master bedroom to be chic, boutique hotel like (that quirky, unique, curated vibe) yet restful and easy to maintain. I don’t want 80 billion pillows that will get thrown on the floor every night.

After much, much thinking, I am 99% sure I want the overall color palette to be a combo of these 2 pics:

Via Sarah Gordon Home

Via Ashlee Raubach Photography (Those lamps are TO DIE FOR!)

The main colors in both photos are: teal, white, hot pink, silver, and gold. I’d also throw in some black for a dash of drama. Our tall tufted headboard will be the star of the show along with a BIG damask rug I snagged from Overstock last week. I’ve got the 2 leads in the master bedroom show, and now I need a whole supporting cast. It is so hard to find those perfect accessories to really bring a room together. While that is the most stressful part of it, it is also the most fun. My husband and I have no shame in scouting every single Home Goods, Marshalls, Ross or TJ Maxx in a city.

WE HAVE NO SHAME.

I’ve been on the prowl for an affordable version of the chrome lamp above, and I found a nearly identical lamp at One Kings Lane for $149. Each.

Gulp. Or you can pay even more for this nearly identical version.

Dimond D1426W Waverly Table Lamp, Chrome Plated Glass With White Shade

Or this one is kind of cool, too:

Only $65 from Amazon.

But I also did find a STEAL of a deal on a pair of damask pillows, $36 for both, with free shipping.

These nightstands I made over earlier this year will get made over again, or I may just splurge on mirrored nightstands.

Nightstand22

Or I could turn them into peacock colored nightstands with a high gloss/lacquer finish? I can never achieve quite the look I am going for sometimes. Must keep trying.

What do you think? I have taupe walls with stripes, dark cherry handscraped floors, and a bright white popcorn free ceiling (more on that soon)…

What now?

Wednesday, May 30, 2012

Guest Room Makeover {Lighting & Design}

My interior design hero has to be Candice Olson. Her work is simply stunning, and if you’ve watched every single episode of her show as I have, you’d know one thing.

She loves lighting.

In all of her designs, she focuses a huge amount of time and effort on lighting. She will rip out ceilings, spend half the budget on a chandelier, etc.

Well…I am no Candice Olson and even if I sold a kidney I would not be able to splurge as much as her clients do on lighting. However, you can apply those same principles to any makeover you do. Period.

We have a guest room in our home that gets used maybe 5 times a year. Every time we have guests, all we do is wash the linens and tell them to make themselves at home. It’s about time we showed our guest room a little TLC. Now, unlike many of my makeovers, I didn’t buy a ton of accessories nor paint any walls. I simply focused on the foundation of a good room—lighting.

Daniel and I headed to Walmart with a $2 coupon in hand (which you can print for yourself at the bottom of any page on my blog) to buy bright, white CFL/energy efficient bulbs by GE Lighting. And, I also wanted to splurge on a lighting addition, whether it be a floor lamp or a table lamp.

I have my coupons on hand to save some money. Notice they don't expire for over 2 years?! I love it. My husband printed one and I did, too.

The room desperately needs better lighting.

GELighting01

See? It’s dark and yellow. You know what I mean by yellow, right? It’s that awful yellow that normal light bulbs cast onto a room.

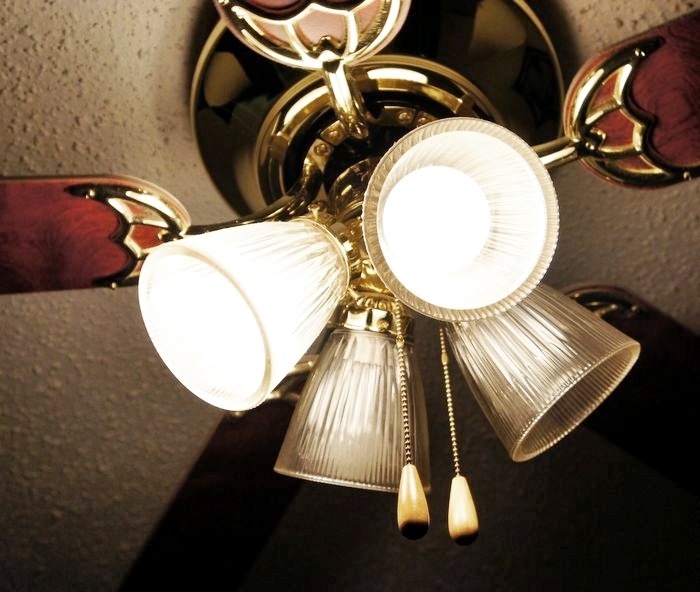
Not flattering. It also didn’t help that 1/2 the light bulbs were dead in our ceiling fan. I believe they’ve been that way since we moved in back in 2010.

GELighting02

While at Walmart, we chose this pack of CFL bulbs. Why? Well, it said fresh, energizing light, which hopefully will be bright like natural daylight. Basically, not yellow.

GELighting03

They came securely packaged. A+

GELighting04

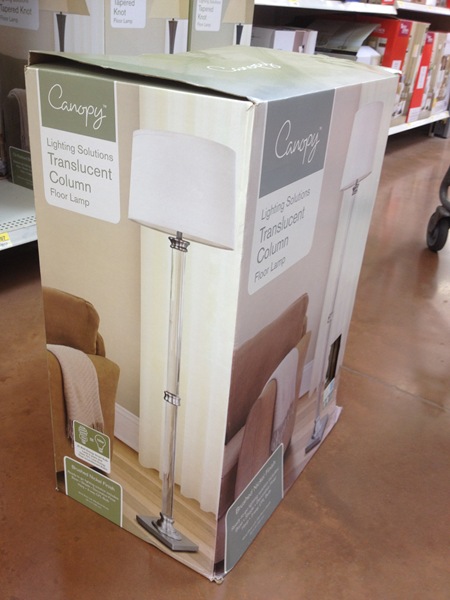
While I was swapping light bulbs, Daniel put together my new crystal column floor lamp. I’ve been wanting this lamp for years!

This assignment finally gave me the excuse/desire/motivation to buy this lamp. I have been eyeing this floor lamp for years. You see, I have a weak spot for crystal/translucent lamps. They tend to be very pricey, but this floor lamp is a steal at $50. It is STUNNING in person.

GELighting05

And 10 minutes later I had a BRIGHT guest room. What a difference that makes.

GELighting06

Once I adjusted my camera settings, you can better see how the light looks in the room:
GELighting07

It’s white, flattering, bright yet very livable. You don’t feel like it’s too bright.  Well, maybe Pee Wee does.

GELighting09

I love how I was able to get accurate color on my pictures without a flash and without any post editing. This is all straight out of the camera.

GELighting08

And if you turn the ceiling fan lights off and just opt for the floor lamp, you still get a bright, natural light that is great for reading or watching TV. Isn’t my new floor lamp pretty?!

GELighting10

And here’s what the bulbs look like in my ceiling fan. Not super chic, but I’ll take the energy savings and white light over the yellow bulbs of doom.

GELighting12

What do you think? Here’s a side-by-side before and after.

GELighting01 GELighting06

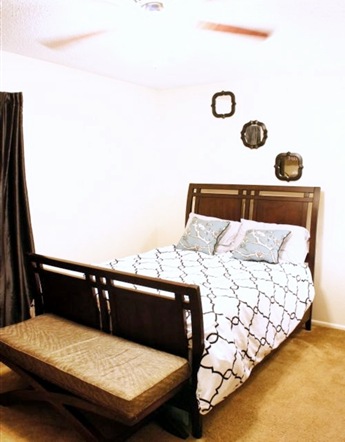
I did add in a few accessories I already had on hand (pillows/mirrors), but overall this makeover took 15 minutes and about $65 ($50 floor lamp, $15 bulbs). I hope our guests will appreciate the slight facelift when they visit us again. And maybe I will paint the walls…eventually.

Overall, the main motives for this makeover were to improve the look of the guest room AND to help save money on energy costs. Energy efficient lighting may cost a smidge more upfront, but in the long run it’ll last longer, save you money on your electric bill, and it will make a room look fantastic without needing to spend tons of time and money.

If you click on over to this neat CFL Savings Calculator, you can calculate how much you’d save by switching your bulbs. I calculated my savings and over one year, we’d save about $37 in the guest room. The bulbs were $13 with coupon, so this means in our first year we’d save $24. If we replace all the bulbs in our house, we could potentially save $285. Looks like I need to do more light bulb shopping. That much in savings could equal a new designer handbag every year.

Just sayin’.

If you have more questions on GE Energy Efficient Lighting, feel free to connect with them on their social media channels: Twitter or Facebook.

Do you care about lighting choices in your home? Do you try to pick energy efficient lighting?

Up to 75%. That is a lot of savings when you think about all the bulbs in your house that you could replace.

I am a member of the Collective Bias™ Social Fabric® Community. This content has been compensated as part of a social shopper insights study for Collective Bias™ and GE. All opinions are true and not influenced by monetary compensation or promises of puppies and rainbows. #CBias #SocialFabric #GELighting

Tuesday, January 17, 2012

Restoration Hardware Furniture {DIY Tutorial}

In a happy, magical place there exists a Monica who can buy Restoration Hardware furniture without having to save up for 6 months.

I am not that Monica. Darn it.

I am the Monica who has to scour Goodwill, garage sales and thrift stores to find secondhand furniture with potential. It’s a thing I love to do and hate to do all at the same time. But when I score, I score big.

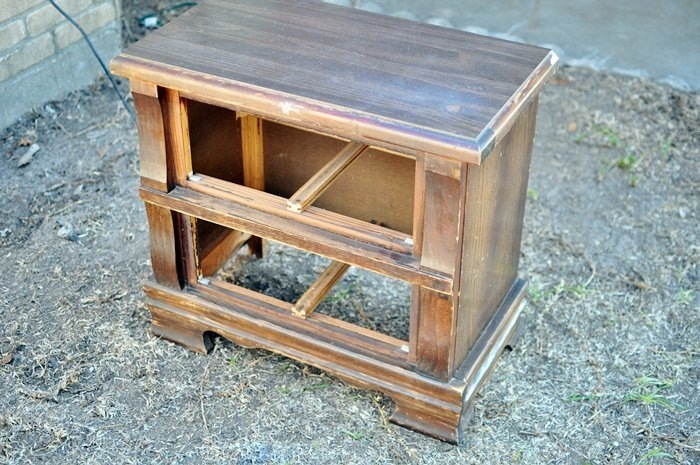
The goods: 2 Goodwill nightstands I bought for $6.50 each back in 2010.

The task: Make them look kinda like these nightstands. (ie: dentil detail, weathered gray/reclaimed wood look…but kinda glam)

image

From Restoration Hardware, $1045 each.

image

From Overstock, $690 each

The supplies:

-Nightstands (mine were laminate + wood)

-2 cans of flat white spray paint (the 98-cent Walmart kind will do)

-Latex paint (I chose a dark gray/brown color: Urbane Bronze by Sherwin Williams in a satin finish)

-Sand paper

-3” paint brush

-Tack cloth

-Cheesecloth or a lint-free rag

-Optional: replacement hardware

Okay, let’s get started. My nightstand was made of mostly laminate (top/sides) yet the drawers have a wood front. I didn’t treat the wood differently than the laminate. Also, this method is fool proof. Anyone can do this. Even you. Yes, you.

You need to scrub down your furniture to make sure it is clean. Super clean. I usually use Lysol wipes for that step. Also, if there are any holes/pieces that need to be filled/glued do that now. One of the side pieces broke off to one of the nightstands, so we just put that sucker on there with liquid nails. I also needed to drill new holes for the handles, so I filled those holes, too.

Nightstand06

Nightstand05

Now we’re ready to sand.

Nightstand07

It may look a little crazy when you sand, but it’ll all be ok. Generally try to go in the direction of the grain/faux grain.

Nightstand08

Wipe off all sawdust with tack cloth. I do this twice to make sure it’s dust free.

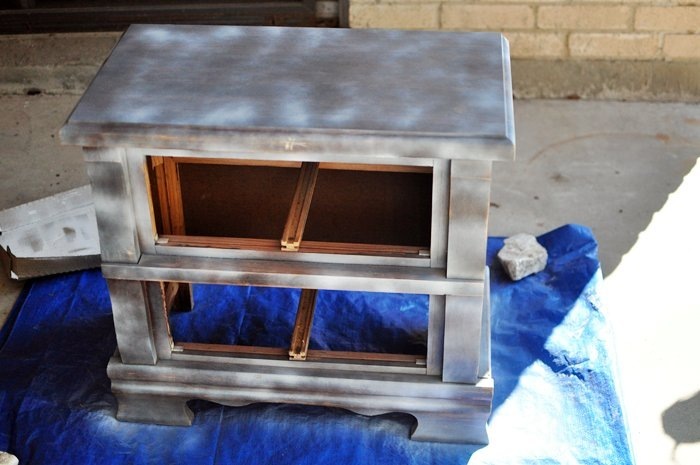
Now, we prime. Here’s my most favorite primer- the 98-cent can from Walmart. I used about 1.5 cans for my 2 nightstands. Apply one coat (lightly) to the nightstand + drawers. I do use the spray paint adapter thing (seen below in black) so my finger doesn’t hurt when using cheap spray paint. Best $2 investment ever.

Nightstand09

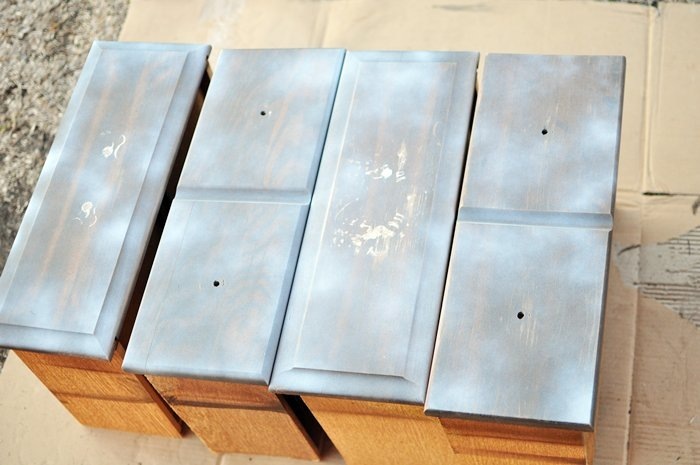
It will look splotchy. Don’t cry. This is normal. :) You do not want a solid white finish.

Nightstand10

Let the first coat of primer dry about 20-30 minutes, then do a 2nd coat. It will still look splotchy. This is ok. It will be fine, I swear.

Nightstand11

Nightstand01

Ok, so once both coats of primer are dry (spray 1st coat, wait 20 minutes, spray 2nd coat, wait 30 minutes), you can paint. Sort of. What you’re going to do is get your brush, dip it into the paint ever so slightly and start brushing it onto the nightstand. This is almost dry brushing (as in, do not saturate your brush with paint).

Nightstand13

My gorgeous paint color: Urbane Bronze by Sherwin Williams.

Nightstand14

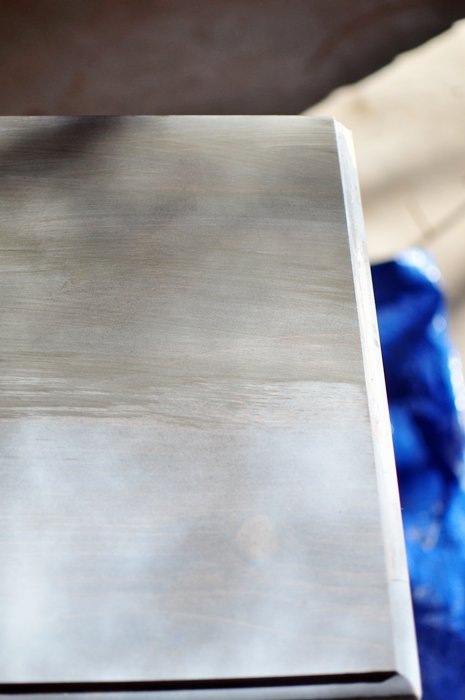
Here’s an example of what it should look like. You can tell I’ve brushed on some paint in the top half of the photo, while the bottom half illustrates how the nightstand looks with just primer.

Nightstand15

But what happens if you get too much paint on your brush and onto the nightstand? Just wipe some off (GENTLY!) I used some cheesecloth for this and it worked well. Do one coat of the dry brushing, let it dry for about 30 minutes and then do coat 2. You can basically do as many or as little coats as you’d like. For my nightstands I did 3 light, light coats. I love.

Nightstand16

I then brought them inside to make sure they were both about the same color. They won’t be identical, but that’s ok with me for this project.

Nightstand17

And now they have their spot in their new home (our master bedroom) and they got some fancy hardware from Hobby Lobby.

Nightstand18

That lamp is getting a makeover, too. For now, it stays black.

The smooth, satin finish is lovely. You could also add poly after the paint has dried. I am lazy and haven’t done so yet, but I likely will. Maybe.

Nightstand20 Nightstand23

Love the dentil finish. Makes it look a bit nicer, while the curves on the bottom make it look a little shabby chic.

Nightstand24

Nightstand22

And there you have it! A fool proof tutorial on how to achieve that coveted Restoration Hardware/Pottery Barn/Ballard Designs weathered gray reclaimed wood kinda thing. Whew. That’s a lot of words. I want to remind you that it works on wood or laminate furniture, and it’s so cheap compared to buying this stuff from a store.

Restoration Hardware price: $1045+ each ($2030+ for a pair)

Monica’s Luxe for Less price: $20 each ($40 for the pair)

That’s almost TWO THOUSAND DOLLARS in savings. Fist pump.

Is this something you’d try out? I can only imagine how great this would look on a buffet or kitchen table. Let me know if you try out my tutorial!

Be back tomorrow with some more painting/staining questions. I think I need y’alls help.

And I leave you all with a cute picture of Pee Wee…look at those eyes. I melt.

Nightstand26

Monday, October 24, 2011

The Master Boudoir {Home Décor}

I know that there are lots of people/bloggers that move into a home, and a year later it’s done, it’s fabulous and it’s magazine ready.

I am not of those people/bloggers, so it takes me FOREVER to get a room done because of time and money. Let’s face it, both are hard to come by sometimes. Hence why after I tackled the living room last November, I waited until February to start the dining room and it’s still not done. Now, I’d say it’s 85% of the way there. I need artwork, touch up paint and accessories. Those little final touches that will make my dining/office/craft space really chic and have a wow factor. So until it’s 100% of the way done, I’m not showing you all anymore pictures. None. Ok, maybe a few on Facebook (hint, hint…)

But what will I work on after this dining room is done with? Well, the title of my post says it all. The boudoir. I know it’s not a room anyone will see much besides my husband, Pee Wee and I (plus you lovely people), but it is a room I despise. It’s got a king bed in it (just a mattress + bed frame), a random desk and bookshelf and my old, black printer stand. UGLY. It is UGLY up in there. I want to be able to plop into bed in a restful, hotel like, glamorous bedroom, so it is my next DIY makeover that I have planned.

There’s a few things we have definitely decided on:

Flooring: Will be the same as the one we have in the dining room.

image

Bedding: The set we got on clearance for $15 at Target.

Wall Color: Sharkey gray by Martha Stewart (color matched PERFECTLY by Sherwin Williams. Thank God.) Here’s a sample photo I found online of the color…

image

Image Credit: A Simple Kind of Life

Headboard: Uber expensive one we (we being Daniel more than me) love from Pottery Barn (shown in Sage, we’re buying Buckwheat)

image

I know some people may get judgy about the price or tell me I can DIY, to which I say, sorry. Not going to DIY because I am a PERFECTIONIST and will hate anything I make. And the price, well. Oh well. Sometimes you have to splurge. I do have a coupon that is knocking about $100+ off.

Curtains: I snagged these for $14 a panel on clearance at Target

image

Nightstands: This will be a Goodwill revamp. I’ve had a pair of nightstands I bought at Goodwill for $7 each that will be getting a drastic makeover. Everything I’ve shown you all thus far has been very neutral, so trust me, these nightstands will bring in a pop of color to the room. Especially when paired with this hardware I love from Lowe’s:

image

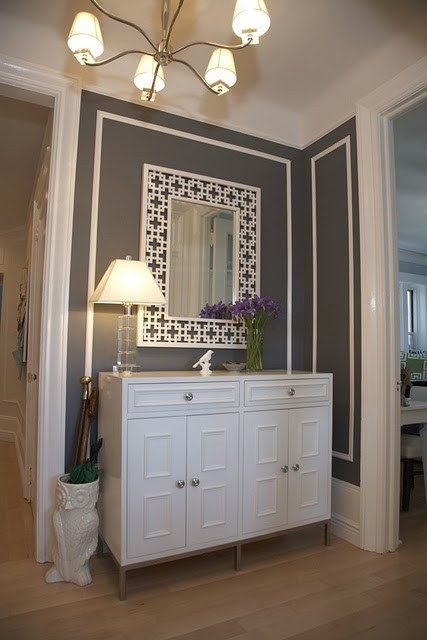
I still need lamps (also might be a makeover/DIY project with some Krylon), a rug, a TV stand, wall art, vanity area, etc. but overall the main pieces of the room have been chosen. Now, I still look to Pinterest often to get ideas and inspiration for the vibe I want set forth when you look at my space, so here’s the top 5 that reflect my design vision (click on photo to be taken to Pinterest/source).

image

image

image

image

image

All of them are different, yet cohesive in some way…should be interesting to see how it all turns out.

What does your master bedroom look like? Any ideas or suggestions for our bedroom that I haven’t thought about yet? I would love a recommendation for a perfect all-season duvet that is affordable/reasonable in price.